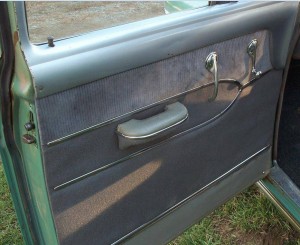
 I’m typically not a very lucky person, however, in the case of the ’50 Oldsmobile, I happened to find a number of them for sale online. Finding the car for sale makes researching paint colors and details way easier than trying to google search. In the case of this car, there are no less than 12 1950 Oldsmobiles for sale on Hemmings.com which gave me a number of sources to view. The reason it is so much easier is that cars for sale tend to have way more pictures than you’re going to find in a simple google search. As luck would have it, one of them has the same two-tone interior colors that I was trying to match. Technically, I think this one may be done in three colors, but I don’t think I can reasonably pull that off.
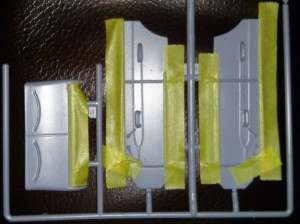
 Sticking with my two-toned theme, and taking inspiration from the source photo above, I taped off the areas that should remain the lighter color. This was pretty straight-forward, although I did learn that when you are covering something against an edge (as is the case around the chrome trim) it is much easier to stick the tape well over where you are trying to cover and use a stout toothpick to force it back to the edge. That’s what I did in the attached photo. Due to the odd shape of the front top portion of the door panel, I had to leave some excess tape in no-man’s land beyond the front trim piece. I didn’t want to try to trim the other side of the angle as well because I was fairly certain I would lose the tack of the tape on the finished side if I tried. It took me about 45 minutes to get this taped and tucked into the seams with a toothpick. After that, all there was left to do was spray it.
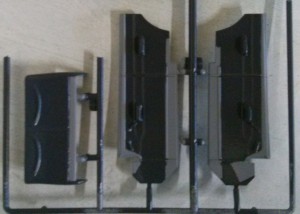
 Learning from the rough edges I had with the seats last night, I sprayed it and then immediately put on a rubber glove to hold the tree and grabbed a pair of tweezers to strip the tape away while the paint was still very, very wet. This gave me much sharper edges than I got when I let the paint dry enough to handle it. With the tape now stripped away, you’ll see what I mean about leaving the tape in no-man’s land near the front. It will be easy business to tape off a straight line on the trim piece and get that portion repainted. It needs to all be done in the lighter color and I hope the dark doesn’t show through. The portion in question will be under the dashboard though, so it doesn’t need to be perfect. If I have too much issue hiding it, I could just as easily do it in the dark color. However I plan to do the carpet in a dark color as well and I think the light would look better next to it. I’ll have to see how well I can cover it with the lighter color and make the decision then.
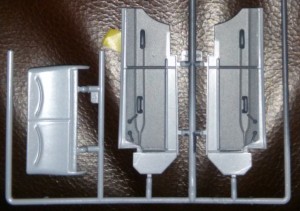
 Once the paint was dry enough to tape it up again, I went ahead and did the front portion back to the light color. At the same time, after doing some dry fitting, I discovered that the seat back also needed to be done in the light color to match the trim I had already done on the seat front, so I went ahead and painted it back to the light color as well. Now that the paint is dry, it looks pretty good. The edges certainly came out a whole lot crisper than when I let the paint dry on my first go. Lesson learned. Another lesson learned is to leave yourself a ‘tab’ of tape sticking off to make removal with wet paint easier. Obviously it’s very important to be able to grab the tape easily and pull it cleanly away or you risk dropping it into the wet paint.
All that’s left to do is the trim on the doors. To do the chrome trim, I’ve decided to take a shot at it with a Sharpie, oil-based, extra-fine point, metallic silver paint marker. I have never tried using one of these before and can only hope it will work. If it doesn’t look that great, it will be on the interior of a car which isn’t a convertible, so it won’t really be seen that much anyway. If it does work, I will probably finish the window rollers with the same pen and maybe even take a crack at the chrome with the “Futuramic” lettering mentioned in the previous post.
I’ll follow up once I’ve gotten the markers and given this a shot.
