I have been having problems with the faucet in my shower for about six months now. I have neglected to fix it because I absolutely knew that I was going to encounter all kinds of problems when I tried to fix it, and of course I was right.
The problem with the shower is a bit odd, really. For reasons unknown the hot water side will gain and lose pressure seemingly at random. It could go for 2 weeks without having a problem, it could go for 2 weeks without working properly. I had tried disconnecting the hot water line and just blowing water through it without success, so I needed to try something else. The plan was to try to just pull the control lever and clean the fittings inside of that; possibly replace a couple of the rubber seats. Of course this all went to hell the second I touched it.
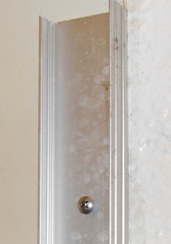
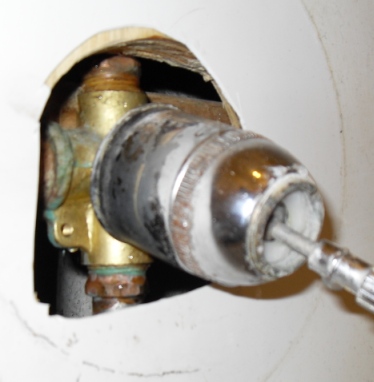 You can see that little bastard here. I have taken off the trim already, and started trying to take the ring that holds the faucet together off. Up to this point it hadn’t been working -which is to say that it wouldn’t move a bit- so I knew it was only a matter of time before this minor repair became a major headache. You can actually tell from the photo that the whole faucet has been moving as I have been trying to apply gentle and even force with a wrench, you can also tell by the angle it is currently at that is hasn’t been working to loosen the retaining ring at all. I already have the water off at this point, and I have no intention of stopping until I get the damn thing working again, for better or worse, so I grabbed the camera to document the demolition phase disassembley.
 There are lots of instructional videos online showing just how to do this (take the ring off and replace the seats and springs, that is), and in all of the videos these fittings are barely finger tight, and the entire operation takes about two minutes. Of course in the real world you will be there with a pipe wrench -actually leaning on it for additional torque- and the fucker is going to break. You’ll know you’ve reached this point when the water starts pouring out of the handle as seen here. Pretty much as expected I broke one of the lines on the back of the faucet well before the retaining ring broke free. I want to point out the quality of the image though: you are seeing a version that is cropped pretty heavily and reduced to 20% of the original size, and still those little water droplets just hang there, as if frozen in time… It’s a good thing I had the camera handy, eh?
 Another thing that all the instructional videos I saw online had in common was that there was always ready and easy access to all of the plumbing. That’s nice for making a video, but a house generally tends to have most of the plumbing fixtures hidden away in walls. They are much more difficult to get at there, but they also aren’t nearly as much of an eyesore. My house is one that has said plumbing connections hidden away, so there was much work to be done. The wall behind the shower (the one on the outside of the bathroom) is about 18 inches of solid adobe. There is an access panel that goes about halfway up the back of the bathtub, but no reasonable way to access the faucet from there. You can reach the water supply lines and that is about it. That meant I had to do all the work from the front (and theoretically finished) side. First I had to remove the sliding glass doors that I put in when I initially remodeled the bathroom a few years back. That is easy enough; the top bar is held in place only by gravity, and each end is easily pulled off by removing three screws and cutting the bead of silicone running along the edges.
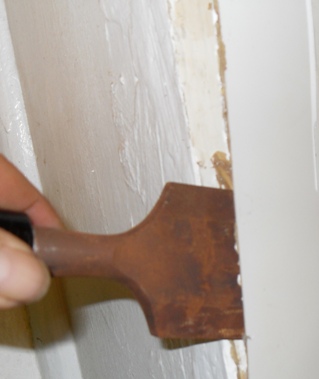 The walls of my bathtub/shower are covered with a 5-piece pre-molded surround. This also went in when I did the bathroom remodel. Previously there had been 8″x8″ ceramic tiles that ran only about 30 inches up the wall. Water had gotten between and behind them and done some horrible damage to the adobe. Water is the #1 enemy of any structure, but in adobe that is tenfold: water + packed dirt = mud. The goal was now to try to remove this piece of the surround without doing extensive damage to it. I expected I was probably not going to be able to do it without getting any cracks in it, but I was hoping that I would be able to reuse it; I really don’t want to have to replace the entire surround. So with a chisel and some finesse, off to work I go.
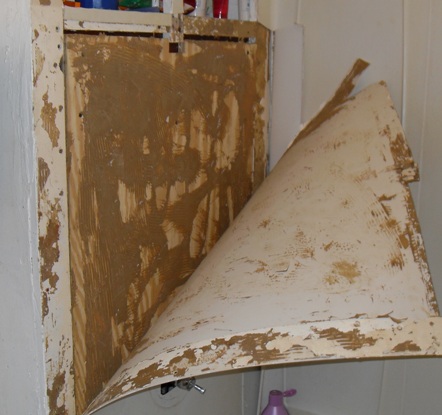 Now having mentioned the prior problems I had with water getting behind the shower enclosure, I knew that I took extra effort to make sure that it wouldn’t happen again. I remember being pretty liberal with the liquid nails on the back of all of the panels, then going batshit with the silicone near the top and edges, but even I was surprised to see just how much glue I had holding this thing up. I mean holy mother-loving shitballs that is a lot of glue! I was taking my time here to try to do this slowly, peeling it back a little at a time, trying not to let it crease so that it wouldn’t crack. You can see one large crack near the top of the picture but thankfully that is behind an overlap when installed.
 I managed to get it off in one piece, with only a minimum of damage. Near the bottom left you can see a crease which would end up cracking, but with a little bit of caulking it will be just fine. If I was doing this for someone else I would certainly replace this whole sheet (I should also point out that there is absolutely no way I would do this for someone else anyway, so that example probably doesn’t mean much), but since it is my house and I don’t mind a few imperfections this is good enough for me. I would move this out of here and lay it flat on the floor after I saw that first crease form, and that was the only visible crack that formed during the process.
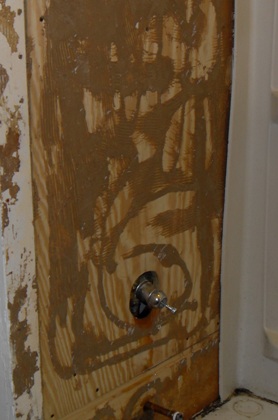 Getting the plastic surround off was really the only part I was dreading. Once I got down to the lumber and plumbing I was a lot more confident that I could do this without too much of a headache. The plywood that you see in the picture here was all added when I remodeled the bathroom. There had been a couple of 1″x4″‘s behind this previously that were holding up some particle board, and it had all rotted through. Plywood is not an ideal structural material, but in this application the only thing it is actually holding up is the thin plastic shower surround, so there isn’t any real weight to it, and it needed to be smooth. This whole thing came off easily, there are about 10 screws holding it up (they can be seen as little black dots throughout). A couple of them had gotten hidden behind that ridiculous mass of glue, but I was able to get them all out pretty easily to get at the plumbing.
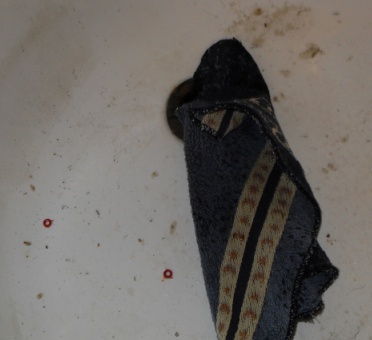 The cup that I had been holing all of my screws and other hardware in got knocked over into the tub. As I was picking the parts up, I snapped this picture. If you are ever working on a sink or bathtub, make sure you plug the drain. I just threw a handy washcloth in there, and as you can see there are still a couple of little red washers in there from where the cup tipped. I’m sure that the sliding glass door frame would go back up just fine without them, but the less crap you get in your drain the better. The last thing you want is to have to tear out your drain as well.
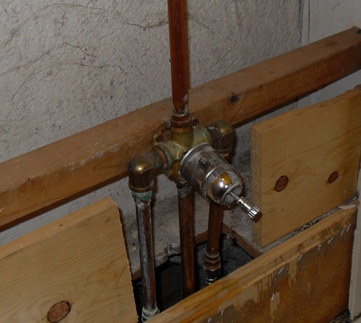 Here we see the faucet assembly. The board that it is mounted to is another addition I had to put in there, the old faucet had been simply held in by the pipes and I needed to change that. Also the little pieces of one inch lumber on the sides were added to give me a couple more screw points for the plywood front. Down at the bottom you can see a piece of lumber with a square cut out if it, that exterior access is just below that. As you can imagine it would be impossible to get a screwdriver all the way up to the faucet mounting screws from there. I am to the easy part at last!
 This shot is just to get a good look at the copper and bronze fittings. You can see a lot of discoloration on them right near the tips, and the hot water side has some running the length of the pipe, but being copper and bronze these are still in pretty good condition and don’t really need to be replaced. Those bronze elbows go 5-8 bucks each (depending on the store) and sweated copper pipe can last a hundred years easy, so there is really no need to replace it.
 Remember to disconnect the shower head assembly before you start trying to remove this line. I actually neglected to do that during the remodel and was forced to replace the entire line after I applied about three ass tons of force and creased the copper. This top piece is usually in a finished chrome so be careful not to damage it if you are going to reuse it. I find that you can usually stick a screwdriver inside of it and use it for leverage (the top piece that goes into the shower should be bent so this works nicely).
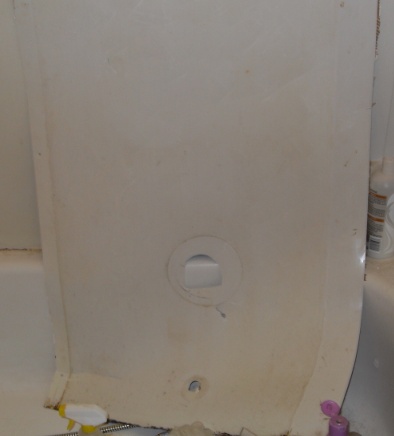
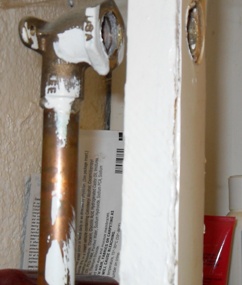
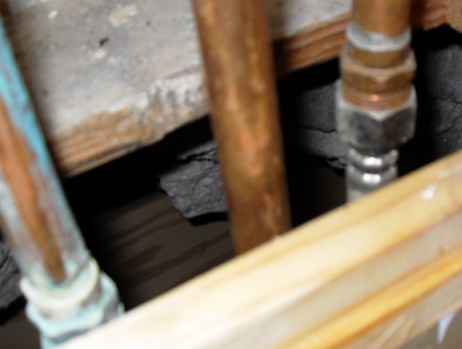 Disconnect the water supply. I am going to point out that this is one area where I probably went far astray from building code. I really shouldn’t have the flex lines you see there in this application. I should be using compression fittings for this (the ones with the nut that crimps down on the pipe to tighten it) and I think building code would dictate that since this is inside a wall you shouldn’t have this type of connector (I can’t swear to that) but when I put this thing in I knew I was going to have to replace it eventually, and using the flex lines meant I would be able to put just about any faucet back in here, where if I had gone with a solid line I would have had to do a lot of cutting and soldering if it didn’t all line up. I do have access to these lines from the outside (note the hole in the block in the back of the picture) and since I am replacing the faucet now I sure am glad I did it this way.
 Once all the other water lines are disconnected, there are only a couple of screws holding the faucet up. These ones were rusty as hell, but they came right out.
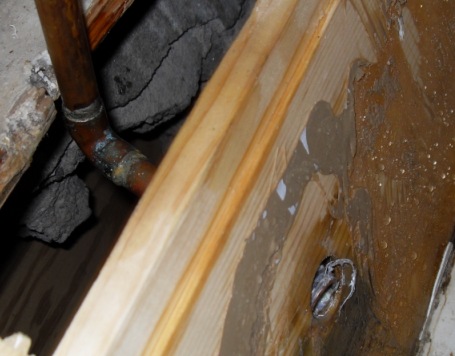 Then to pull the spout out… Unfortunately the length of this piece of pipe wasn’t something that I had a great deal of control over. It had to be long enough that the spout would sit snugly against the wall when the whole thing is assemble, and as it turns out that is about an inch longer than the space I had available to remove it. As you can see I actually had to notch a piece of the lumber out in the back to get this thing pulled out. Again, the plan is to reuse all of this, so I didn’t want to just cut the pipe.
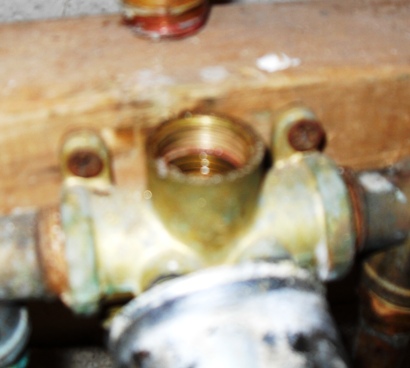
 I wanted to take a shot of this one to show the actual end of the pipe. While it looks extremely corroded, you can see that the threads are still in excellent condition. There was clearly a leak at some point, or it could be from condensation, these lines are not in an insulated area, but there is no damage to any of the pipes or fittings beyond superficial. The flux was still clean and unbroken, there were no bends, kinks, or crimps. I’m sure your helpful hardware store attendant would probably give you the opposite advice, and equally as sure that a general contractor would point to the corrosion as evidence of a need to replace all the plumbing in the house, but in the real world there is no need to throw money at it just because the faucet was faulty.
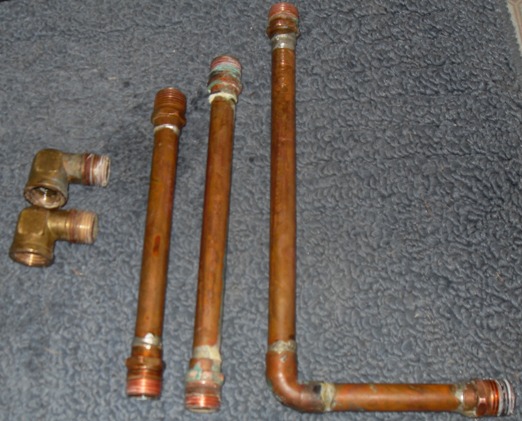 Here are those pieces again, cleaned up just a bit. Just hit them with a wire brush to get rid of any loose debris. The only concern is anything on the threads that might keep the teflon tape from making a seal, remnants of old teflon tape doesn’t fall into that category. Also I didn’t clean the threads all the way to the nut simply because it’s not necessary to screw them any tighter than a couple of turns. Again, a contractor may offer different advice, but we are looking at real world application. Just as there is no need to waste a lot of money, there is also no need to waste a lot of time, unless you happen to be paying yourself by the hour for this repair, if that’s the case, by all means, clean those pipes up like new!
 Here is the whole assembly reattached to the new faucet. You can see that the teflon tape hid all those imperfections around the threads anyway. A couple things to note if you are using a single faucet handle like this: The first is to make sure that you have the correct side up. It would be entirely possible to install this thing upside down. As I’m thinking about it, it might still work upside down, but better safe than sorry. The second is to make sure you get the pipes oriented correctly. I could probably still turn each of those pipes a quarter turn with a wrench, give or take, but since they have to line up, snug (with a wrench) is all you need; if you get stuck and are force to back it out, remove the pipe, retape it, and do it again.
It all goes back together just the way it came apart. Just hook it all back up and, with any luck, there won’t be any leaks. Make sure to test it for leaks before you put the whole wall back together. I have the wallboard only connected by three screws and the laminate cover not glued in place so that I can check again in a couple days to make sure the temperature changes don’t cause it to start leaking.
And that is about as far from the three finger-tightened screw walktrhoughs that you are going to find.