
A few weeks back, I had the brilliant idea to try to use one of those websites to print out a ‘guitar skin’ to try to finish a guitar with some of the imagery from one of my book covers (no link to the site because the resulting image sucked so incredibly hard). Let me say here that I had absolutely zero percent confidence that it would work, and that confidence was not misplaced. Do not try any of these services for a photo-realistic image.
The image I used was one I created specifically for the project. That image was the full-sized version of this image (I am using a screen-friendly 2500×2000 version of it here, but the image sent to the manufacturer was a much less reasonable 10000×7800 @ 300dpi -which should have been suitable to print an image roughly 50×40 inches with reasonable detail):
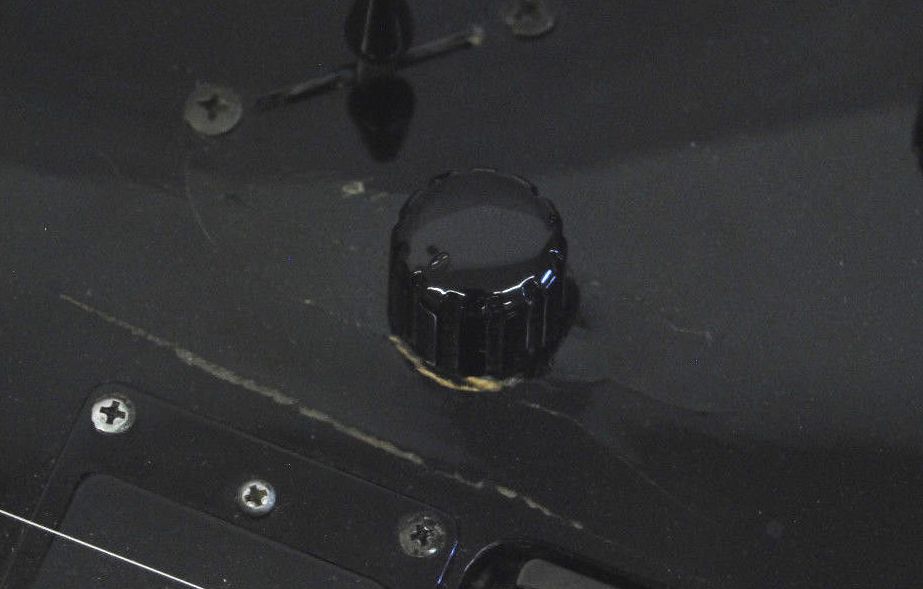
 It turns out that they couldn’t pull off even an image even one third that size. To the right, you’ll see the eye from the above picture as rendered on the final print they sent me. This is literally the image, in 1:1 scale as printed on the ‘skin’ that they sent me. Not only is it not photo-realistic in quality, it isn’t even bad, 1996-ish, 14400 download over a sketchy connection quality. It is absolutely terrible. There are two reasons I am not mentioning the site which rendered this horrible image by name (three if you count potential lawsuits). The first is that I believe I would have received the same results from any of the guitar skin websites. The second is that the skins they sell really are pretty amazing, provided you choose from their selection of pre-made custom skins -which, while amazing, are probably rendered in about 256 colors. As mentioned previously, I knew going in that the thing was going to suck, but I rolled the dice anyway.
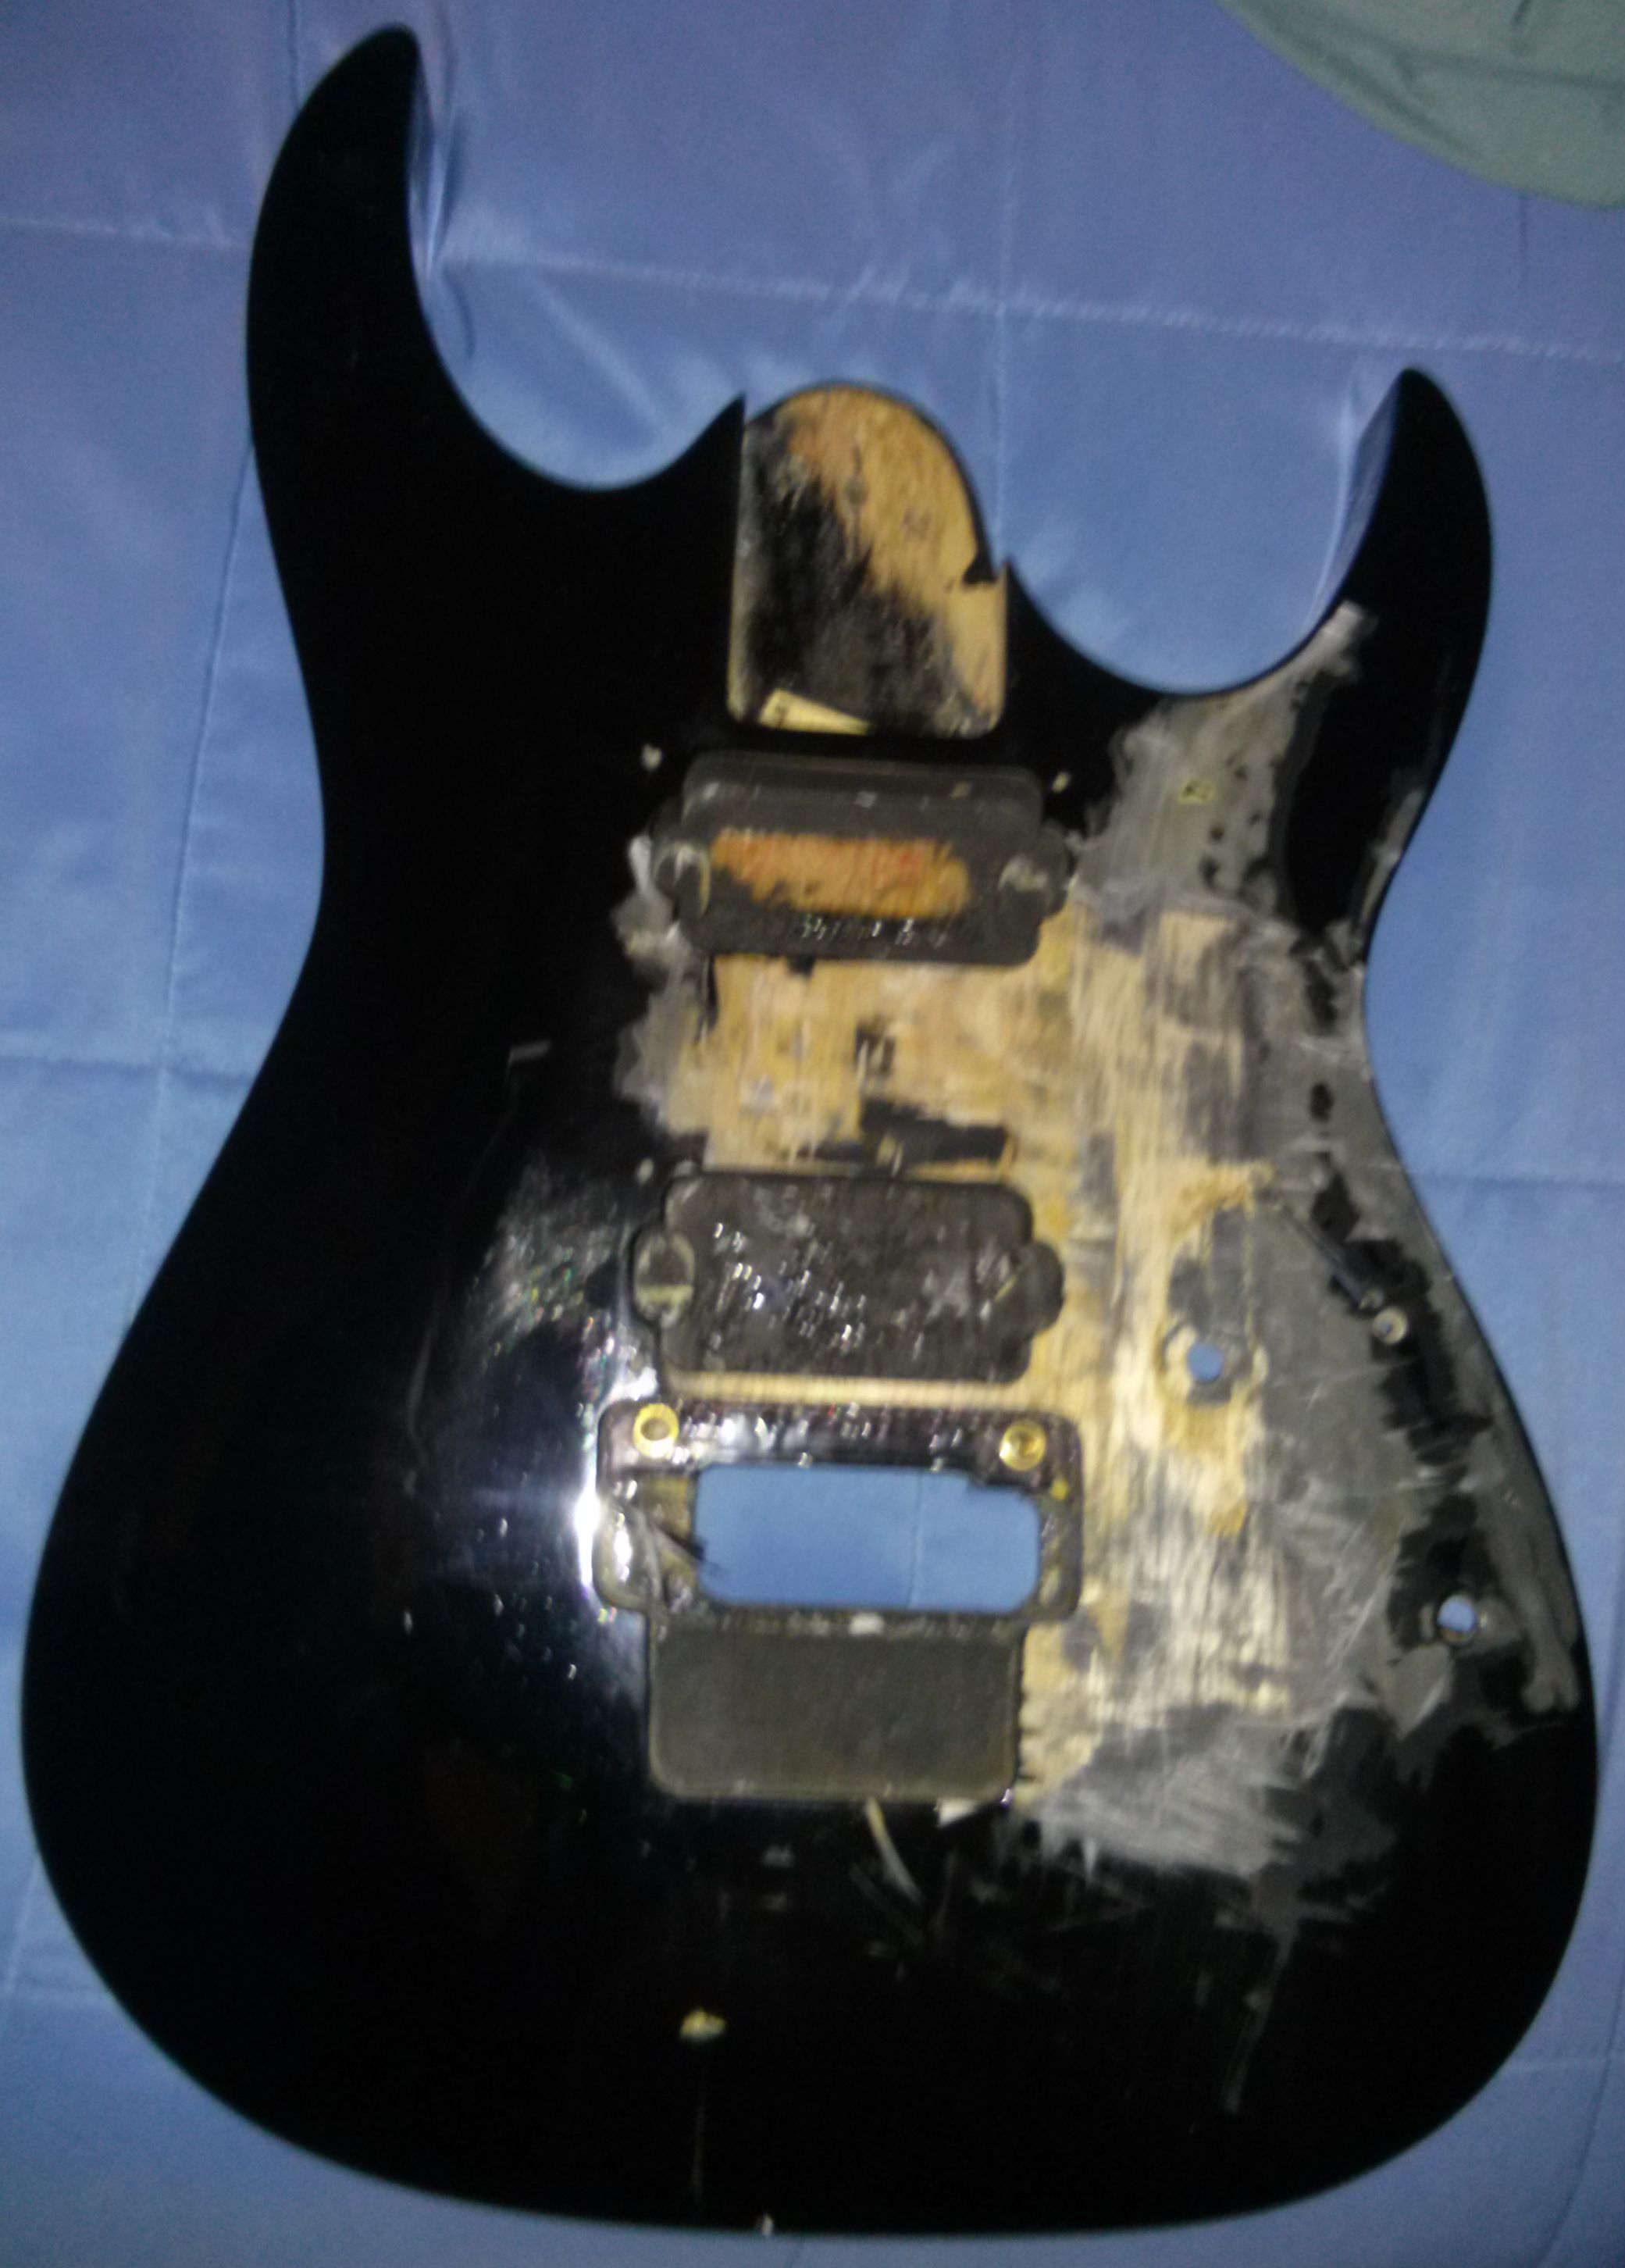
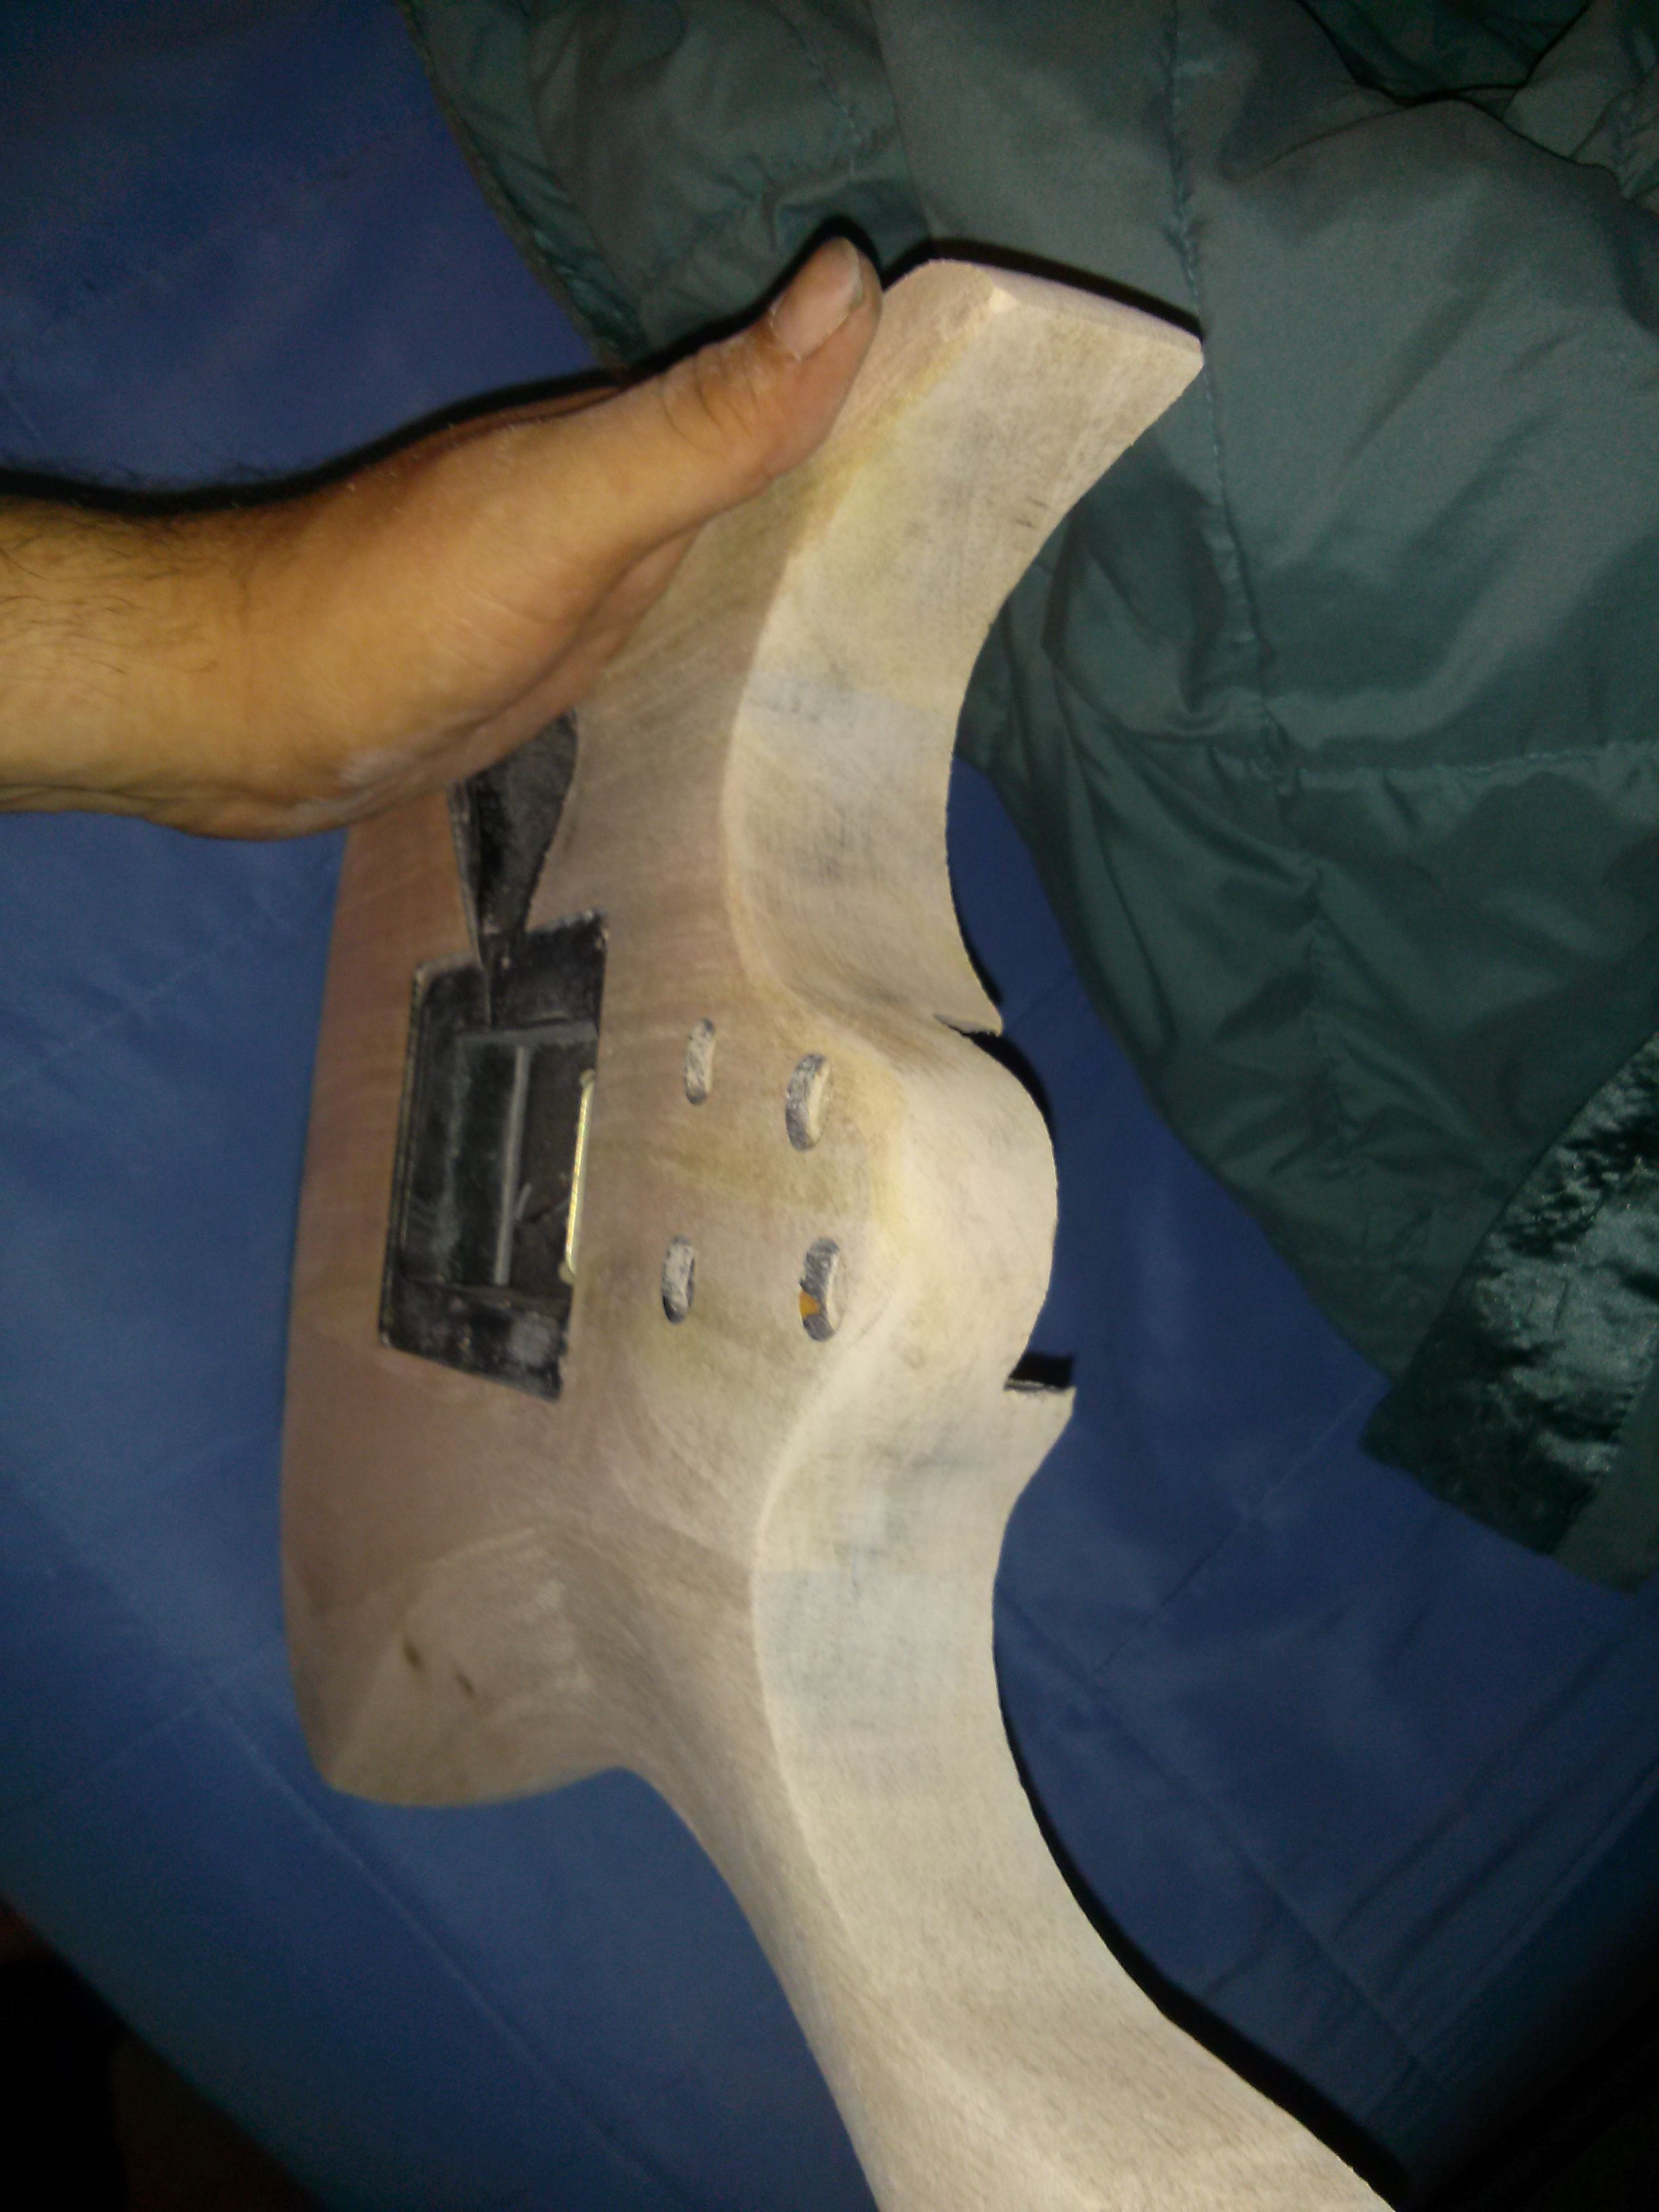
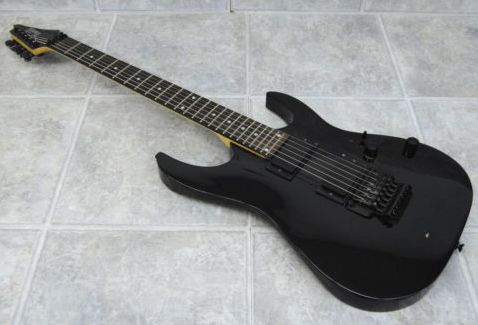 Since my expectations were exceedingly low and I didn’t want to put this sticker on one of my real guitars, I trolled eBay for a couple of weeks to find a suitable victim. I ultimately purchased this Ibanez G10 (despite disliking Ibanez guitars, but for no real reason) because I got it for under 100 dollars and it had a double-locking Floyd Rose Tremolo (which itself costs more than a hundred dollars). The caveat with this guitar is that it had some horrible damage around the knobs (picture below) and at a couple of other spots on the front of the body. I didn’t think that would be much of an issue since it would be covered with the glorious ‘skin’ anyway. Note that the picture doesn’t do justice to the extent or depth of the damage: the paint was damage, the wood was damaged, it was far worse than I’d anticipated.
All of which didn’t matter since the skin sucked so bad.
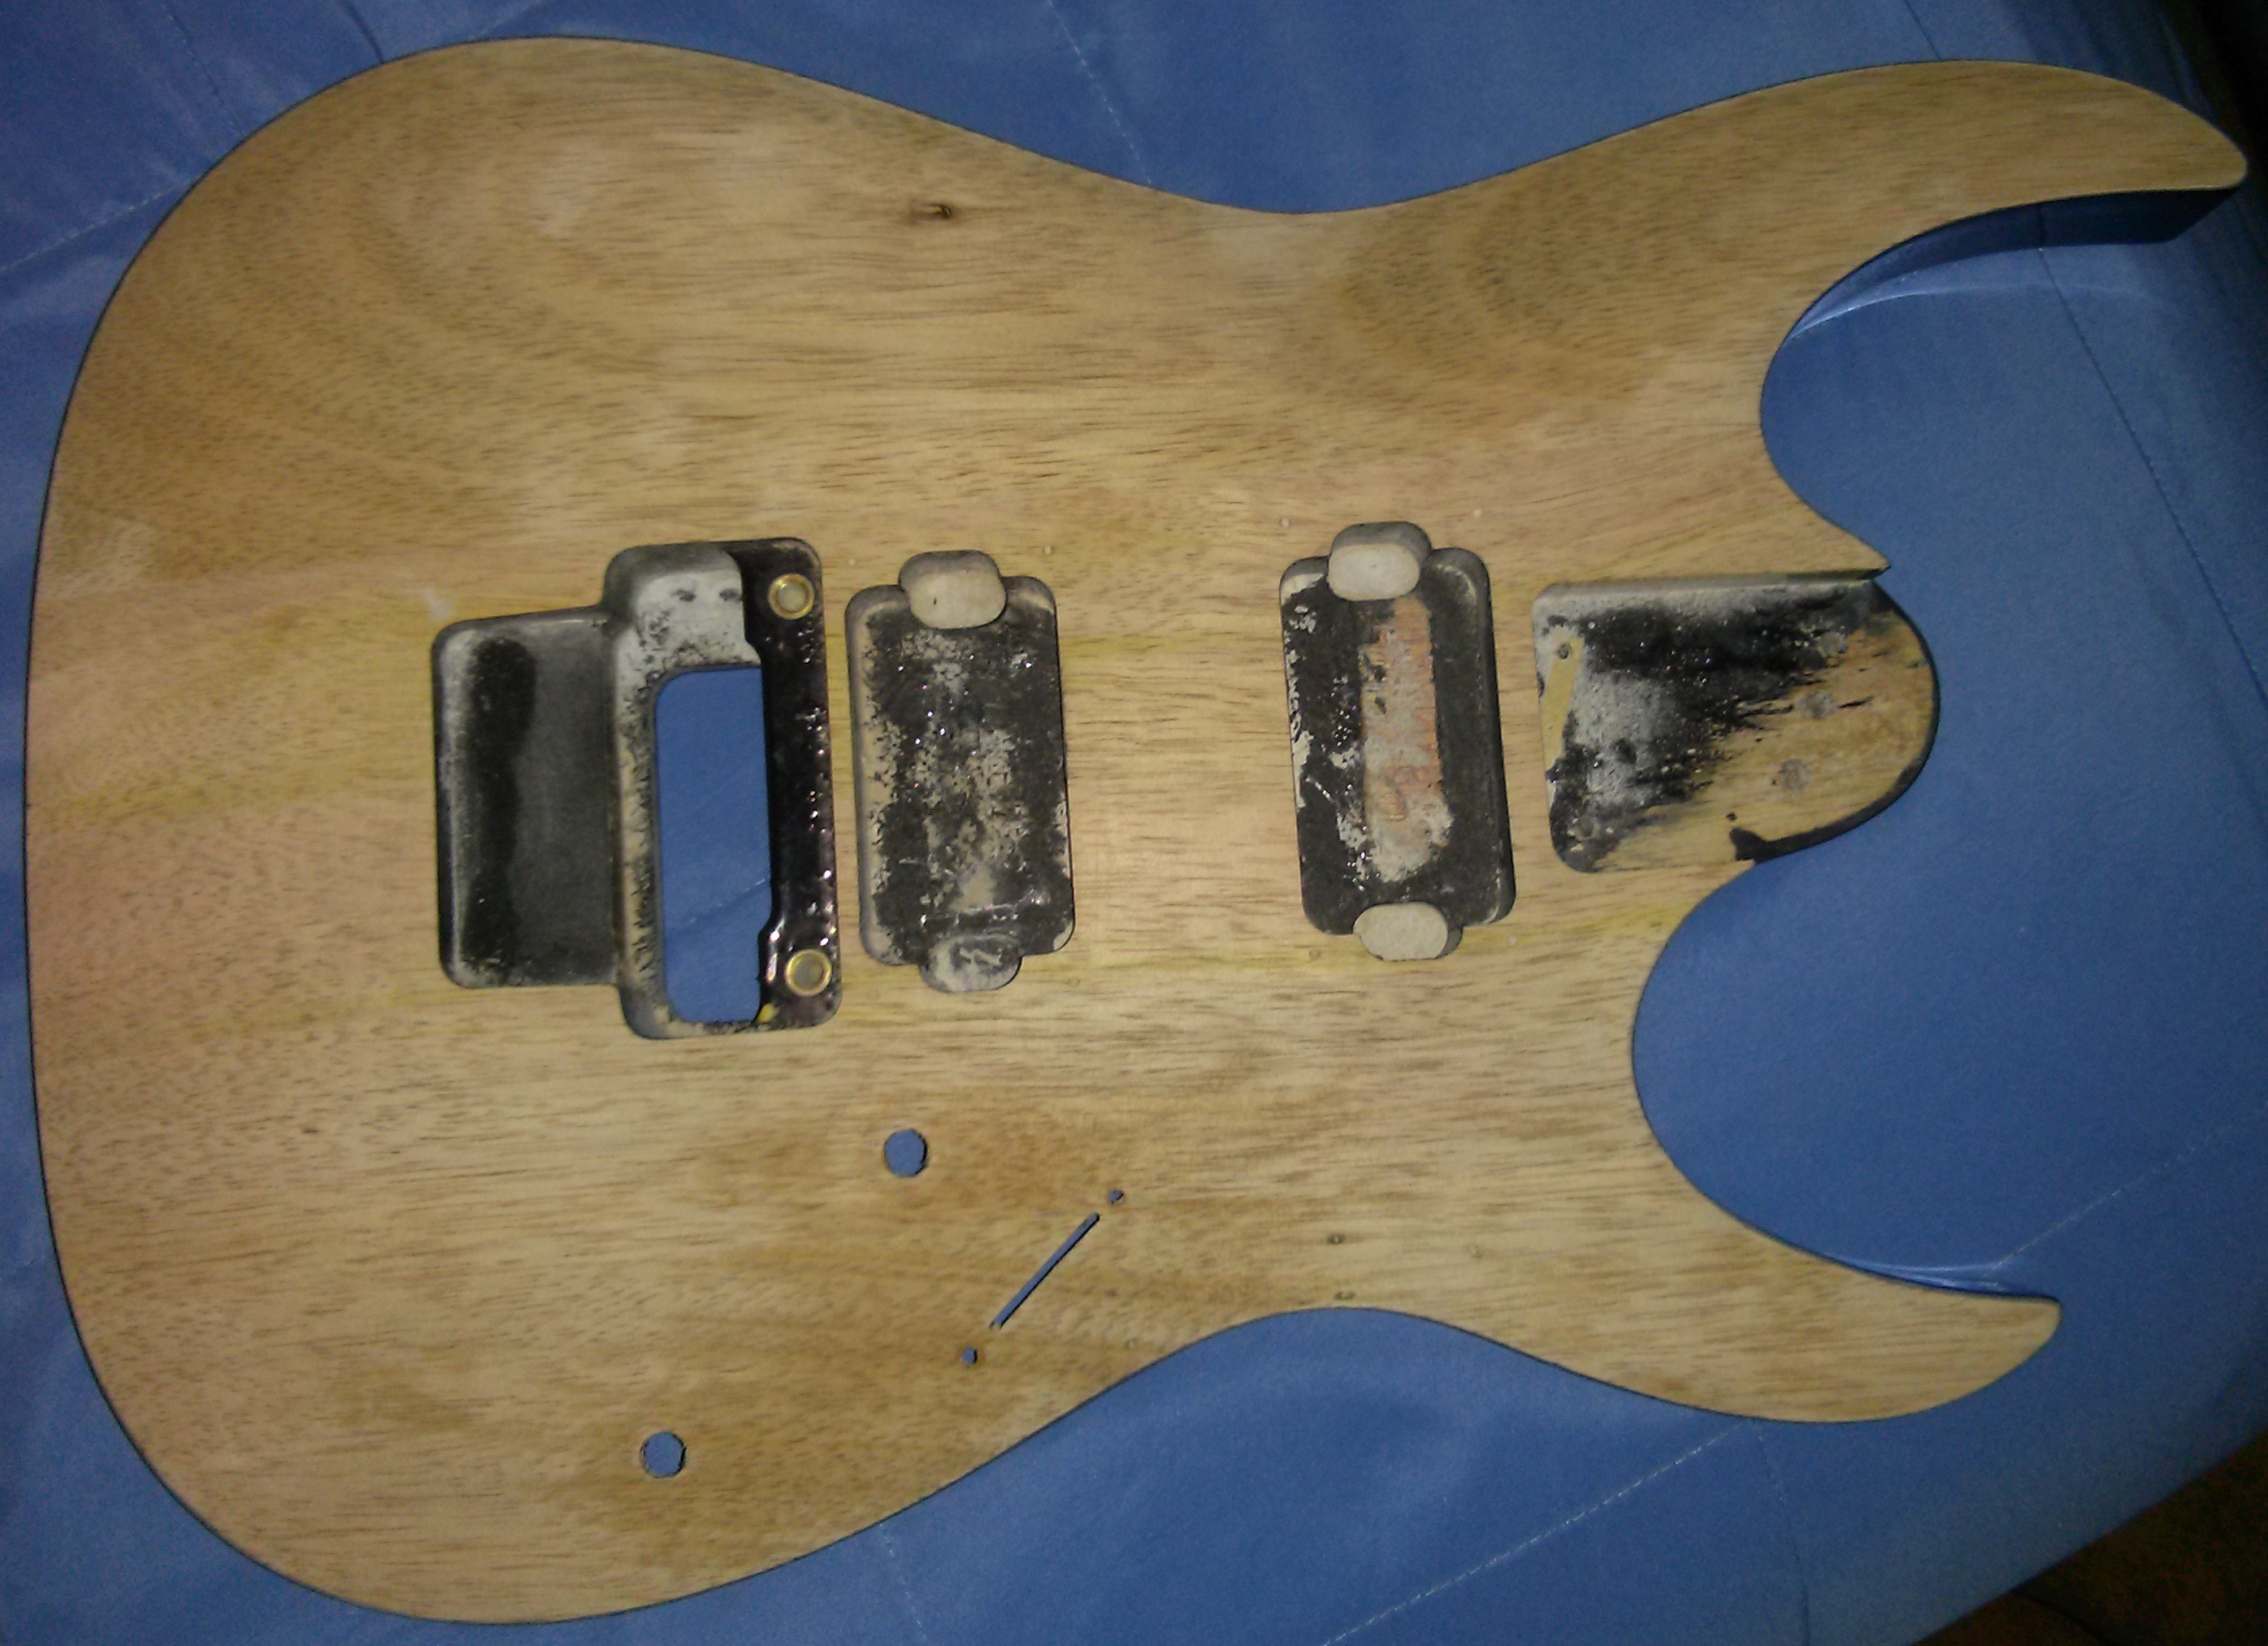
 Once I realized that the guitar skin wasn’t going to work -and also having realized that the guitar actually sounded pretty good- I decided to try to finish the thing anyway. First up: get the old finish off. This is the early stage of that process, when I was using a heat gun to try to get through the clear coat. This was a laborious process which was very prone to mistakes. The correct amount of heat applied at the correct time was a difficult thing to nail down. It resulted in the spotty results you see here. And this took a very long time, for results which were … well … what you see here. After spending several hours trying to strip it with this method, achieving the results you see here, I finally gave up on that approach. My new approach was sandpaper. Sandpaper is cheap and I could throw a lot of it at the project, so, next step, sand that fucker!
In about an hour, using a 60 grit sandpaper, I got the guitar to the state you see here:
Well, I got the front of it to that state. The back and sides were still untouched:
At this point I was still thinking I could just refinish the front of the guitar and call it good enough. As my brother-in-law pointed out, though, that would have looked fucking horrible. So I resigned myself to sand down the back and the edges. Pro tip: to get to the inside curves near the neck, I emptied a 16oz Coors Light can (a number of them, actually, for unrelated reasons), refilled it with water and wrapped a piece of sandpaper around it. I used the sandpaper-wrapped aluminum can to hit a number of other places as well. Scholars may argue that I was doing so only to make sure I always had some empty cans lying around and they could be right. But, for the inside curves near the neck, the can worked perfectly:
The back was a much easier process, since it is almost completely flat, compared to the curves on the front and sides of the thing.

I thought it looked pretty darn good at that point. I also mistakenly believed that the finish was fairly smooth. It so wasn’t. What followed was a week of the most frustrating painting of my life.
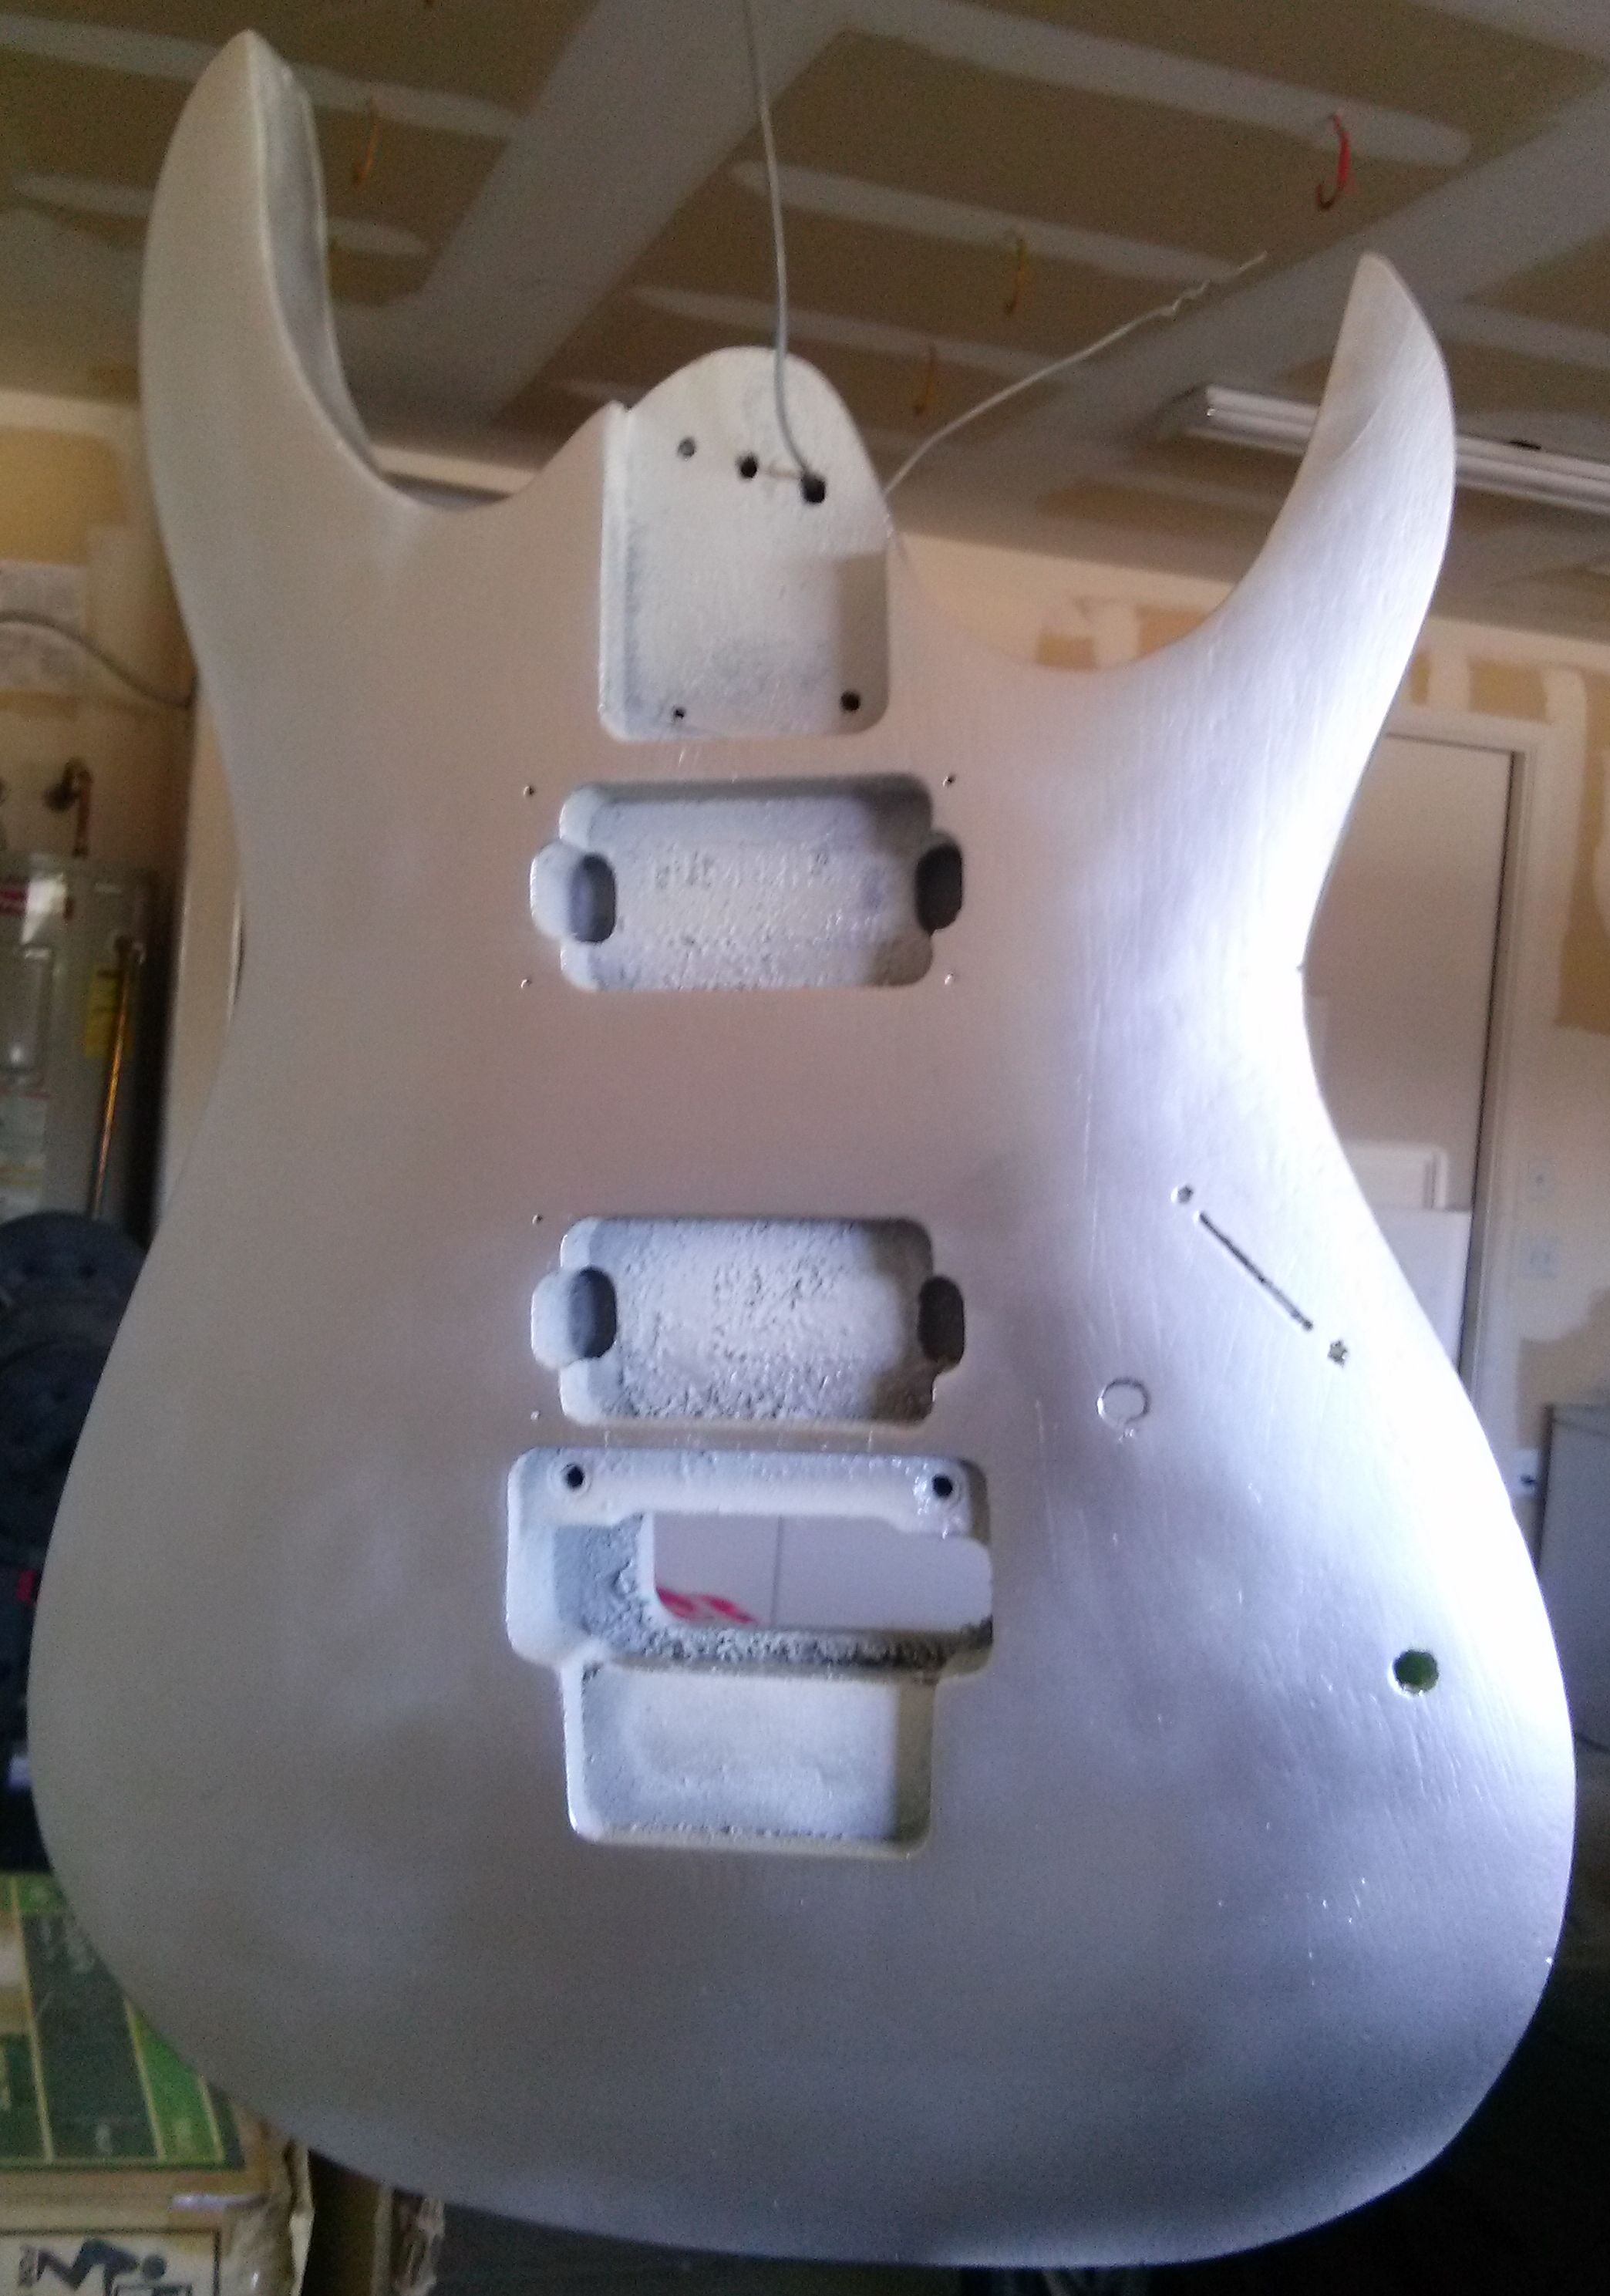
 This is what the guitar looks like after five coats of primer. While the image does little to show the imperfections in the paint, suffice it to say that if it looked as good in person as it does in the photo, I would have stopped right here. It did not, and I did not. I continued the priming process, which ran thusly: spray a coat of white primer, allow to dry, sand down the high spots (removing about 90% of everything I had just sprayed on), wipe it down, spray a coat of gray primer, allow to dry, sand down the high spots (removing about 90% of everything I had just sprayed on), and repeat. First layer white, second layer gray, third layer white, and on and on. I don’t know why, but the primer seemed to disappear into the same low spots in the grain like there was a vacuum sucking it in. I’m not talking about trying to hide the initial damage from the first image in this post; that was hidden easily with a bit of fake wood and one coat of primer. I’m talking about the actual wood grain not being smooth. And no matter how much primer I threw at it, I couldn’t make it go away.
I burned through -very literally- five full cans of primer during this process. This is what it looks like after the fifth can was empty and I finally enacted the ‘5-can-fuck-it’/mercy rule:
Unfortunately, even at full size, I don’t think you can see the issue with the grain coming through the paint. If it looked that smooth in person, I’d be pleased as punch.
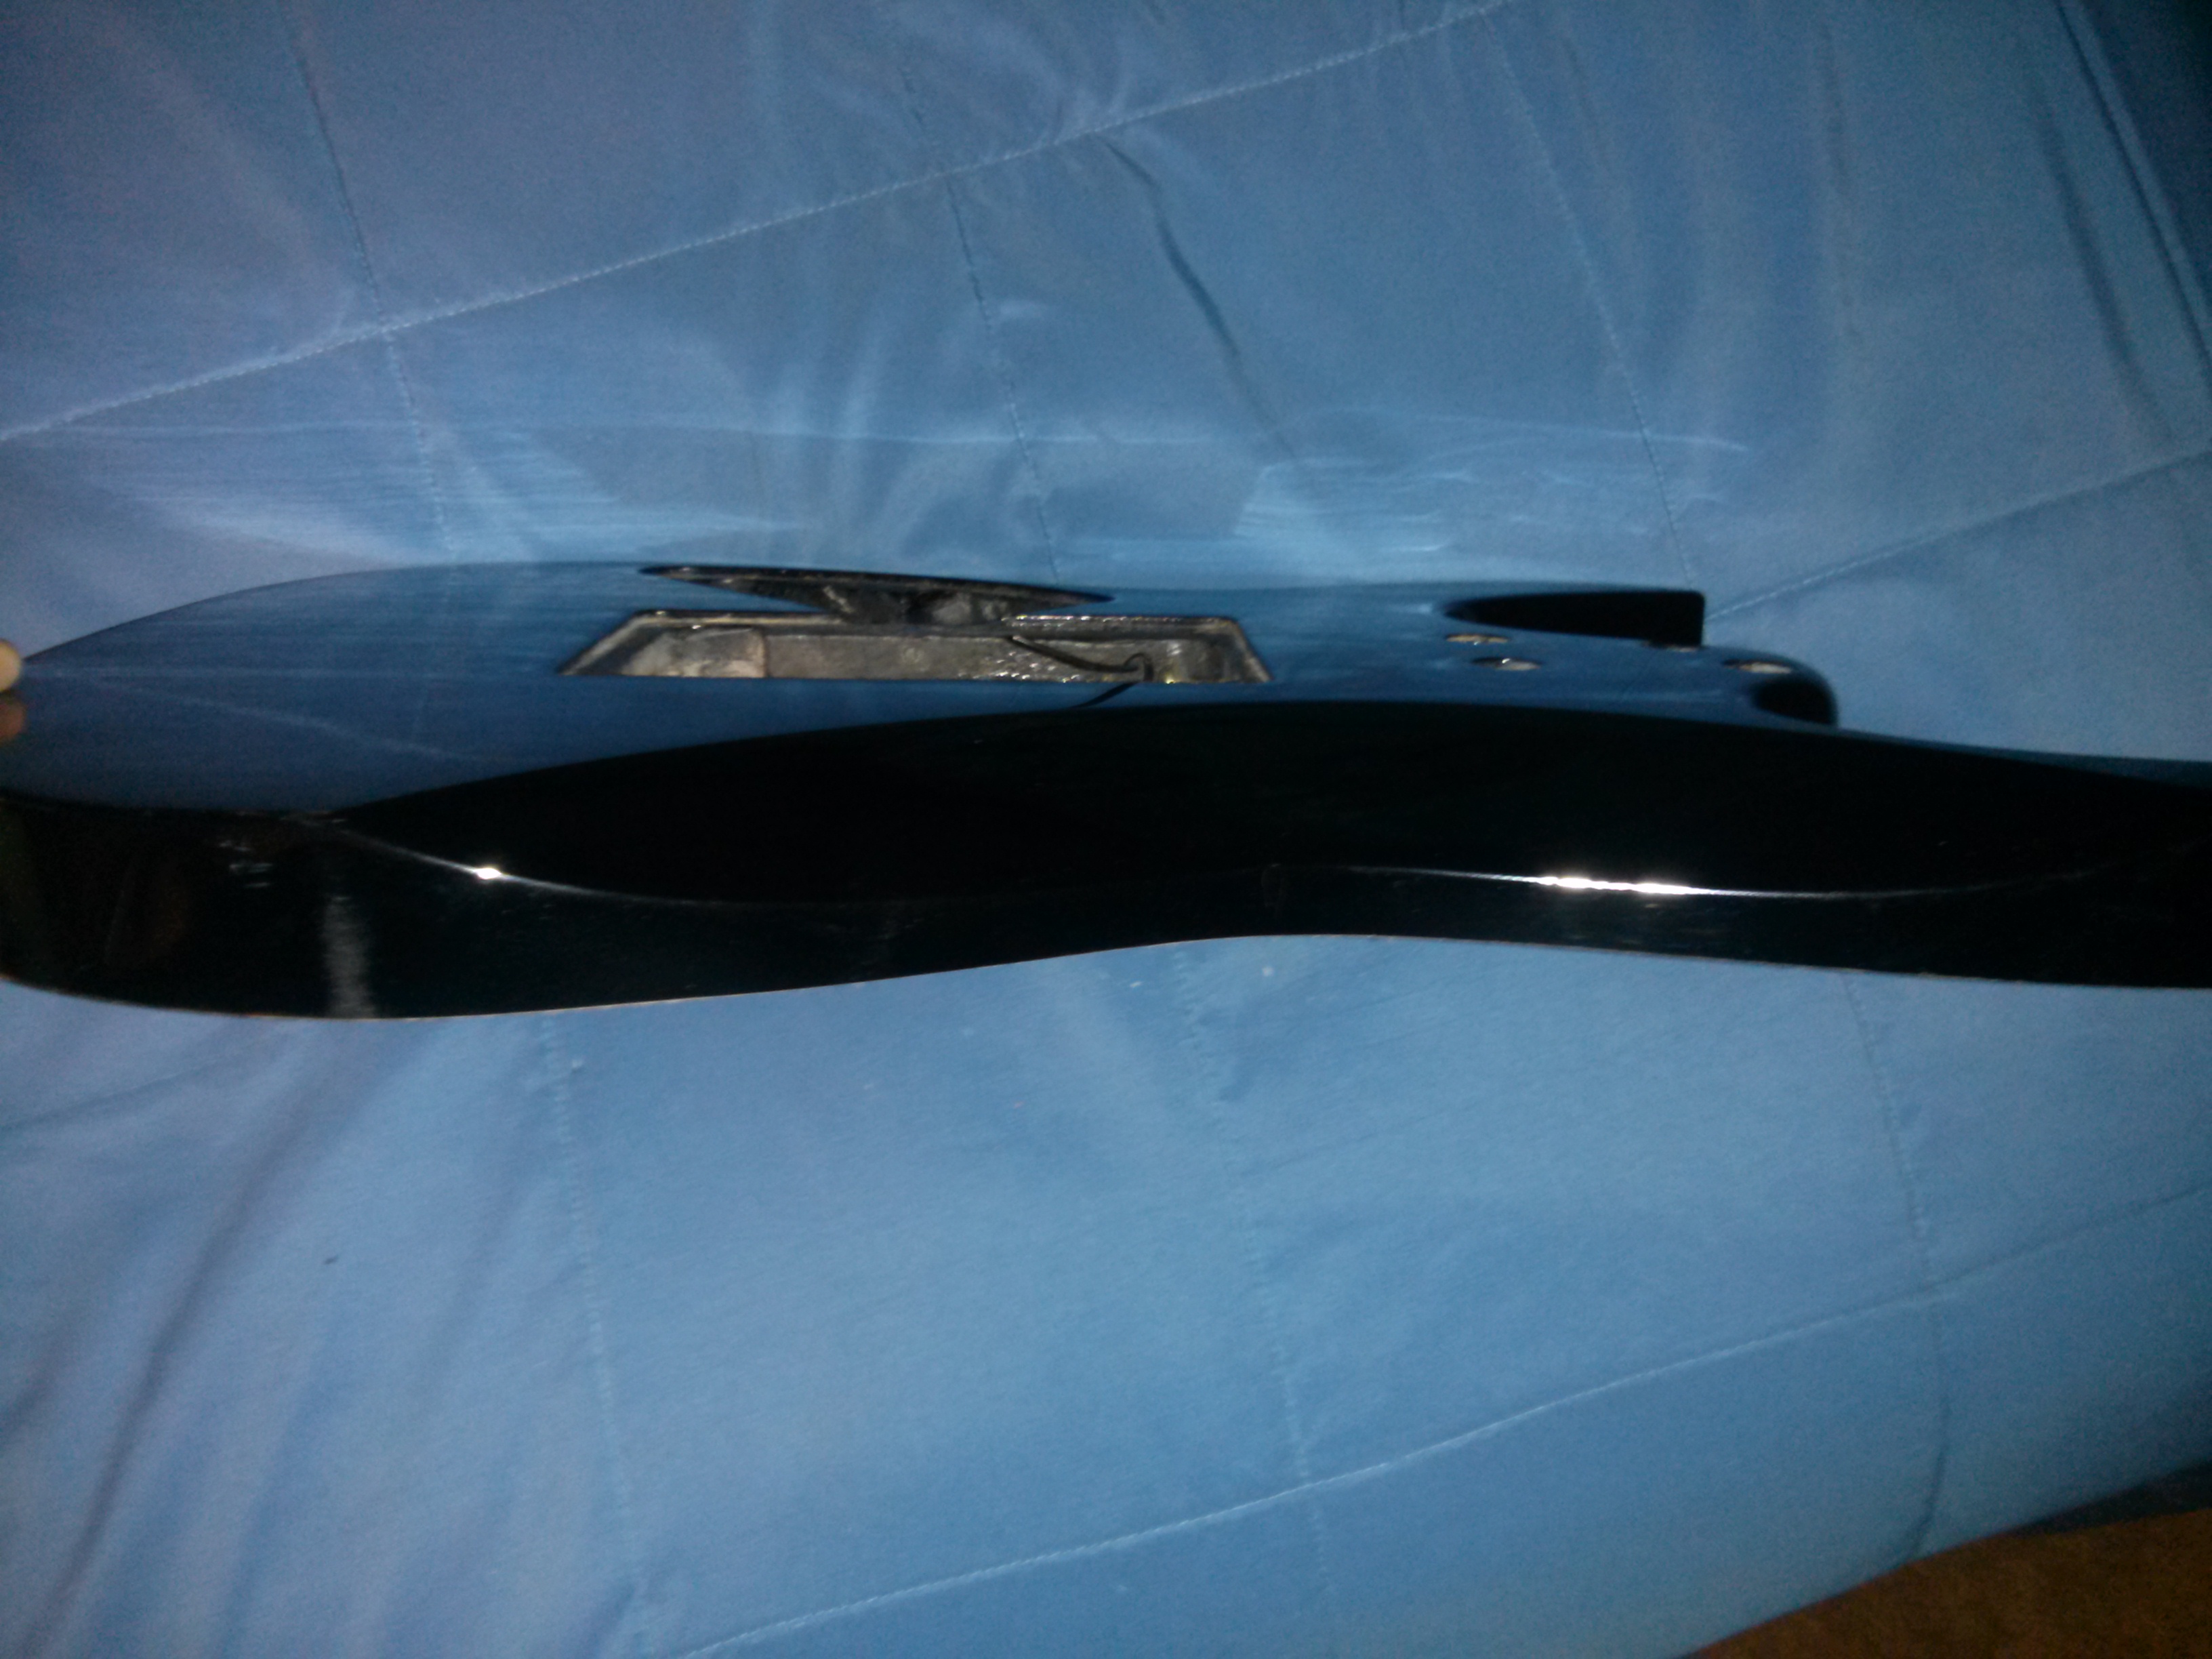
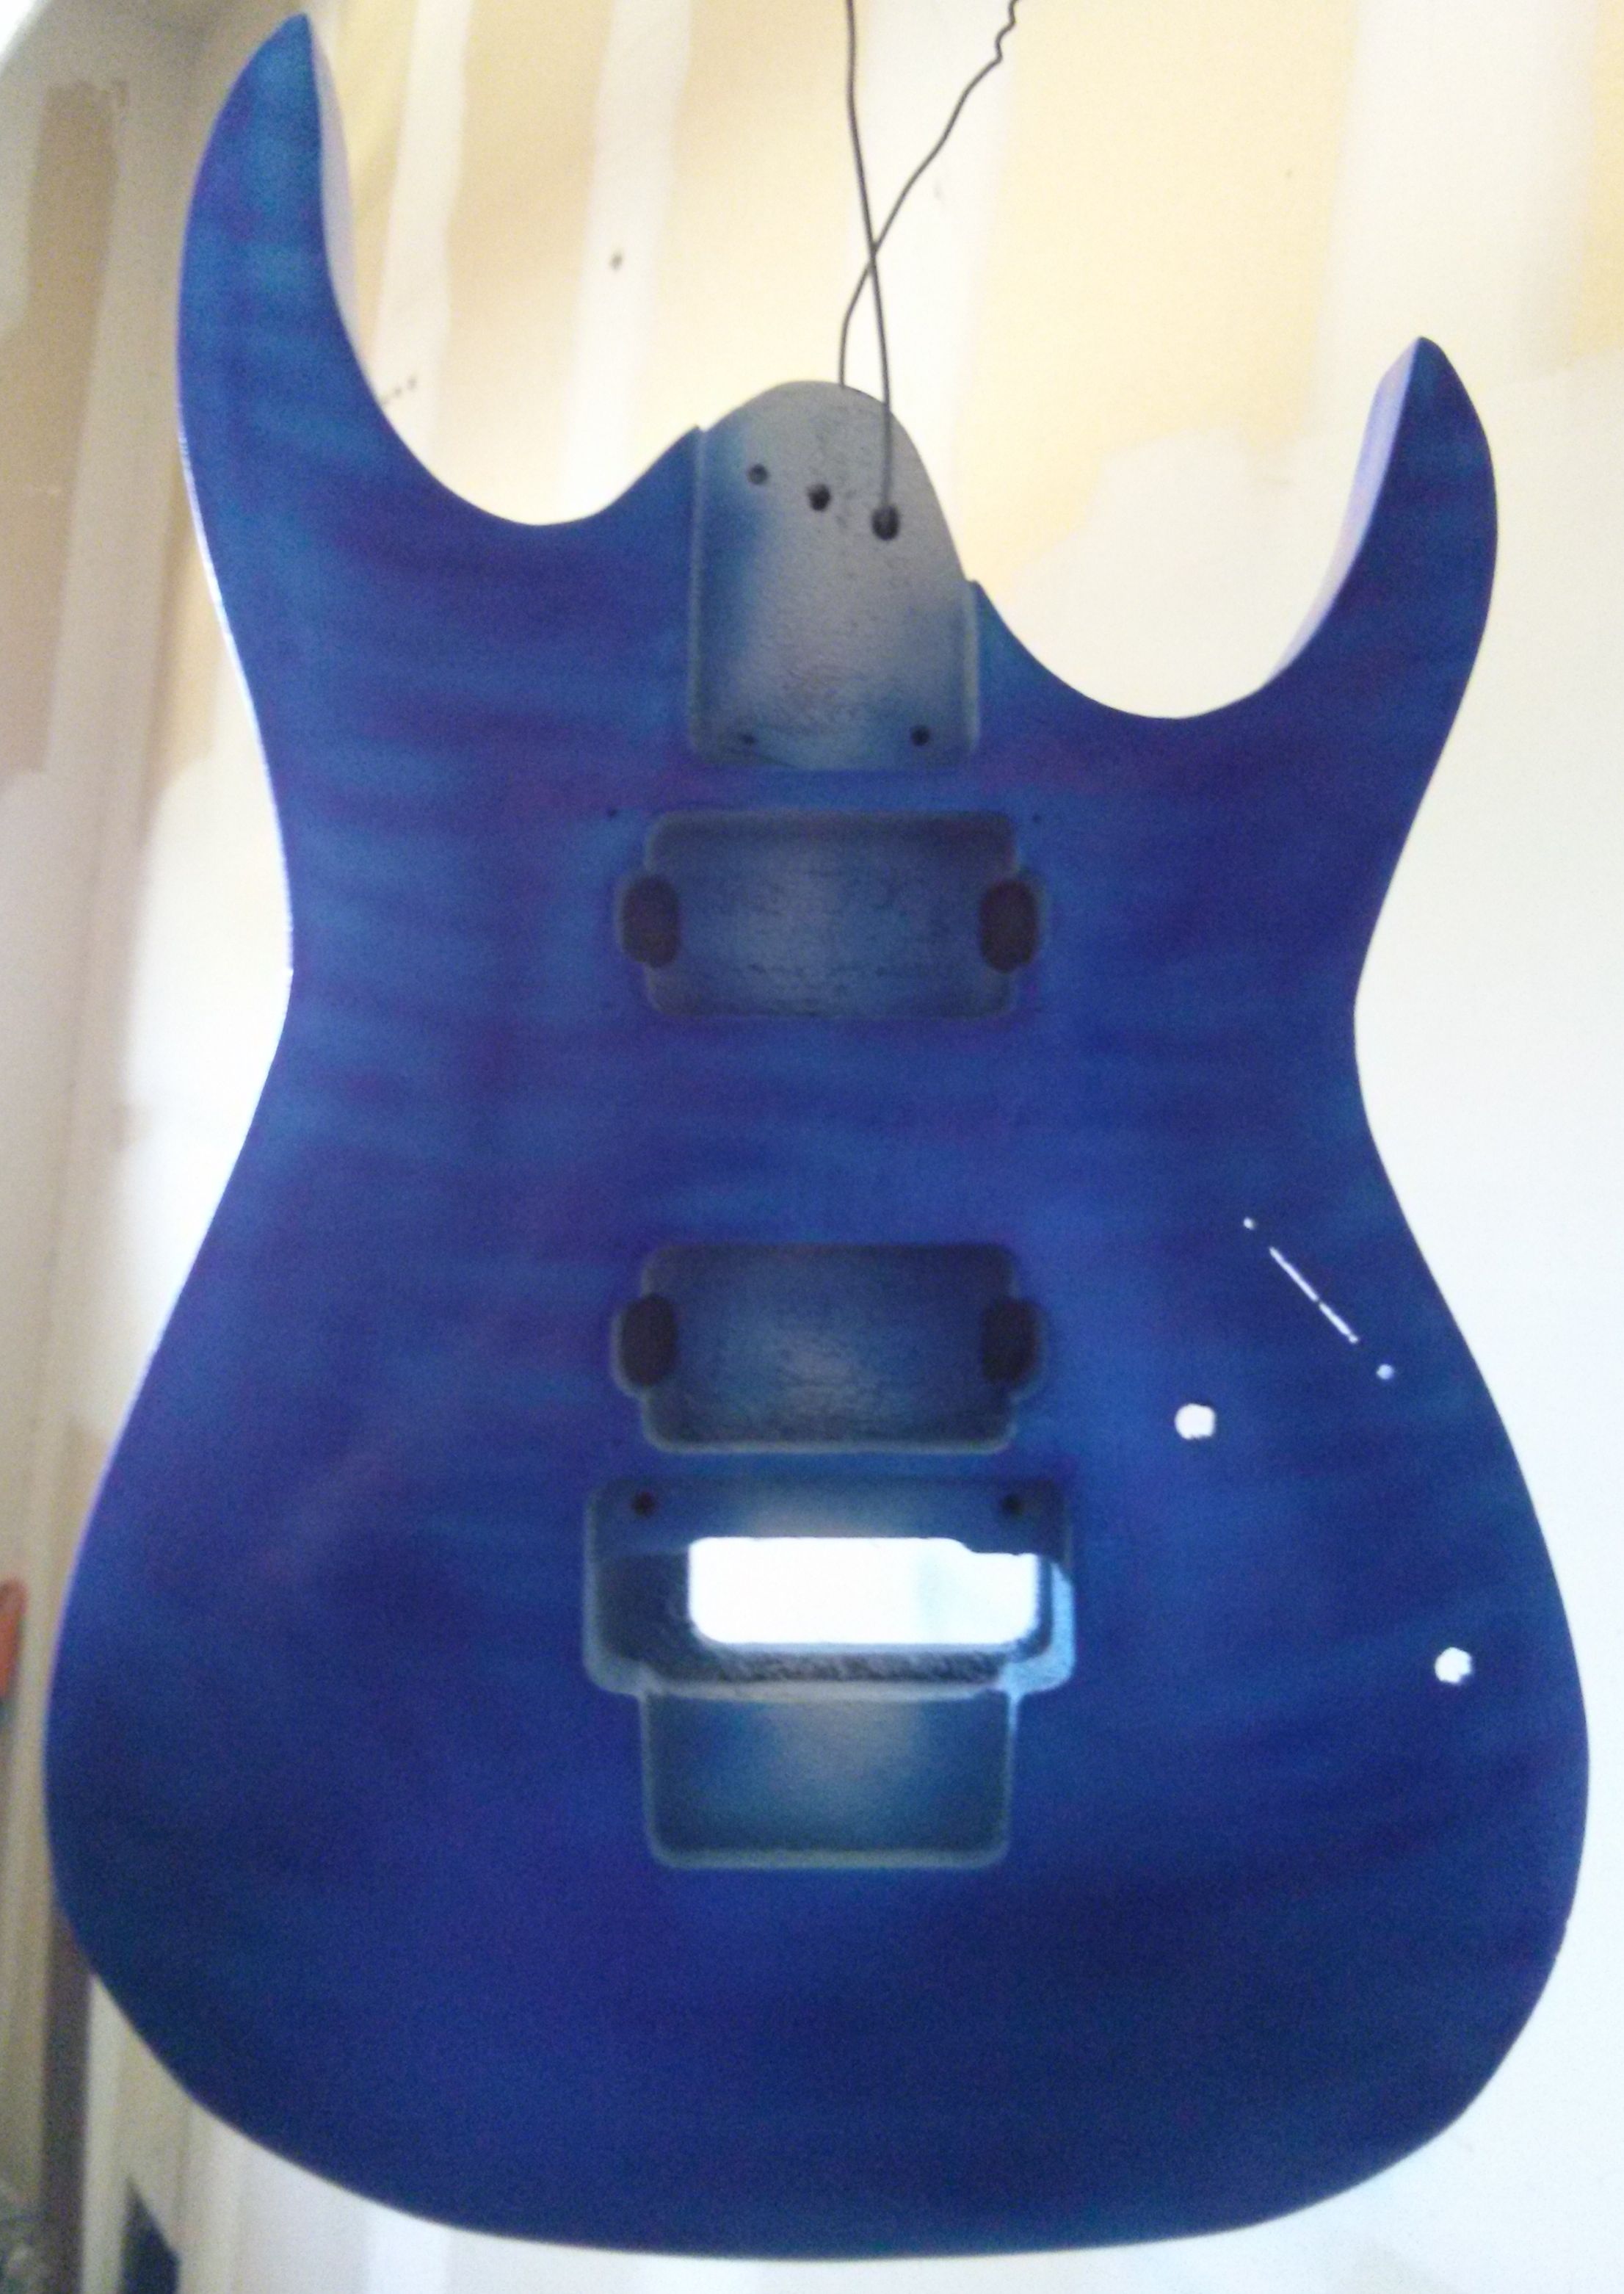
 So, to finish the guitar, I chose to try out something wildly different (at least for a guitar… I think) which is to use Alclad II Electric Blue to try to give it a bit of an anodized look. I decided before I started the process that I was going to try to give the final product some faux tiger-stripes in an effort to distract from the flaws in the base coat. The first step to using the alclad is to coat the guitar in their proprietary silver paint, which I did. That looks like what you see pictured here. Now, with such a shiny finish, you can definitely see some of the wood grain that was bedeviling me throughout the process. It sticks out, just as I thought it would, like the proverbial sore thumb. It looks fucking horrible. Thankfully, though, this is the base coat. I knew it wasn’t going to look great, and the results back that up. But I still had to lay down some color coat. I did that with the electric blue color mentioned above, taking care to add some thick lines every so often to give it some vague tiger-stripish looks. There was no specific method to this beyond adding them where I felt like they should be:
I started this process by lining around the edge of the guitar and the openings for the pickups and termolo with a fairly liberal line of paint. It doesn’t show much in the image, but I did so knowing that if I didn’t, it would naturally thin around any sharp edges because of paint run and my own tendency to stop before over-spraying. The result actually looks quite good, though not quite as good as the picture. It left me thinking I need to do a bit more and make the stripes a bit darker, but I ran out of paint. I ordered more paint to continue (and I also need to paint inside the opening for the tremolo and touch up the edges around some other openings) but it looks pretty okay. It will be a couple of days before I can take another crack at it, but on a scale of 1-100 on results, I’d say I’m at about a 71 right now.
After waiting an impossibly long three days for my additional paint to arrive (I ordered a second bottle of Alclad II Electric Blue and a bottle of a slightly darker Alclad II Cobalt Blue -which doesn’t exist on Amazon) I finally got to give this thing another coat. I really like the way the very dark cobalt paint is interacting with the lighter electric blue:
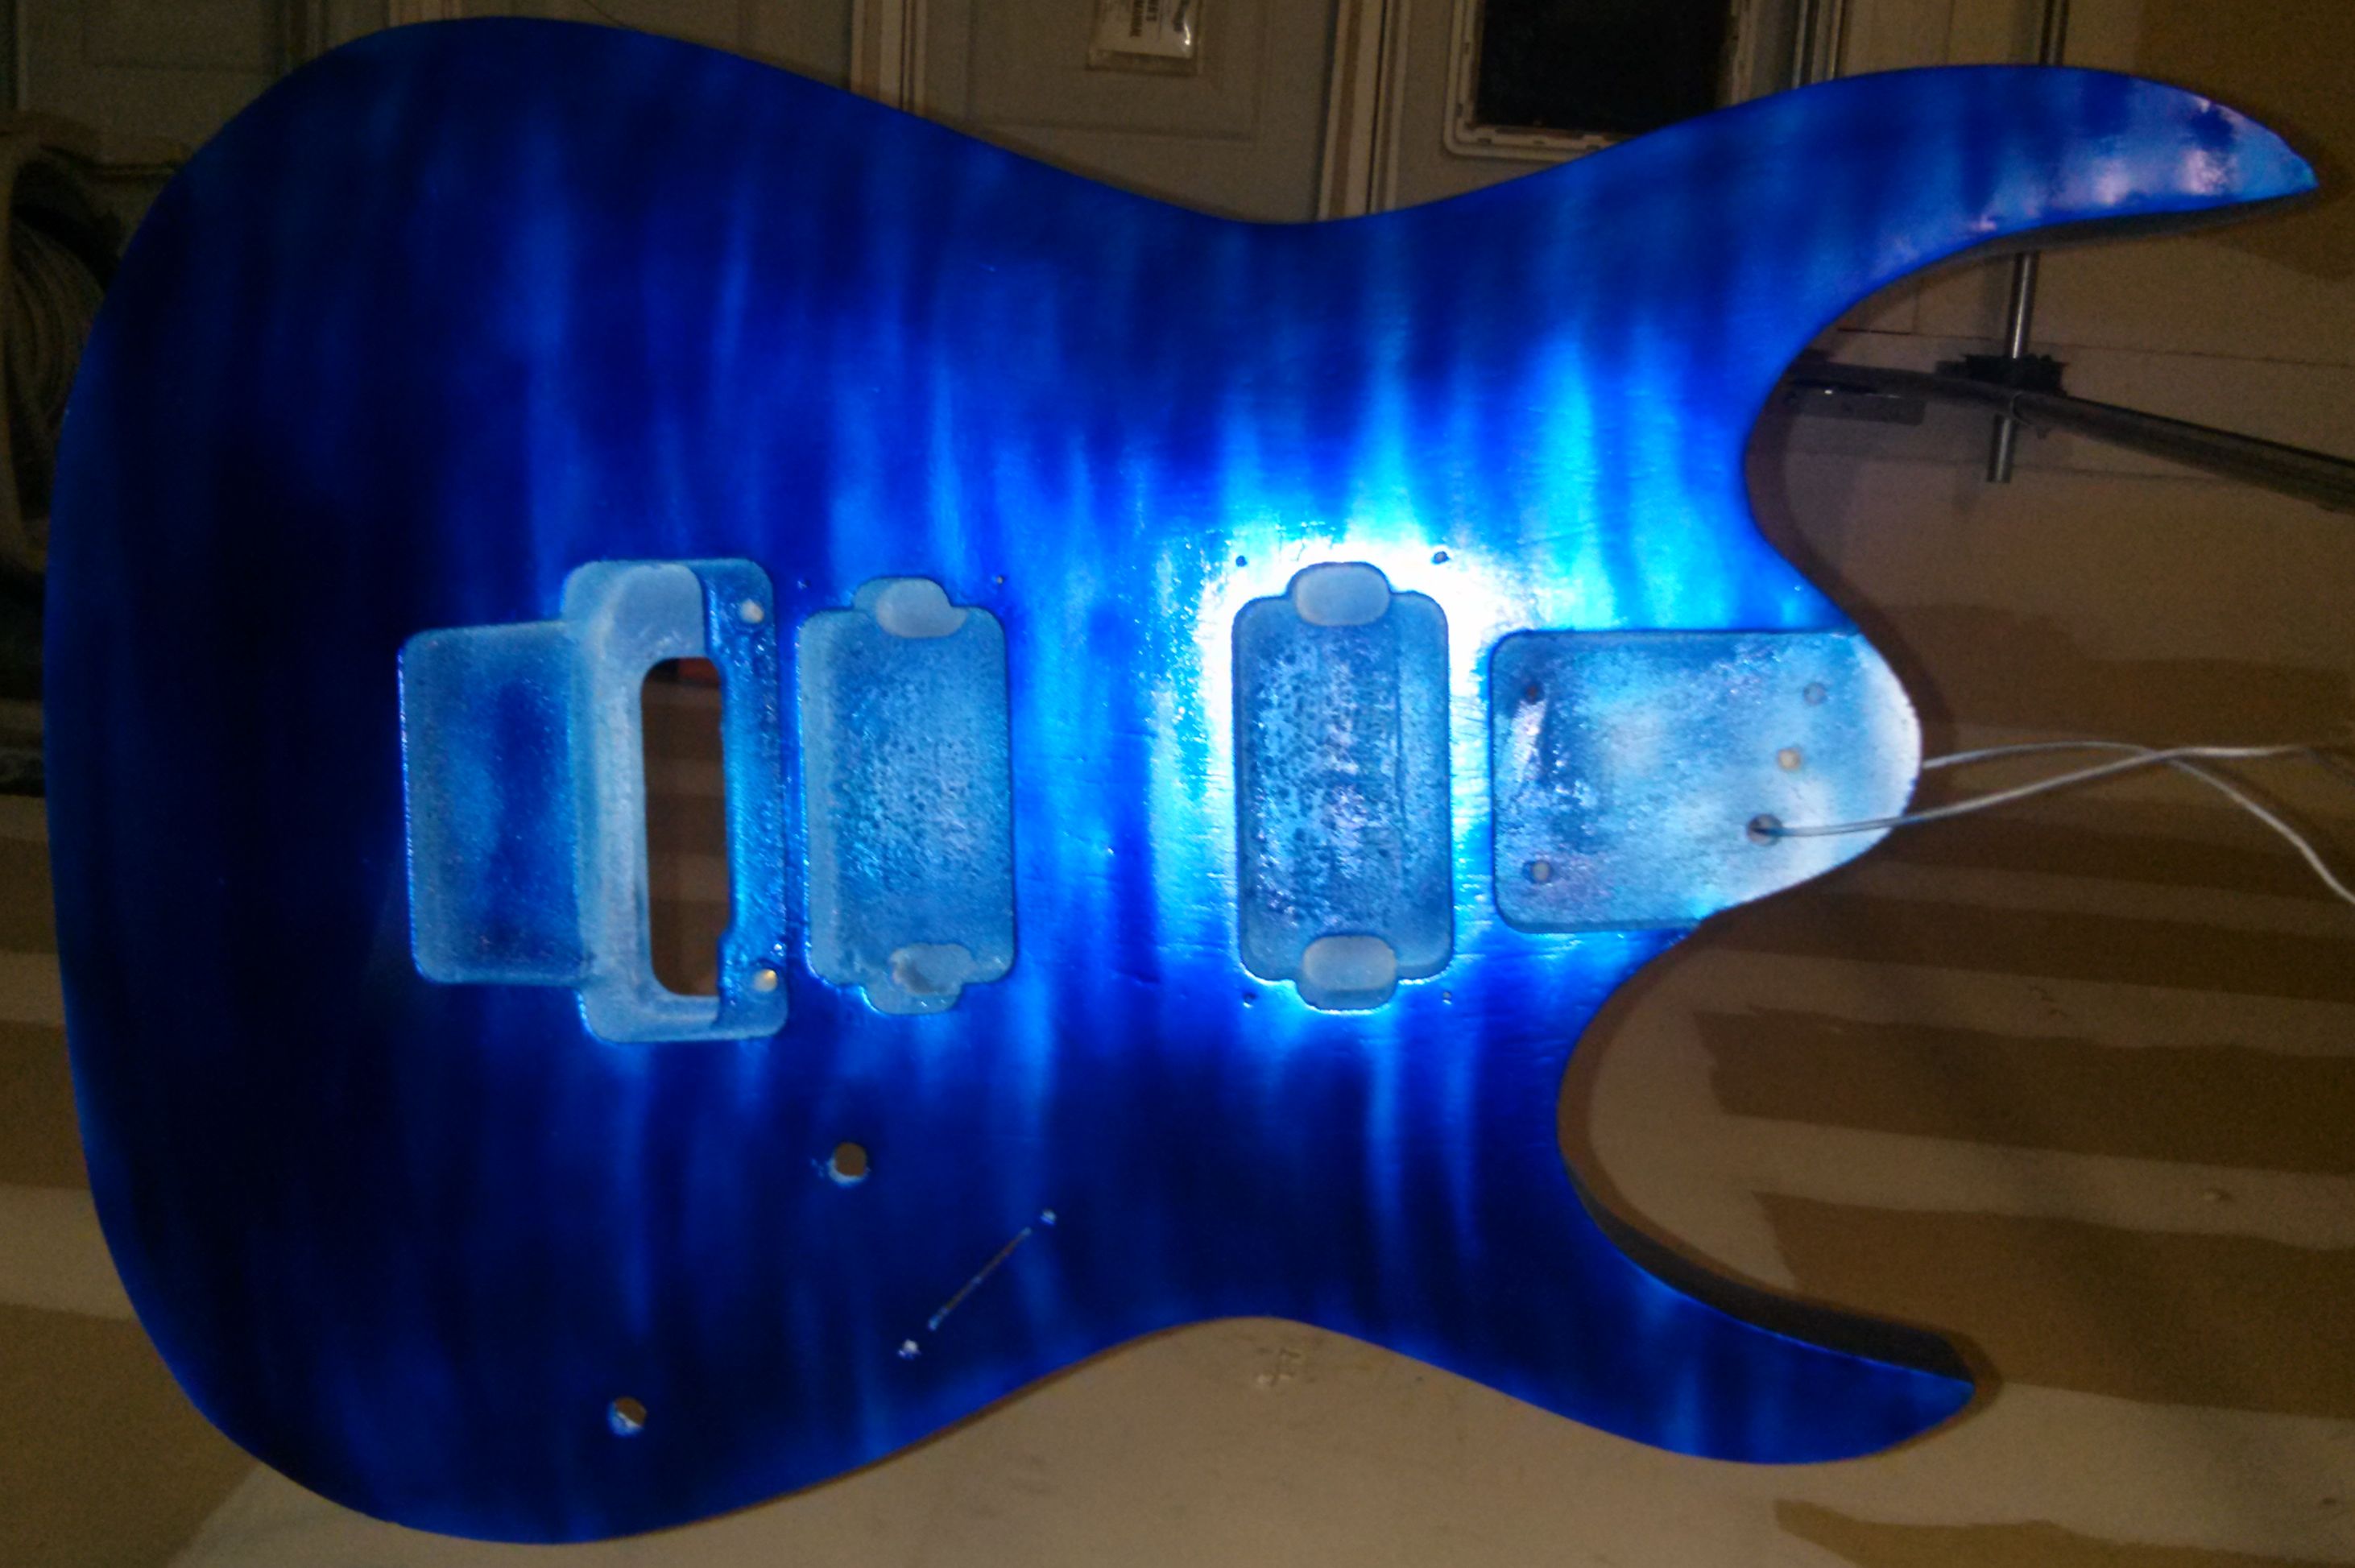
If you click the thumb above to see the full resolution image, you will see a lot of the wood grain that I simply wasn’t able to hide. And again, I’m sure it could have been hidden with the proper amount of time/sanding/patience, but I possess none of those. I mean really, if anyone is looking that closely at my guitar, it must be because I am playing so spectacularly that they have decided to perform some impromptu fellatio. If that is the case, they will be so deeply mired in the regret of their actions that they will be exceedingly unlikely to notice the wood grain through the paint.
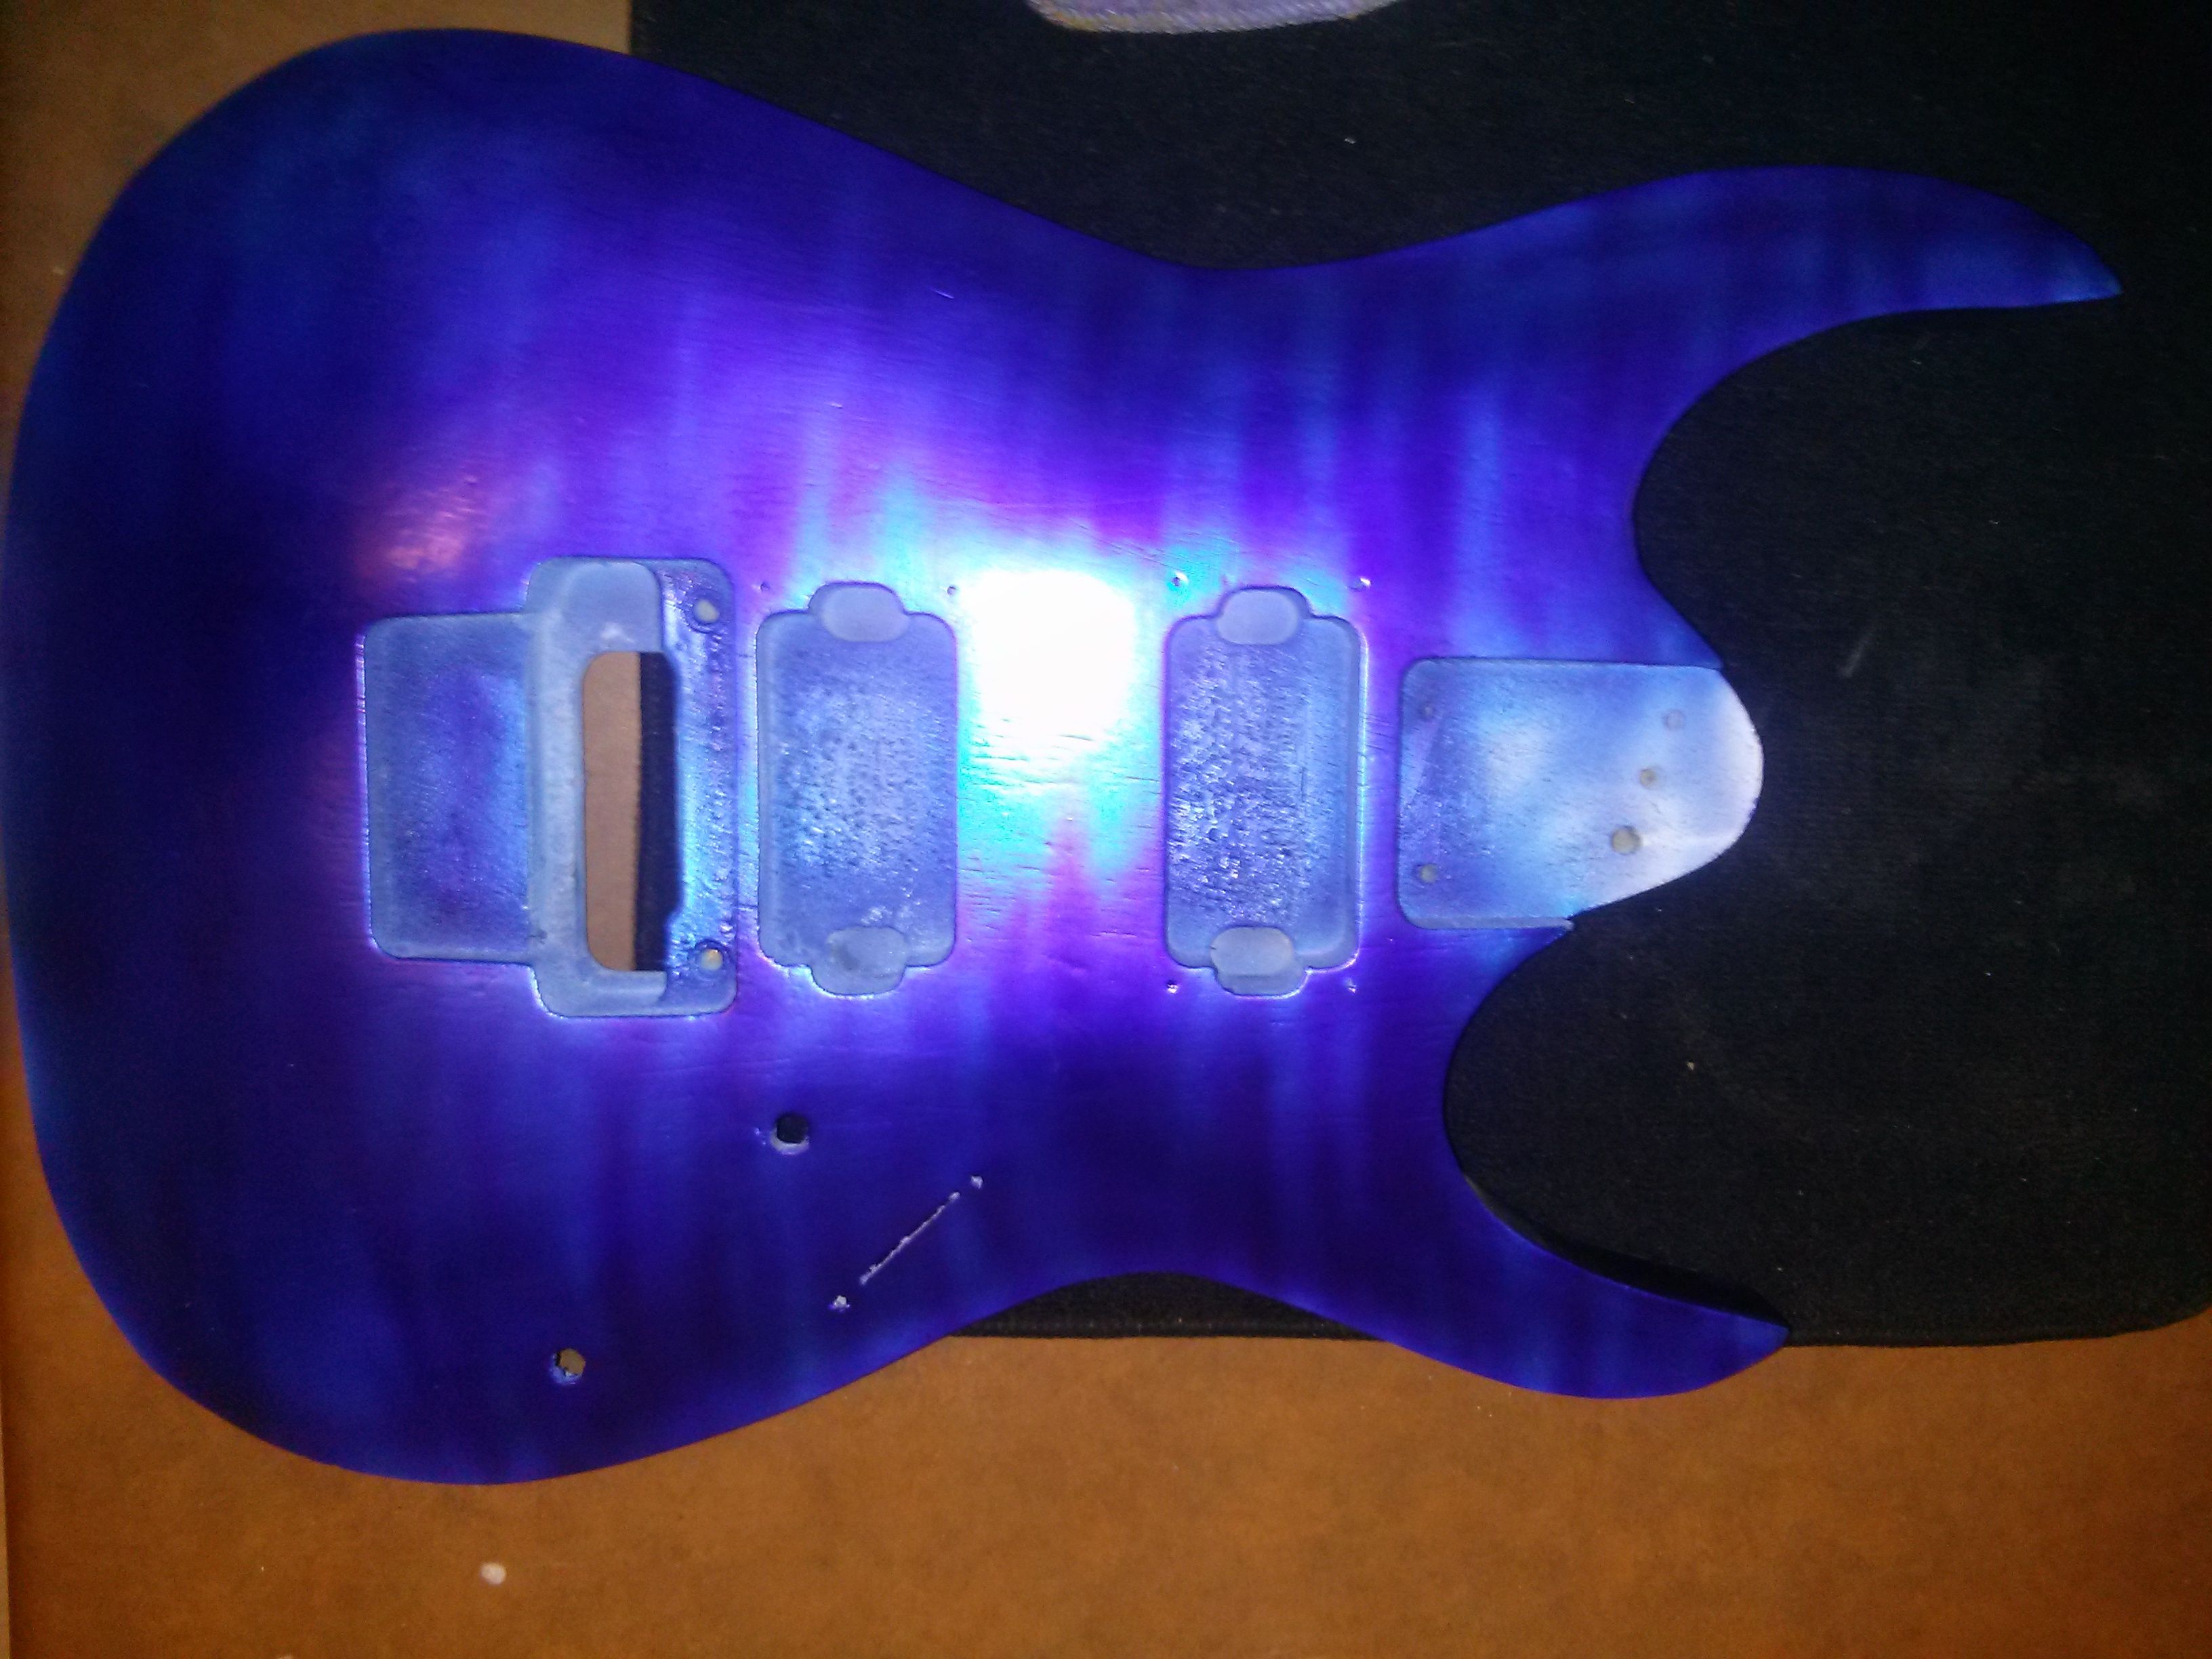
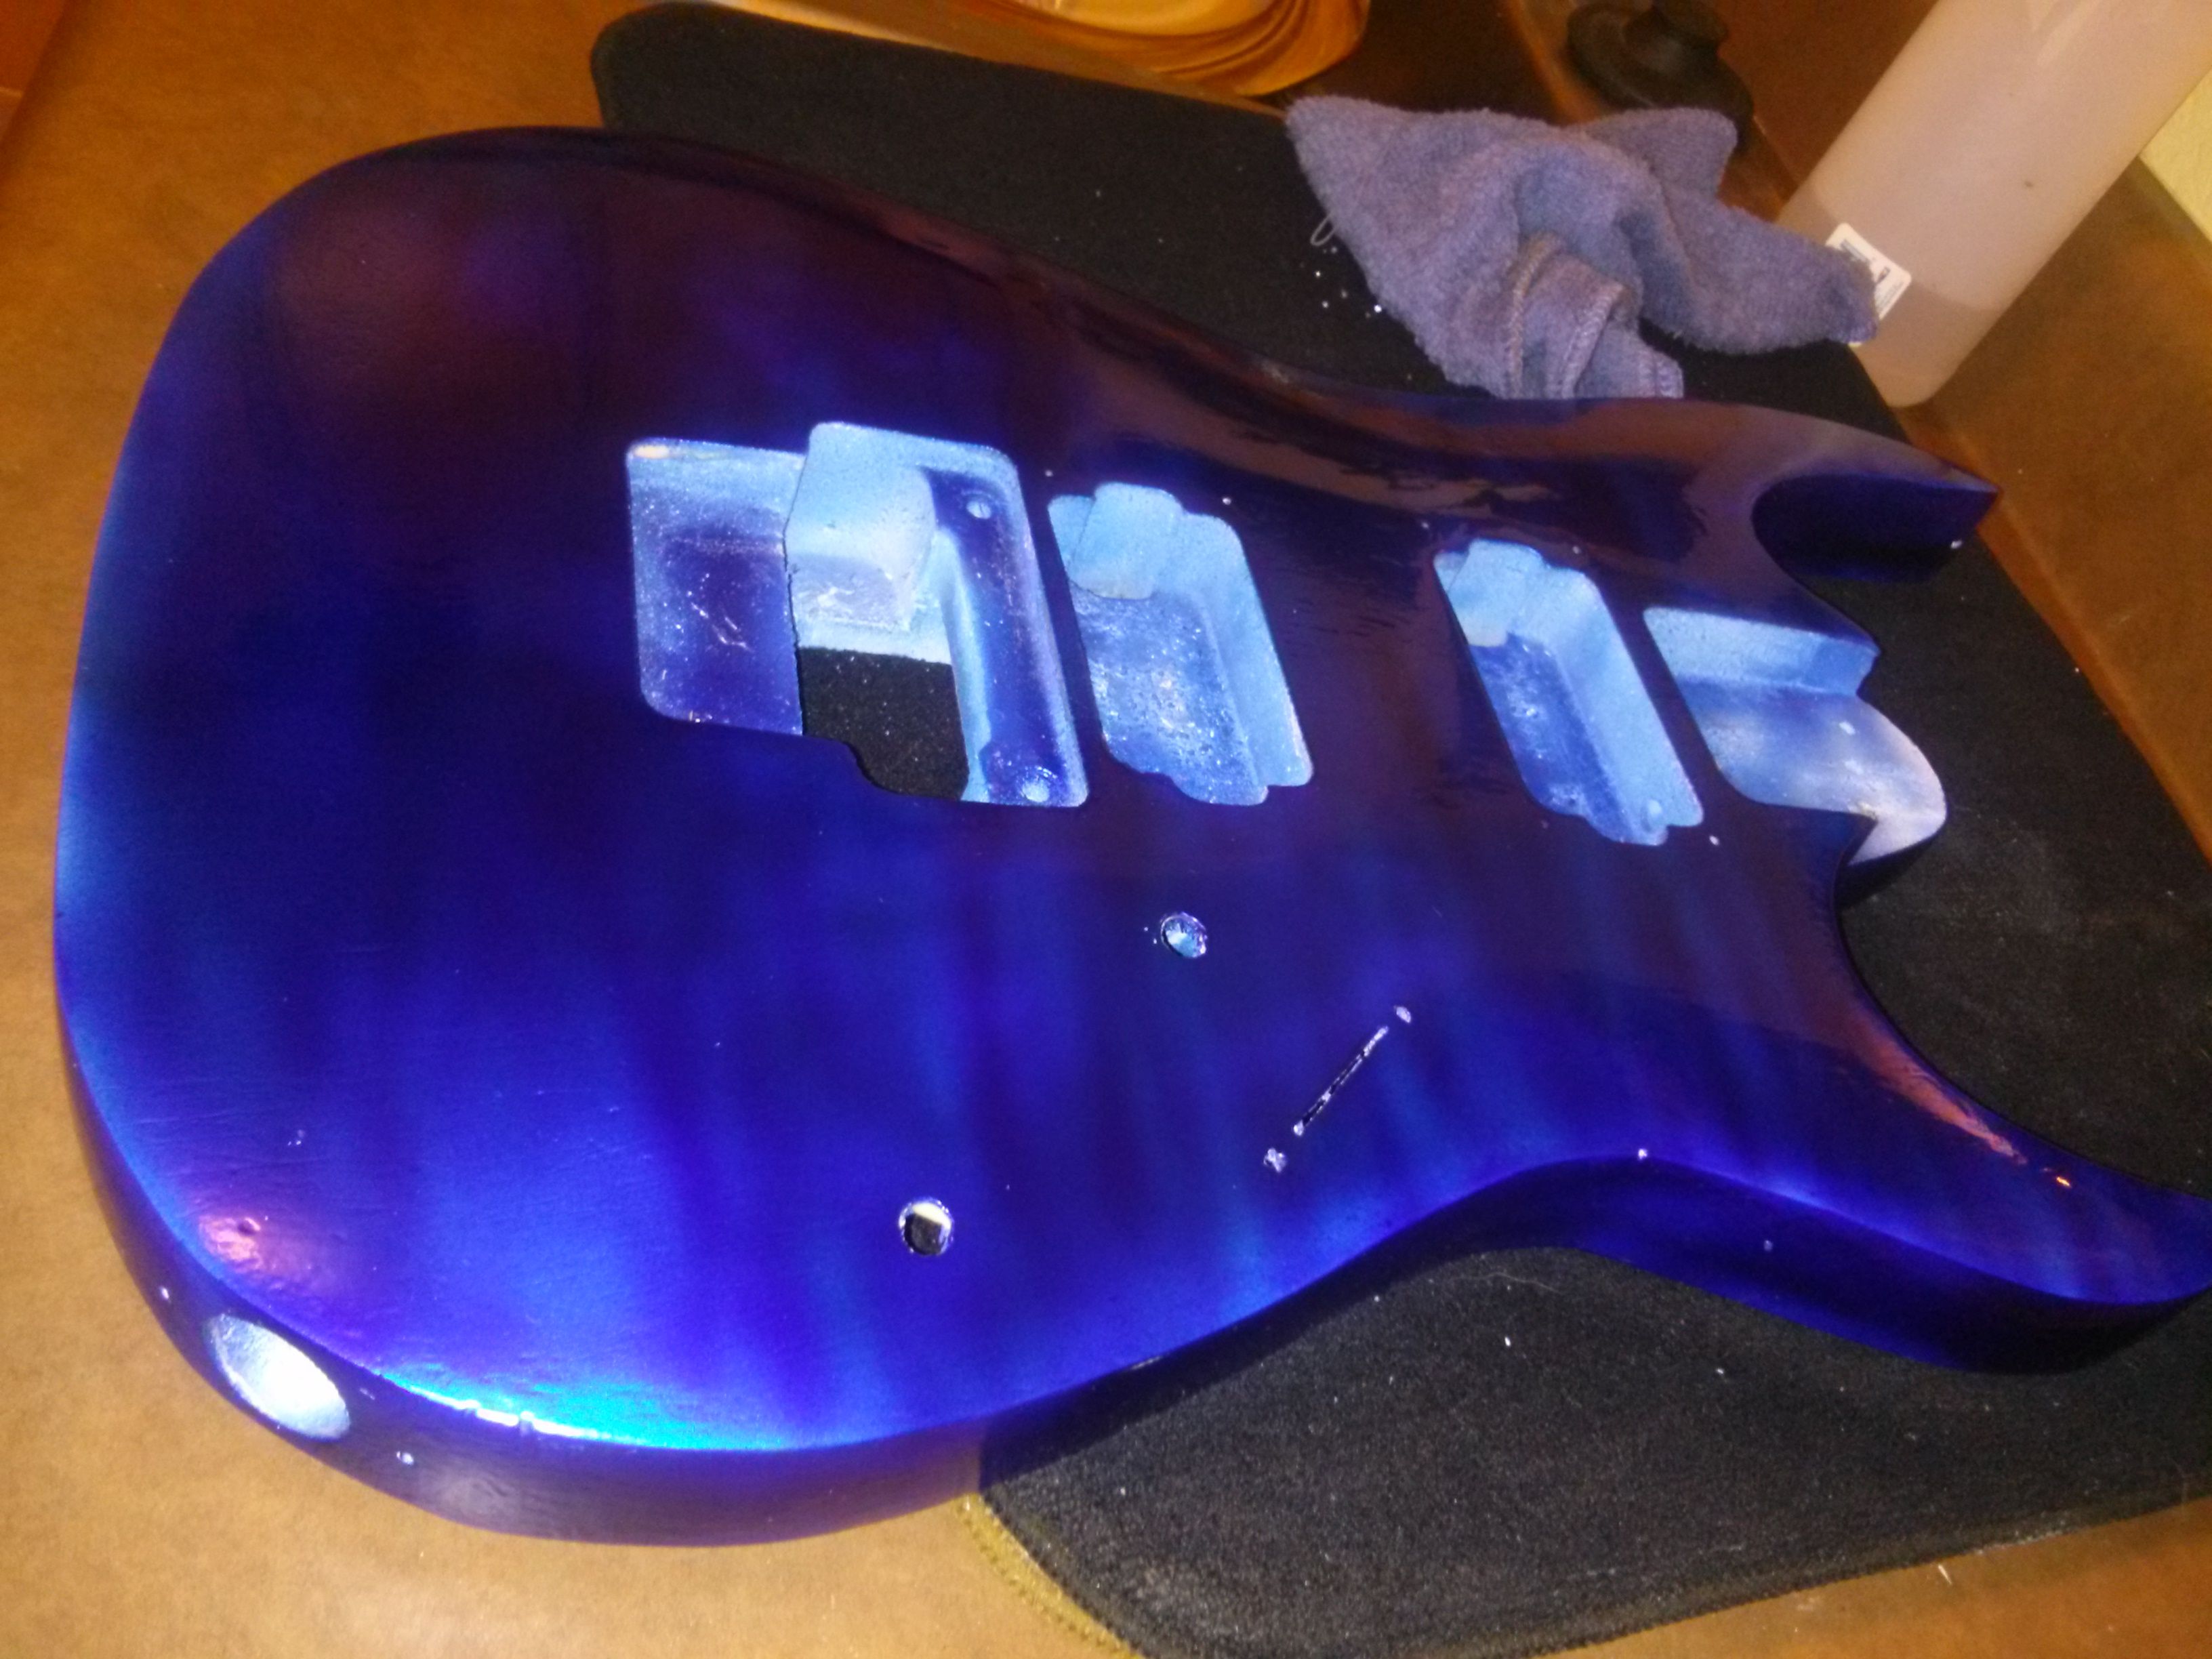
The image is a fair representation of the actual color and look of the current paint, though. At the top right, there are a couple of lines of paint that look like they might still be wet; that is what they actually look like. They are absolutely dry, but they look wet. That is the only thing about the current state of the paint that I’m disappointed with.
For those of you keeping track at home (and I’ll admit that is probably a very narrow audience; even I wasn’t keeping track and just had to do some napkin math to come up with these numbers) the amount of paint on this guitar body right now is: 5 cans of primer at 12oz each, 1oz of Alclad Silver Candy Primer, 1.5oz of Alclad II Electric Blue and about a half an ounce of the Alclad Cobalt Blue which doesn’t exist on Amazon. Bearing in mind that a lot of the primer was ultimately sanded off, I think it’s still fair to say that the paint alone added a good quite a bit of weight to the guitar (discounting, of course, that a spray can of primer is probably two ounces of pigment and ten ounces of shit that evaporates. And I sanded most of it off anyway. Not to mention that I stripped the old finish completely off. The old finish had some fairly weighty epoxy like clear coat that probably far exceeded the amount that I added).
 The next step was clear coat. The clear coat I chose to use in this case was Alclad II Klear Koat matte. I chose matte because I didn’t want it to end with a mirror-like finish which, in my estimation, would draw the eye to the imperfections in the wood a lot more than a less shiny finish. This image (at the thumbnail size here) does a pretty good job of showing how cloudy it looks after the matte clear coat. The matte clear coat went on quickly and in very thin coats. I had my airbrush set to 30psi for this process and, discounting all conventional wisdom, sprayed around twelve very light coats on day one, separated by about five minutes each (which is to say that by the time I got to the bottom, I started back at the top). Which is a fancy way of saying that I pretty much sprayed clear coat for an hour straight on day one. On day two, I repeated the process. I did no sanding between the day one and day two coatings.
I used so many coats because this is a guitar which will be picked up, swung around, and generally mistreated in the way a scale model car will not. There are at least twenty coats of clear coat on this, which will hopefully be enough to absorb some of the day-to-day abuse.
 Here is what the finish looks like after a bit of wet sanding and polishing compound. As I said, I finished this with a matte clear coat in the hopes that once sanded and polished (which simply must happen or it will look horrible) it wouldn’t be quite so mirror-like and reflective. That didn’t work. While this image does little justice to just how shiny the fucker is, suffice it to say that I can literally style my hair by the reflection in the paint. I’m trying to be upset about that, but really the finish looks so damn good that it’s hard to not be happy with the result. The finish does. The surface prep leaves a great deal to be desired.
Having now completed the painting and finishing phase of the project, I’ve had a bit of time to think through what I could have done to make this better. I think my problem comes down to that I was trying to do the traditional method of sanding->primer->base coat->color coat->clear coat. While that works for a lot of things (maybe even this thing if I had a bit more patience) I think a better route to go with this project would have been sanding->primer->clear coat (many, many layers)->finish sanding->base coat->color coat->clear coat. I say that because the finish was amazingly smooth after the layers of clear coat went on (it runs into the cracks/crevices and smooths itself to a nice, level finish) and I can’t help but thing that getting few layers of that between the wood grain and the base coat of paint would have made the finish look significantly better. In fact, I’m considering buying another junk body just to test that. If I happen to find a B.C. Rich Warlock guitar on sale for cheap because of shitty paint or broken electronics, I may just give this another shot.
If anyone has scrolled all the way down here, I’m sure you’re only interest is in what I used to finish this guitar. Here is the list:
Cheap heat gun (20 bucks at walmart or other stores). Sandpaper -60 and 150 grit to strip paint (at walmart or any hardware store) Sandpaper –1000, 1500, and 2000 grit to wet sand. Primer – 5 cans of Krylon primer from walmart or any hardware store -though you won’t need nearly that much with proper surface preparation. Alclad Silver Candy Base -1oz. Get it on Amazon or a hobby site. Alclad II Electric Blue -2oz. 1 bottle wasn’t enough to complete the finish on a guitar. Alclad II Candy Cobalt Blue -for the darker stripes. I got mine on eBay and it may have been discontinued because it is not available from any online retailers. Alclad II Klear Koat matte -4oz. I didn’t use quite the whole 4 ounces, but I came pretty close. Novus polishing kit from Amazon. If you purchase nothing else from the list, this is a must have. This stuff polished even my matte finish clear coat to a mirror-like shine. Well wort the money. You can buy smaller portions if you have no other potential projects. Total cost of this project: including the guitar and heat gun, I’m just about $200 dollars into this project right now.
Was it worth it? For the experience, absolutely. For the finish of the guitar, I think so. I made a short video of the results to show the sheen:
https://www.youtube.com/watch?v=x2kTrHX4cB4
I’ll follow up with some notes about hardware in the future.
Pingback: My first full guitar build: Semi-hollow body
Pingback: Refinishing a guitar – the hardware