
 In my brief time working on these models, one lesson I haven’t quite yet learned is to take pictures before instead of just after. In the case of the frame, I have a before, but it’s not from the car I’m building. Nonetheless, it will serve to illustrate my point, so here it is. One of the great things about this Revell ’50 Olds Coupe Kit
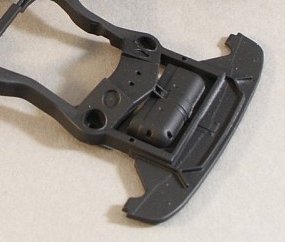
 is that the floor panel is a separate piece from the frame. This made it really easy to paint the frame in black and the pan in grey. However, when test fitting the pieces, it looked odd having the front portion of this in black. You can see where the frame comes out and makes a nice little rectangle there but the rest of the front of the car is attached to the frame because the engine compartment makes it impossible to attach it to the portion with the floor. I don’t like that.
 Enter tape! And I mean a lot of tape. I took my little Tamiya 10MM Masking Tape
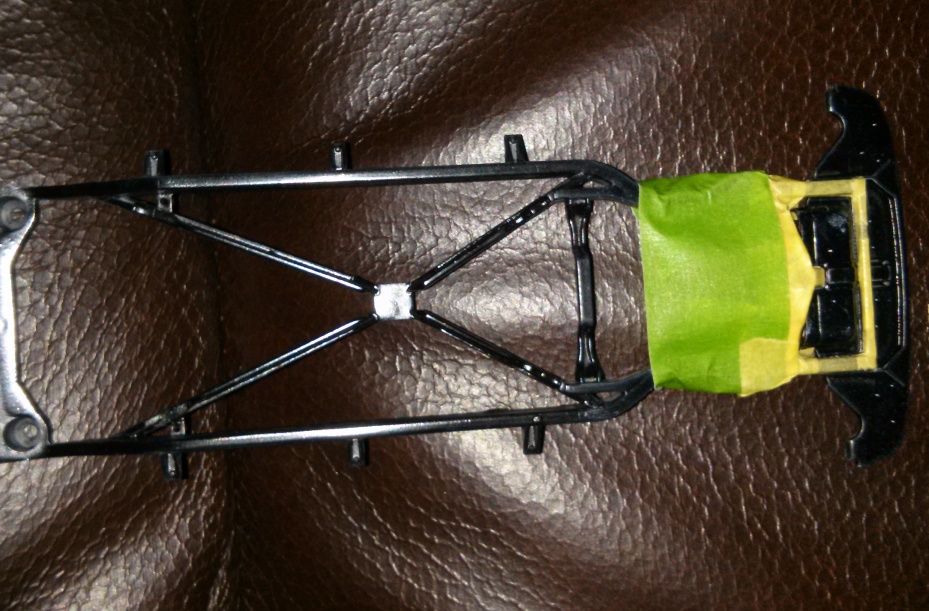
 roll and just went to town. Because of the very small size of the frame, even the 10mm tape was way too wide. I had to cut it into tiny little pieces and apply them in bits. No piece of that tape is longer than probably a half an inch, and each was subsequently trimmed with a razor and tucked in place with a toothpick. Once all the small parts were taped, I followed that up with some FrogTape
to cover the larger areas (the part beyond that was covered with an old envelope while I painted it).
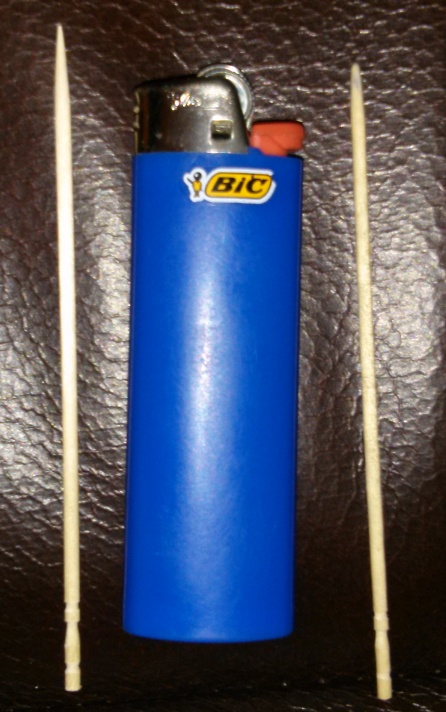 When I say I use a ‘toothpick’, I should specify that it’s not really a toothpick. It’s the behemoth you see in the picture here (shown next to a bic lighter for scale). These are Diamond Extra Long Toothpicks (linked to Target because they aren’t available on Amazon). My wife had these in the cabinet when I started on the first model and I’ve found them to be indispensable ever since. They are far more rigid than a normal toothpick, but soft enough that they don’t do any damage to the plastic. You do have to be careful around paint, but that’s true of most tools. The one on the left of the lighter is what they look like out of the box, while the one on the right is what a battle-worn one looks like. Once the tip gets rounded over a bit, they get considerably better for maneuvering small pieces without getting stuck on edges and the such. Fresh from the box, they are great for tucking the tape into tight corners you wouldn’t otherwise be able to reach. Because they are thicker than standard toothpicks, you can put enough pressure on them to get some really sharp corners.
 I really had to turn off my OCD for this one. I knew it wasn’t going to be anything close to perfect due to the tiny size of the frame being taped and my not-so-steady hand. It certainly looks passable (although a bit better in the picture than in person. While the frame itself looks better in person than in the photo so Megapixels giveth and Megapixels taketh away). I snapped this one with the frame sitting in place on the body to illustrate what I meant about it looking wrong for the whole thing to be black. With the front portion now matching the grey of the rest of the underside, it looks much better in my opinion. Was it worth the thirty minutes of mumbled obscenities as I tried to lay down pieces of tape about 1/8 the size of a postage stamp that didn’t want to cooperate? Probably not. Sometimes you just do things to see if you can.
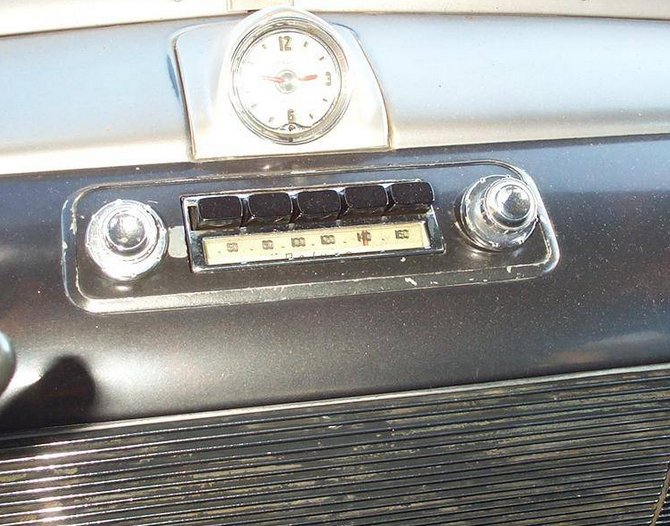 Also today, I got the second (of three) paint colors on the dash. For those of you keeping track at home, I happened across one of these cars for sale and have more than adequate pictures of what the interior should look like. The dash should be a light color on the top with a dark color in the center. The grill looking area will need to be done in a silver or chrome. Ideally looking much like the picture here. Or at least as close as I can reasonably come to it. The kit came with decals for the clock and speedometer which means I’ll only have to worry about tiny little details with the stereo and other knobs. Hopefully I can pull that off (the knobs are another thing I am hoping to be able to do with the Sharpie Oil-Based Paint Markers, Extra Fine Point, Metallic
 . Of course I haven’t yet gotten them so this could all be moot).
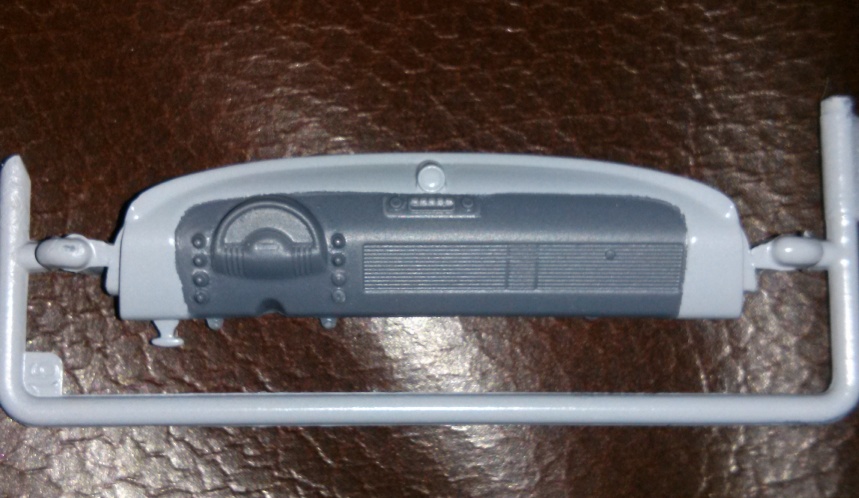 This is the first piece I ruined so badly on the first shot that I actually stripped the paint back down to plastic and started over. Logic says that when you are painting something like this, you’d want to paint the light color first, then tape off the light portion to go back over it in the darker color. This didn’t work at all. The second coat of paint stripped so much detail from the knobs and grill that you could hardly tell what they were supposed to be. With some paint thinner, a brush, some elbow grease and a half an hour, I got it back down to bare, white plastic and started over. The second time, I painted the whole piece in the darker color first, then taped it off to paint the lighter color. Counter-intuitive for sure, but the result was much less paint on the more detailed areas. As you’ll no doubt see in the photo, taping around those tiny elements wasn’t exactly easy. I have a couple of spots that aren’t as straight as I would like them, but it’s like my Dad always said, “if at first you don’t succeed, lower your expectations.”