My first full guitar build: Semi-hollow body

So, after some promising but lackluster results with my attempt to refinish a damaged Ibanez G10 guitar I figured why not go whole hog and do one from the ground up? To add a ton to the degree of complexity, I decided to go with a semi-hollow body guitar for full build number one. To further add to the difficulty, I chose to dye the wood grain rather than paint over it. Because seriously, when you’re learning to ski, are you going to learn more on the Bunny Slopes or on K12? (and kudos to anyone who got that reference without clicking the link.

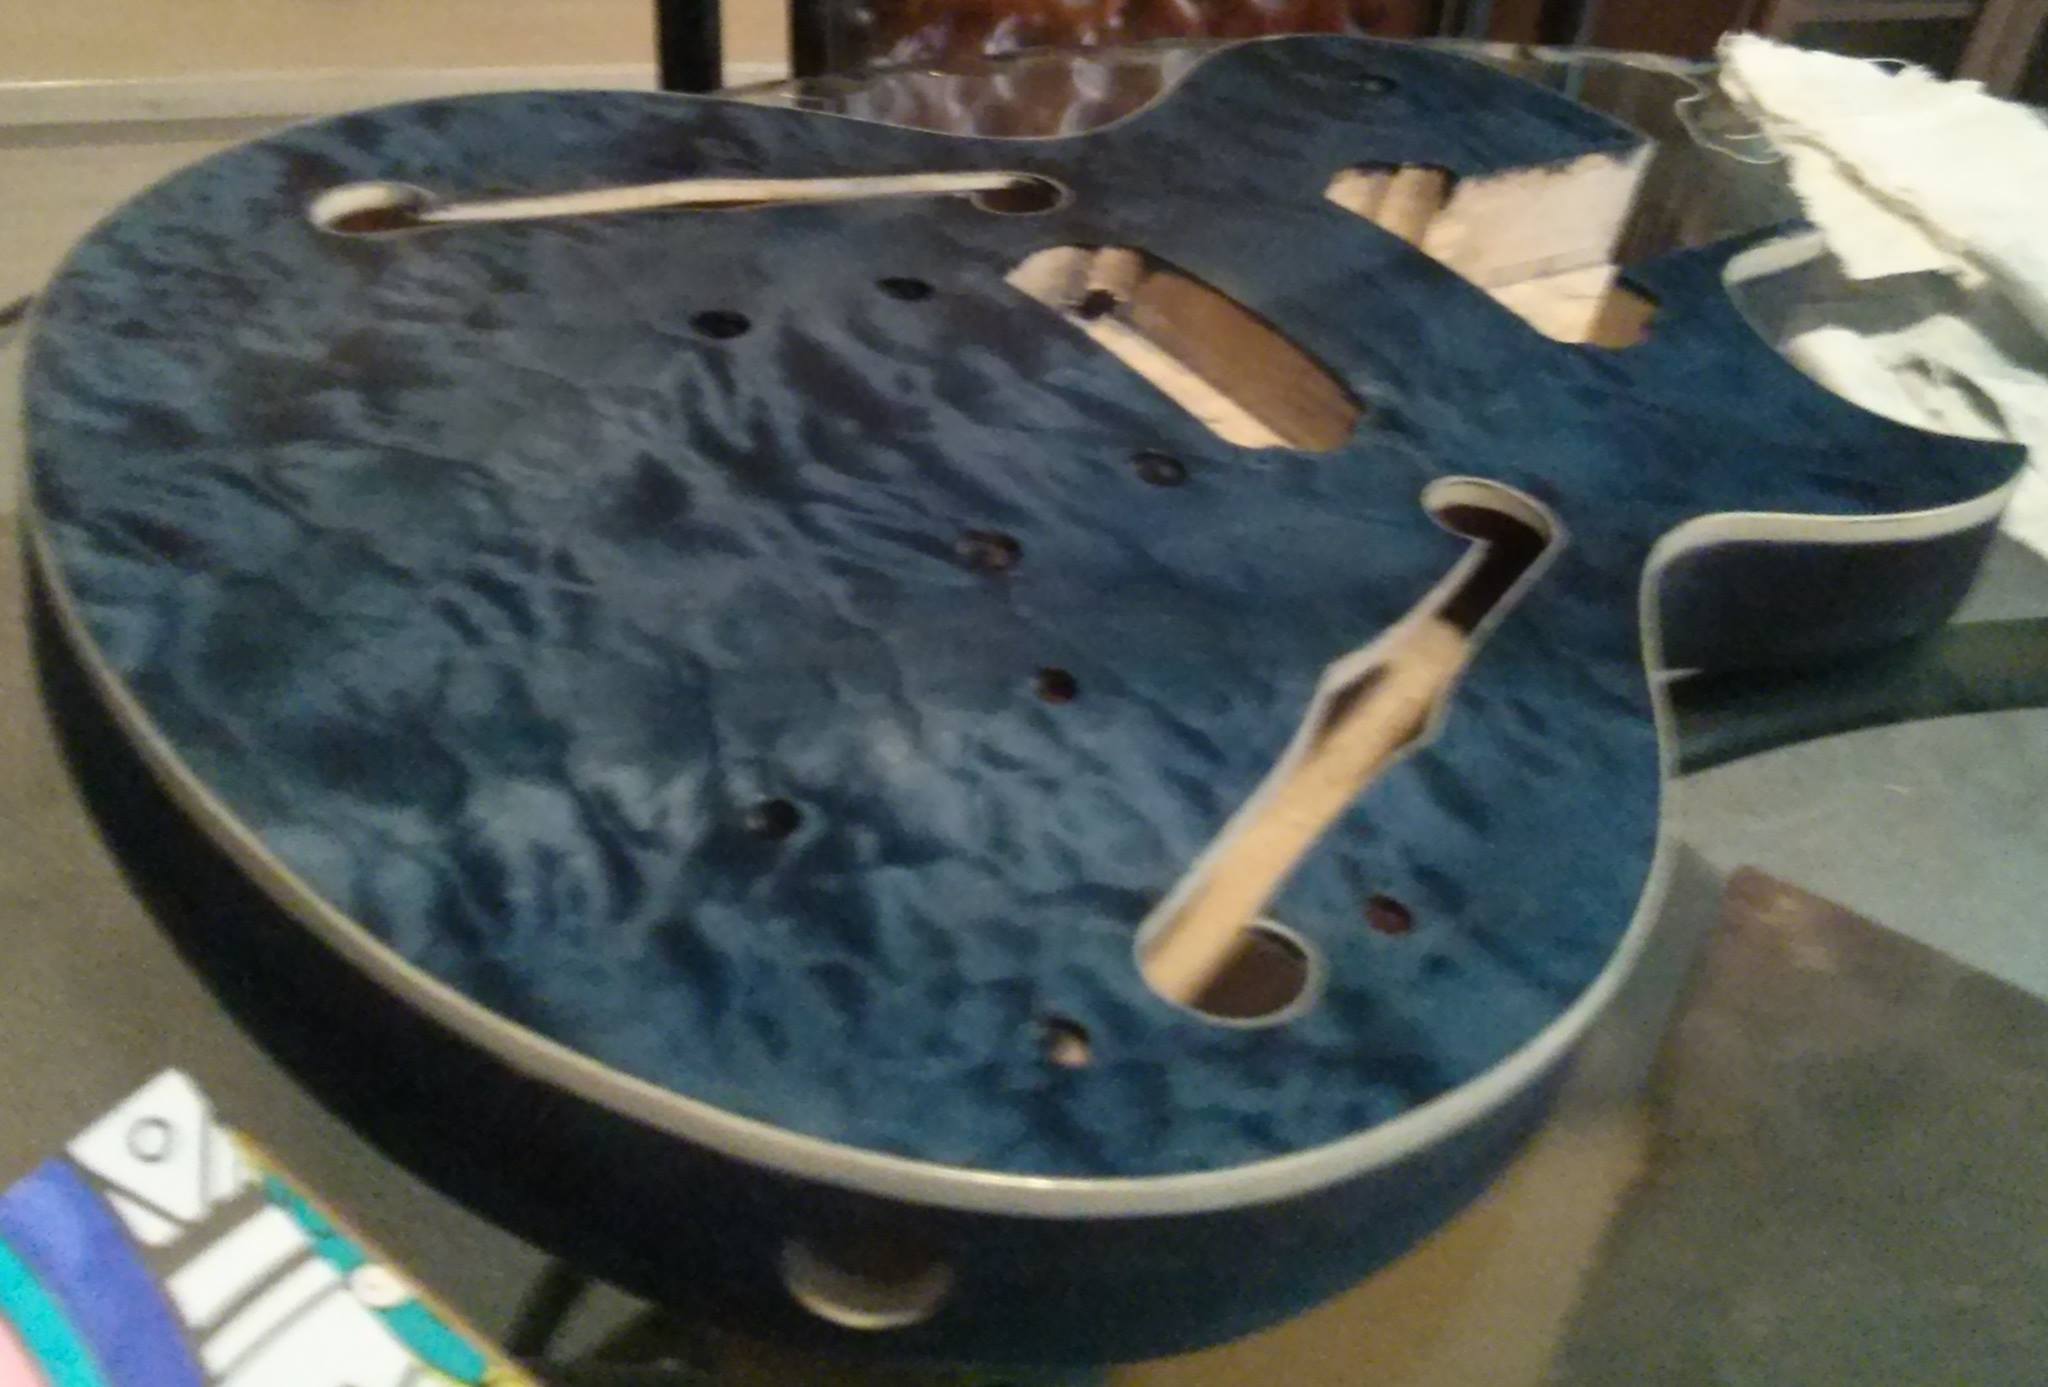
So I ordered up a kit and set to finishing it. The body looked like this coming out of the box:
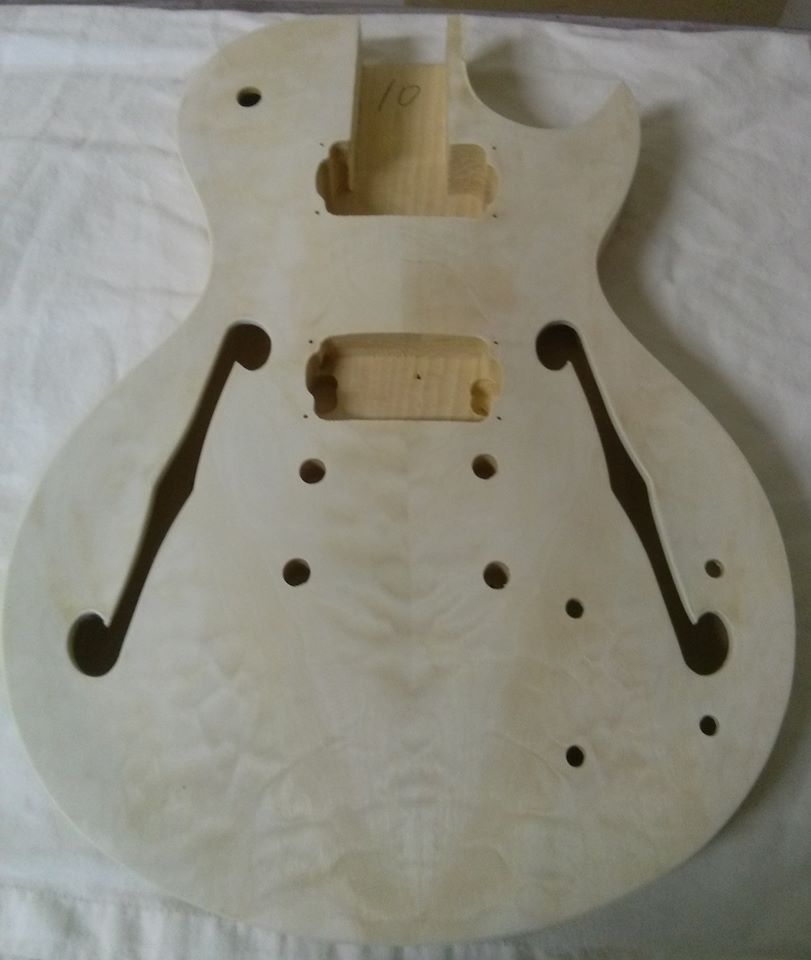
The front had a beautiful grain that I figured I’d be able to finish without much of an issue. Seriously, it looked like I could just throw some blonde (or an equally light-colored) stain on it, lacquer it, and call it a day. That wasn’t my intention though. I bought this specifically to build for my oldest brother, Dennis, for Christmas. The guitar he is currently playing is a semi-hollow body one that I bought for him when I was about sixteen, and that is a damn long time ago. It is showing signs of age, and I thought he might like an upgrade. I was initially pleased with how good the grain on this one looked, because I figured it would be pretty damn easy.

Nope.

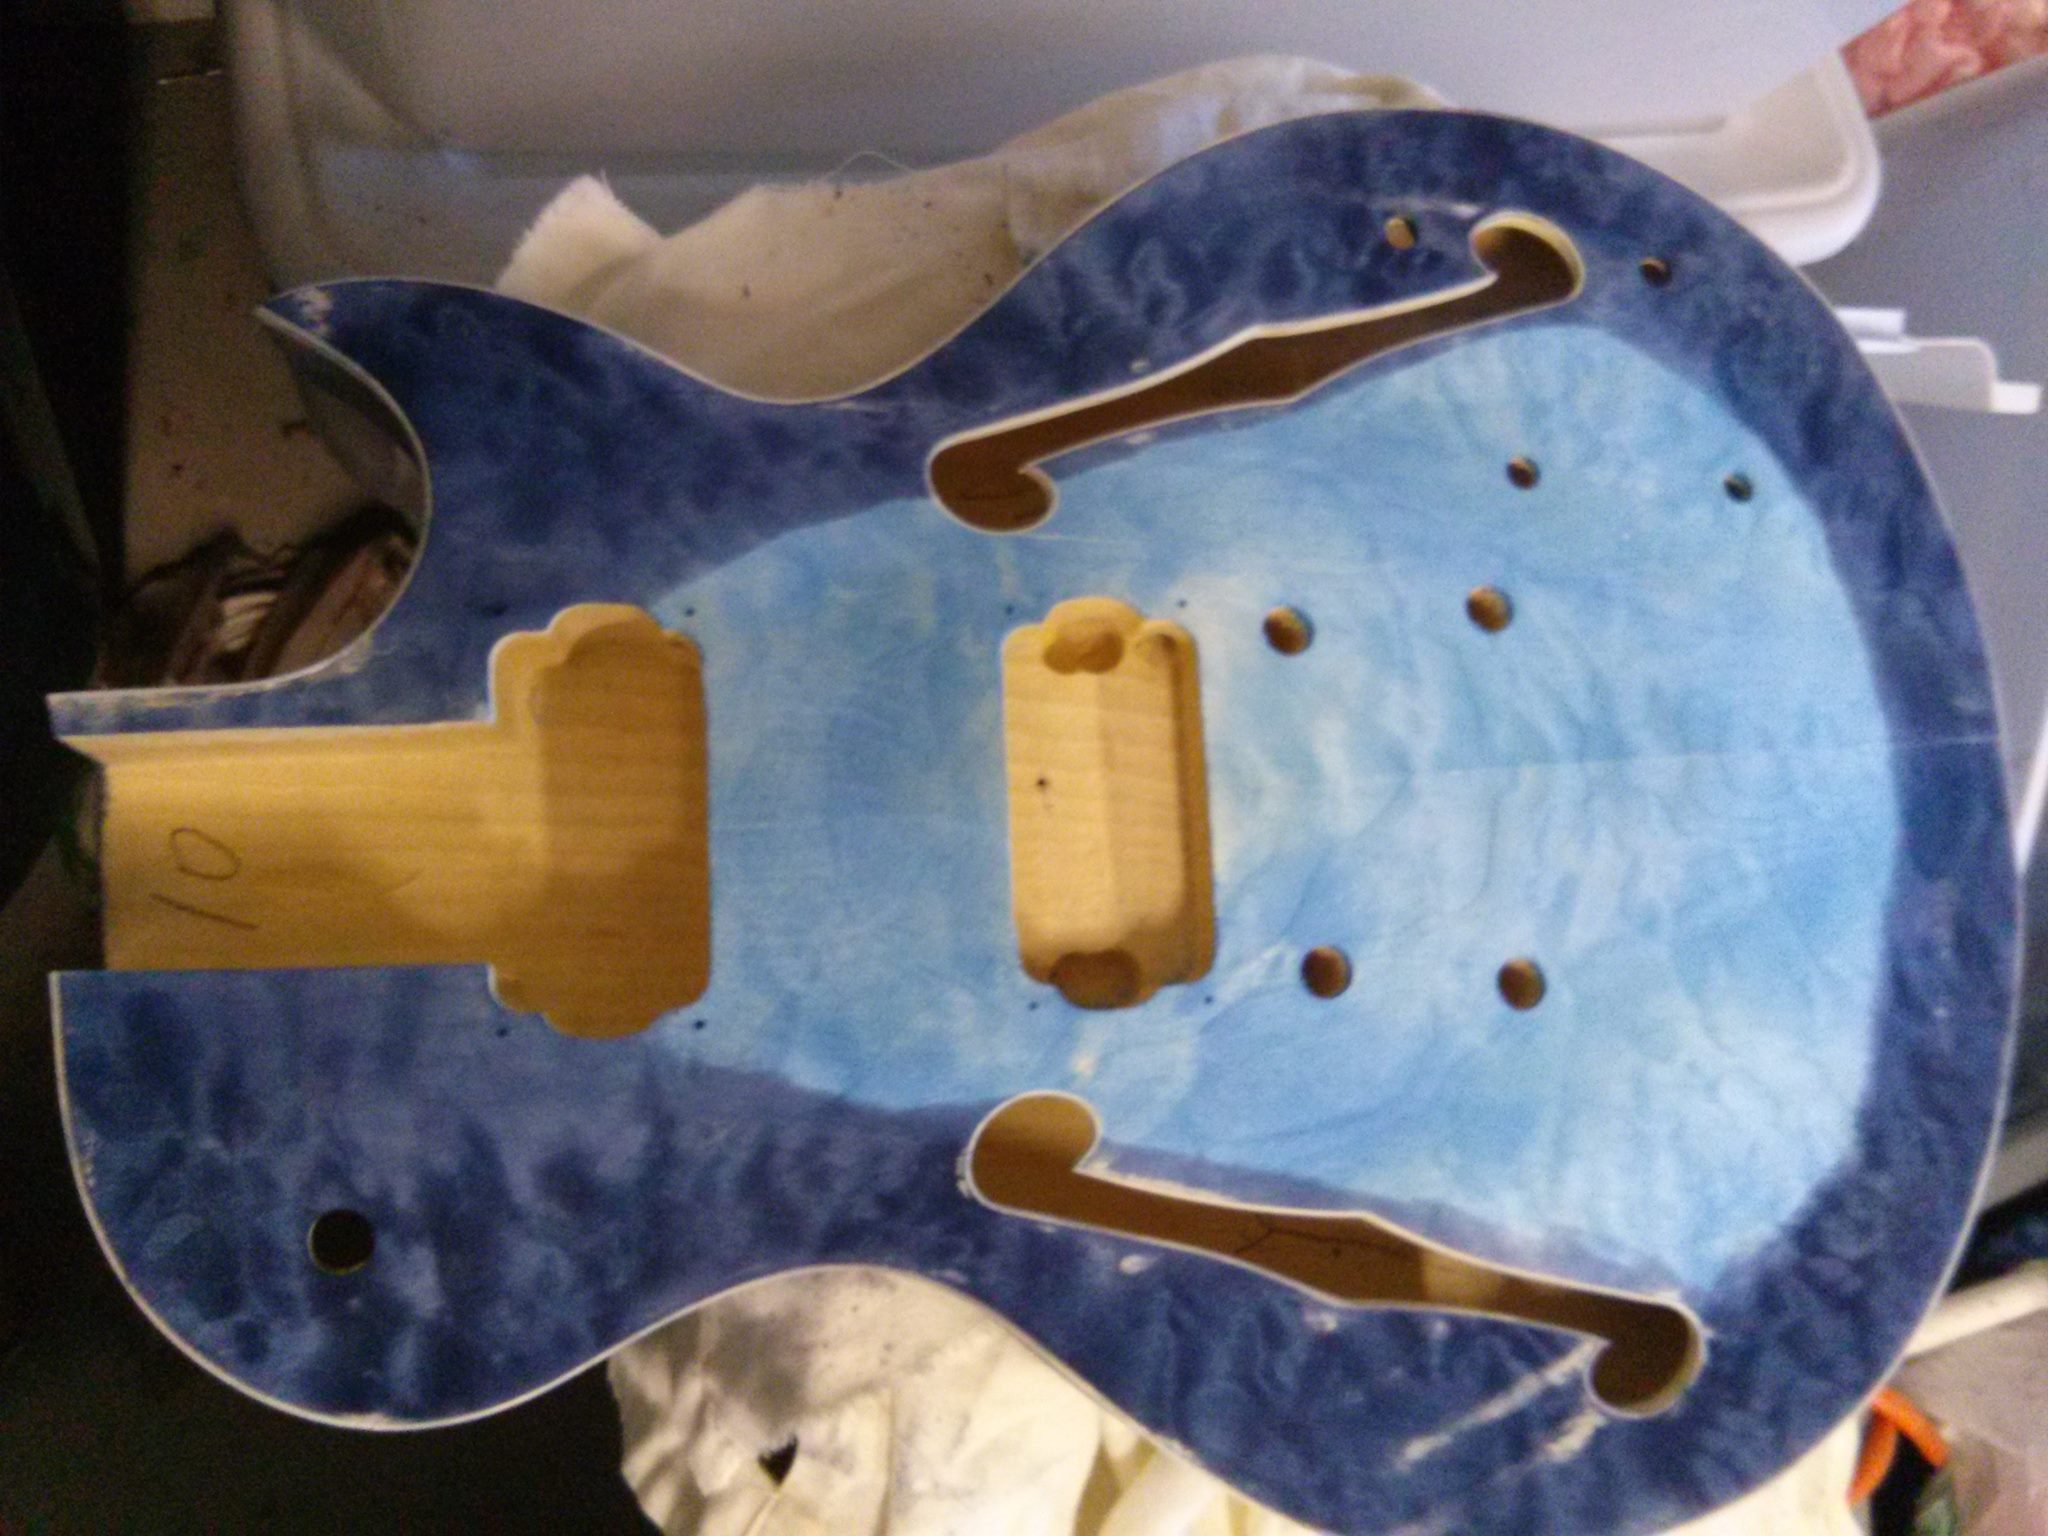
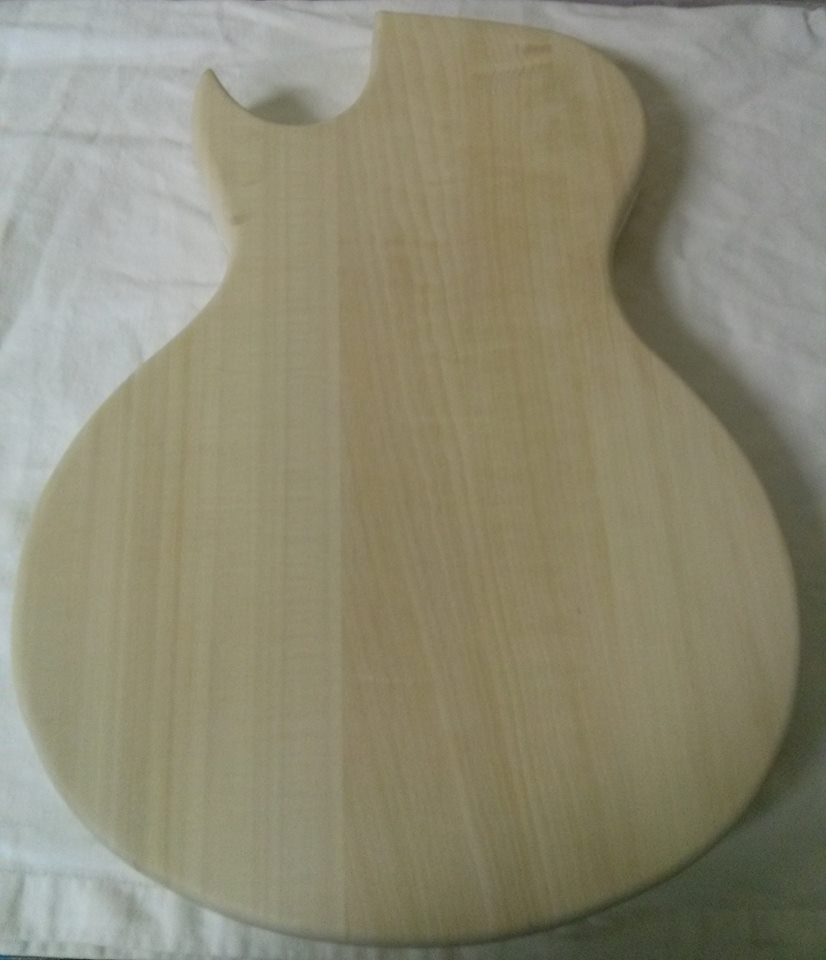
The front of the guitar was a beautiful piece of wood in a butterfly cut, which made for a wonderful grain and some awesome symmetry. The back, on the other hand, looked like this. Since it is a sort of hybrid of acoustic and electric, the front appears to look more acoustic, while the back looks like an electric. That means that it is made of some nasty-ass basswood. More than that, the thought appeared to be ‘fuck the grain, just glue some shit together’. At least that’s what it looks like. I assure you that it looks every bit as bad as this photo (and probably worse). That was disappointing.

But since I figured I’d be able to get an easy home run out of the front, I started finishing the back first. I figured I couldn’t paint it, since I was only going to be dying the front, which meant I’d have to dye the back as well. This turned out to be a PROCESS.

I have to admit that after laying down the first coat of dye (I should mention that I’m using Keda Dyes for the entire finish. Mixed more or less as suggested) I was skeptical that I’d be able to pull this build off. After the first coat (which is still wet in the photo) it looked more or less like I’d taken a magic marker and ran it over the back a bunch of times. I think that may be my way of saying that I thought it looked pretty shitty. You can totally click through that image to see it in larger scale, though I wouldn’t suggest it.

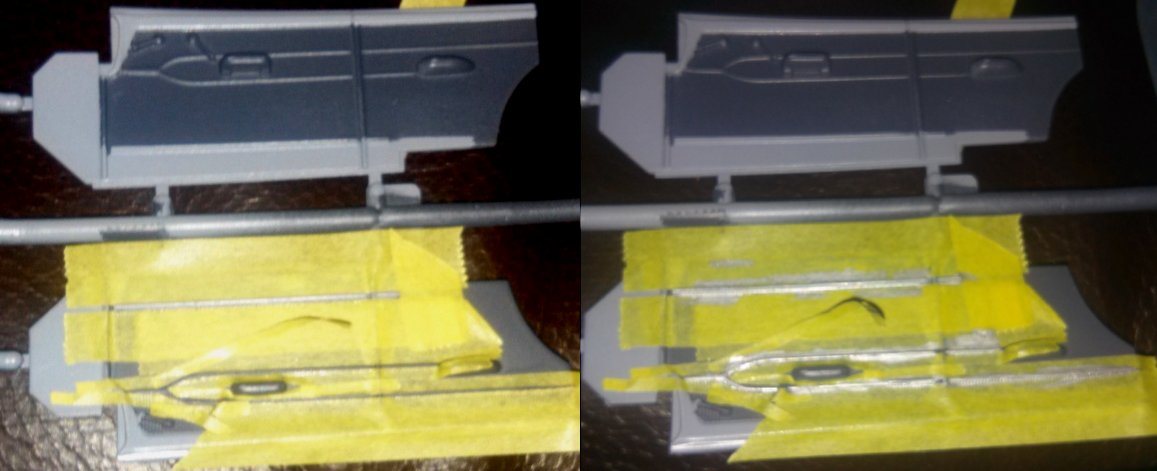
But, after sanding back the black and laying down a coat of dark blue, it started to come around:

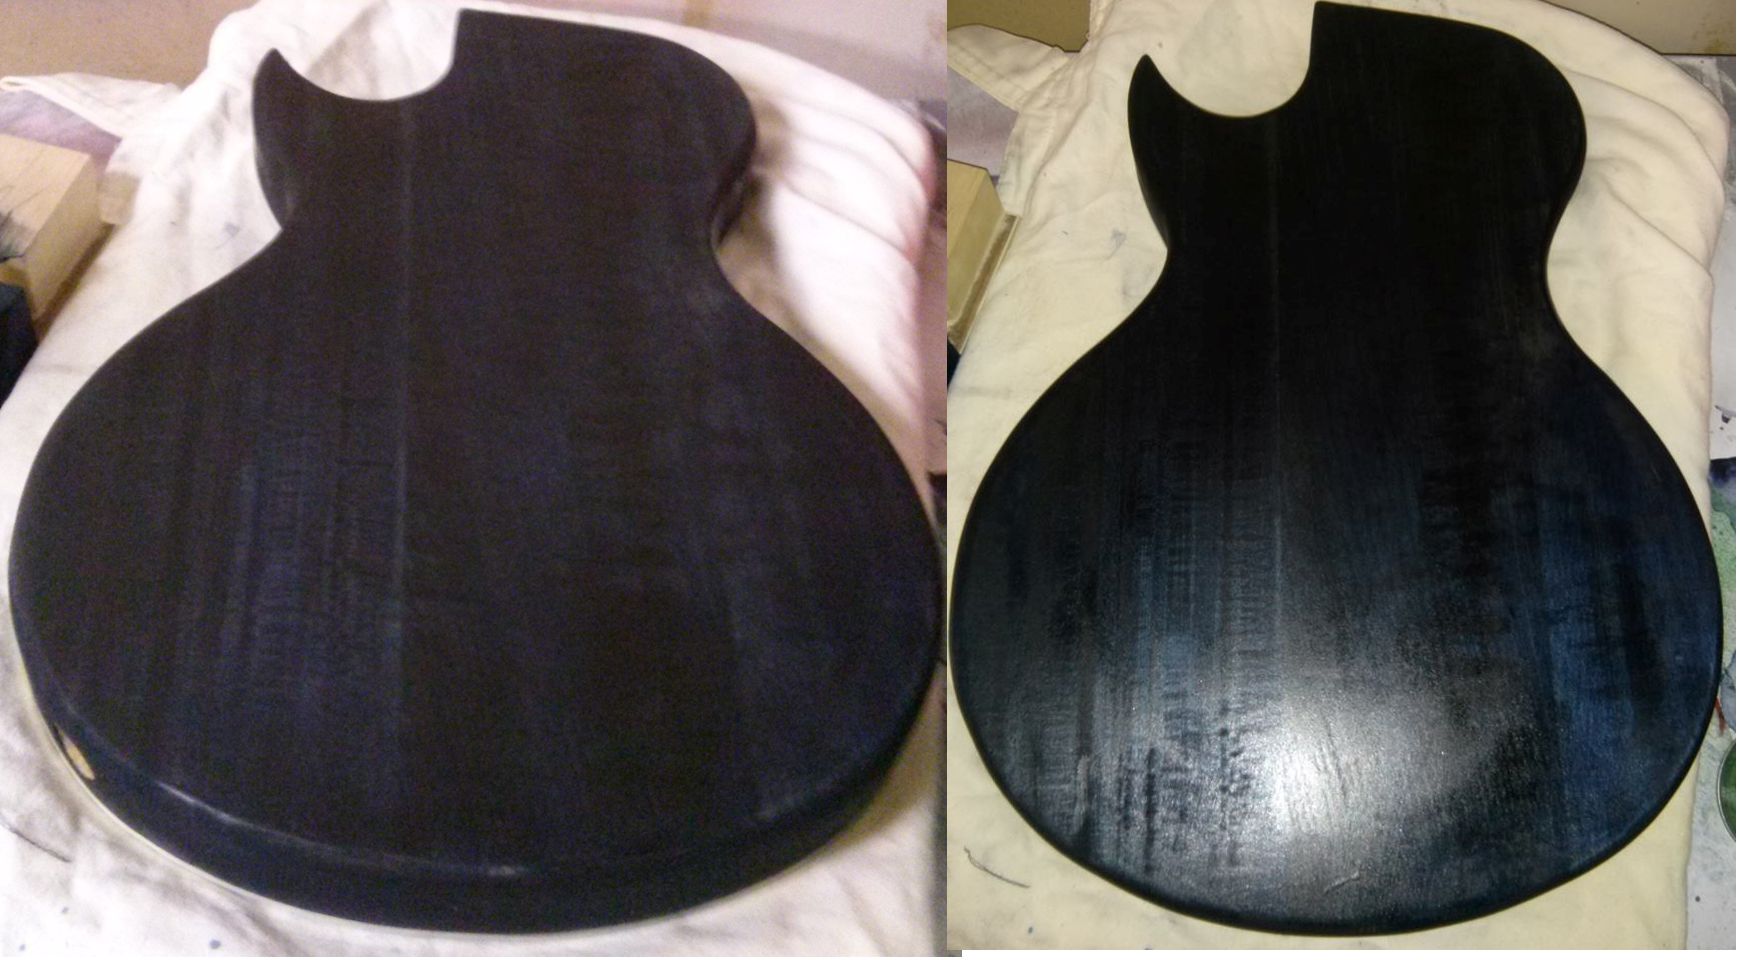
Those pictures were taken at the same time but from different angles and with different lighting. The dye was still a bit wet at the time, but I found it odd that one angle showed it a deep blue while the other angle hinted at it being almost purple.

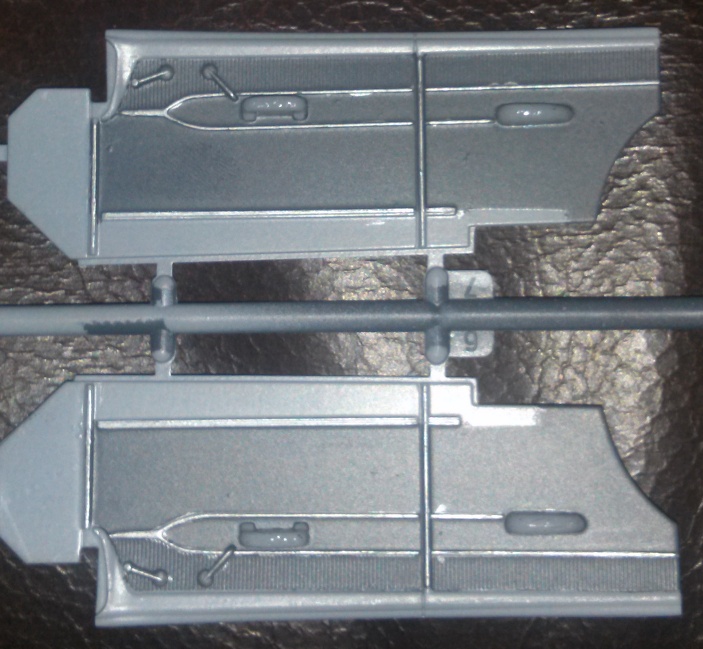
Once it dried, the back began to give off a more even color regardless of the direction of the light. I sanded it back once more, dyed it once more (dark blue) and then layered it with about three coats of spray lacquer. The final result looked like this:

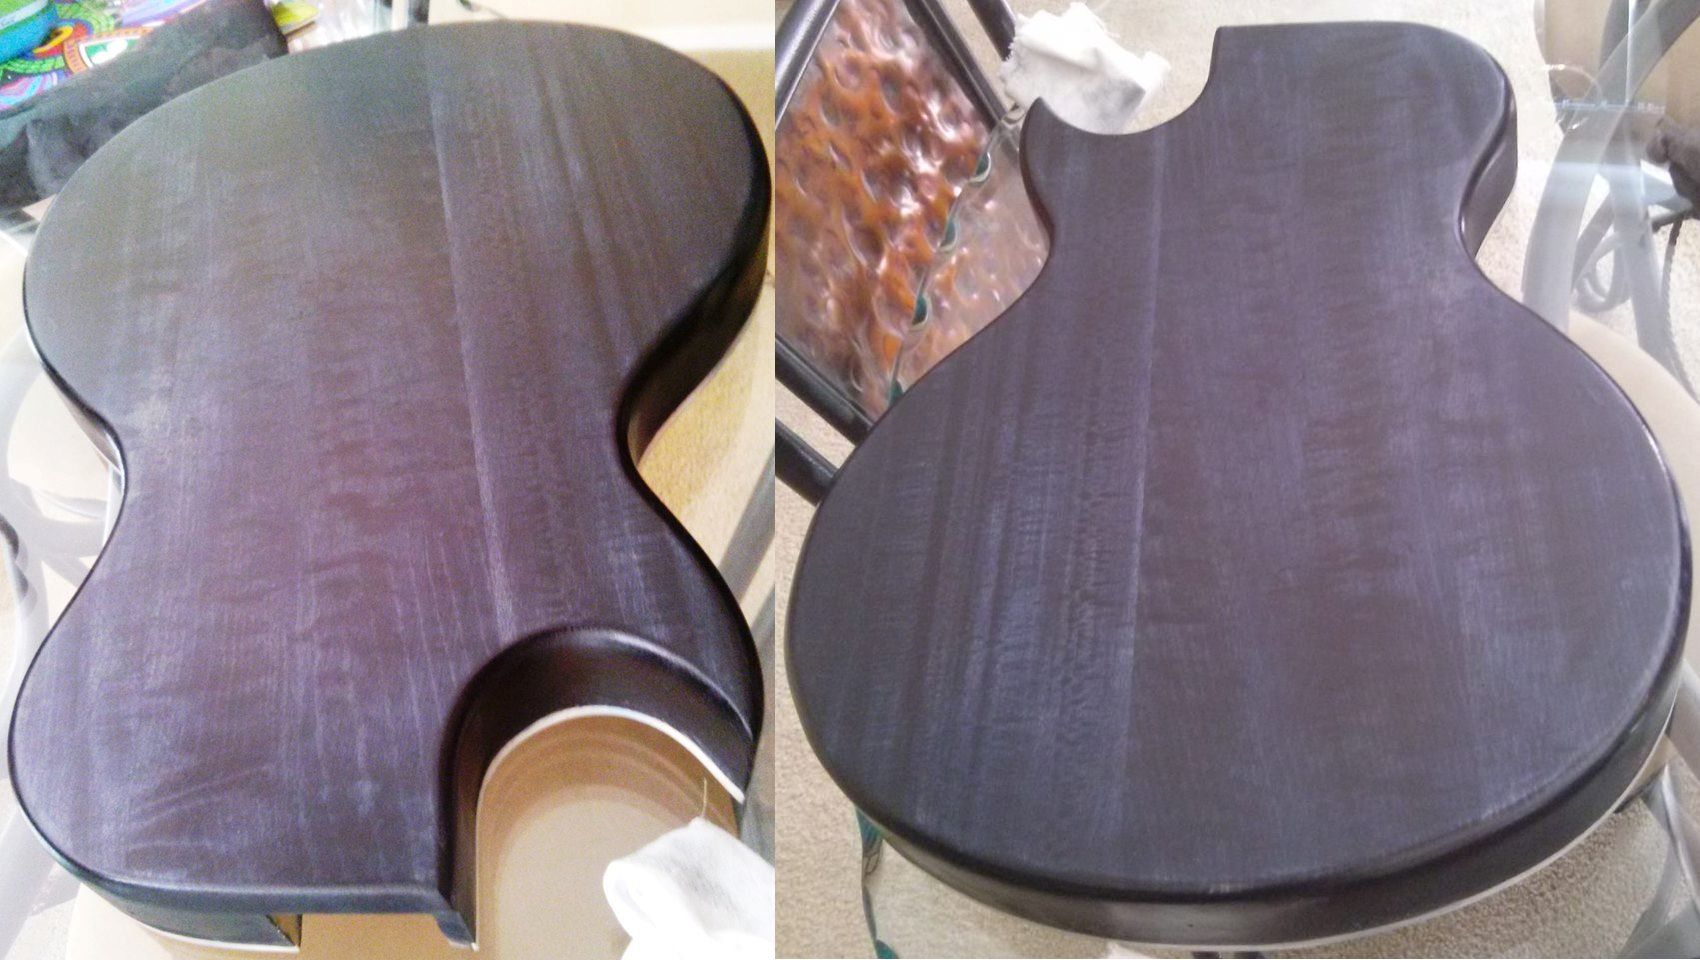
Not exactly the color I was hoping for, but there are enough interesting things going on in the cheap, basswood grain that it still looks totally finished (scroll up a couple photos to that first image of the back if you don’t believe me). The back came out pretty darn good.

Once I’d caressed the ass of this guitar to the point that I was happy, I had to start working the front. That was not such an easy process. I first thought I was going to do a sunburst pattern. Yeah, not so much. Here is the result of the first coat of stain toward that:

You’ll no doubt note the exceptional attention to detail as the dark blue around the edges very gradually fades to the light blue in the center. It’s like a gradient that’s using the full 256 million color capability of modern computers. Goddam seamless is what it was. A perfect sunburst pattern, but done in blue!

Yeah, even I wasn’t believing that bullshit and I tried really hard to believe it. To be fair, I knew it would be pretty stark with the first passing and I would lightly sand it back. I’d then cover it with lighter coats of just the light blue until it got to the point where the transition was seamless. I think I could have pulled that off, but I had to give up on the idea because … At the bottom of the photo (if you were holding the guitar to be playing it, it would be just above the top ‘F hole’. There are several areas the dye just wouldn’t penetrate. My assumption is that there was some sort of glue or solvent still present that the dye simply couldn’t touch. Regardless of why, I knew I couldn’t continue with the sunburst finish.

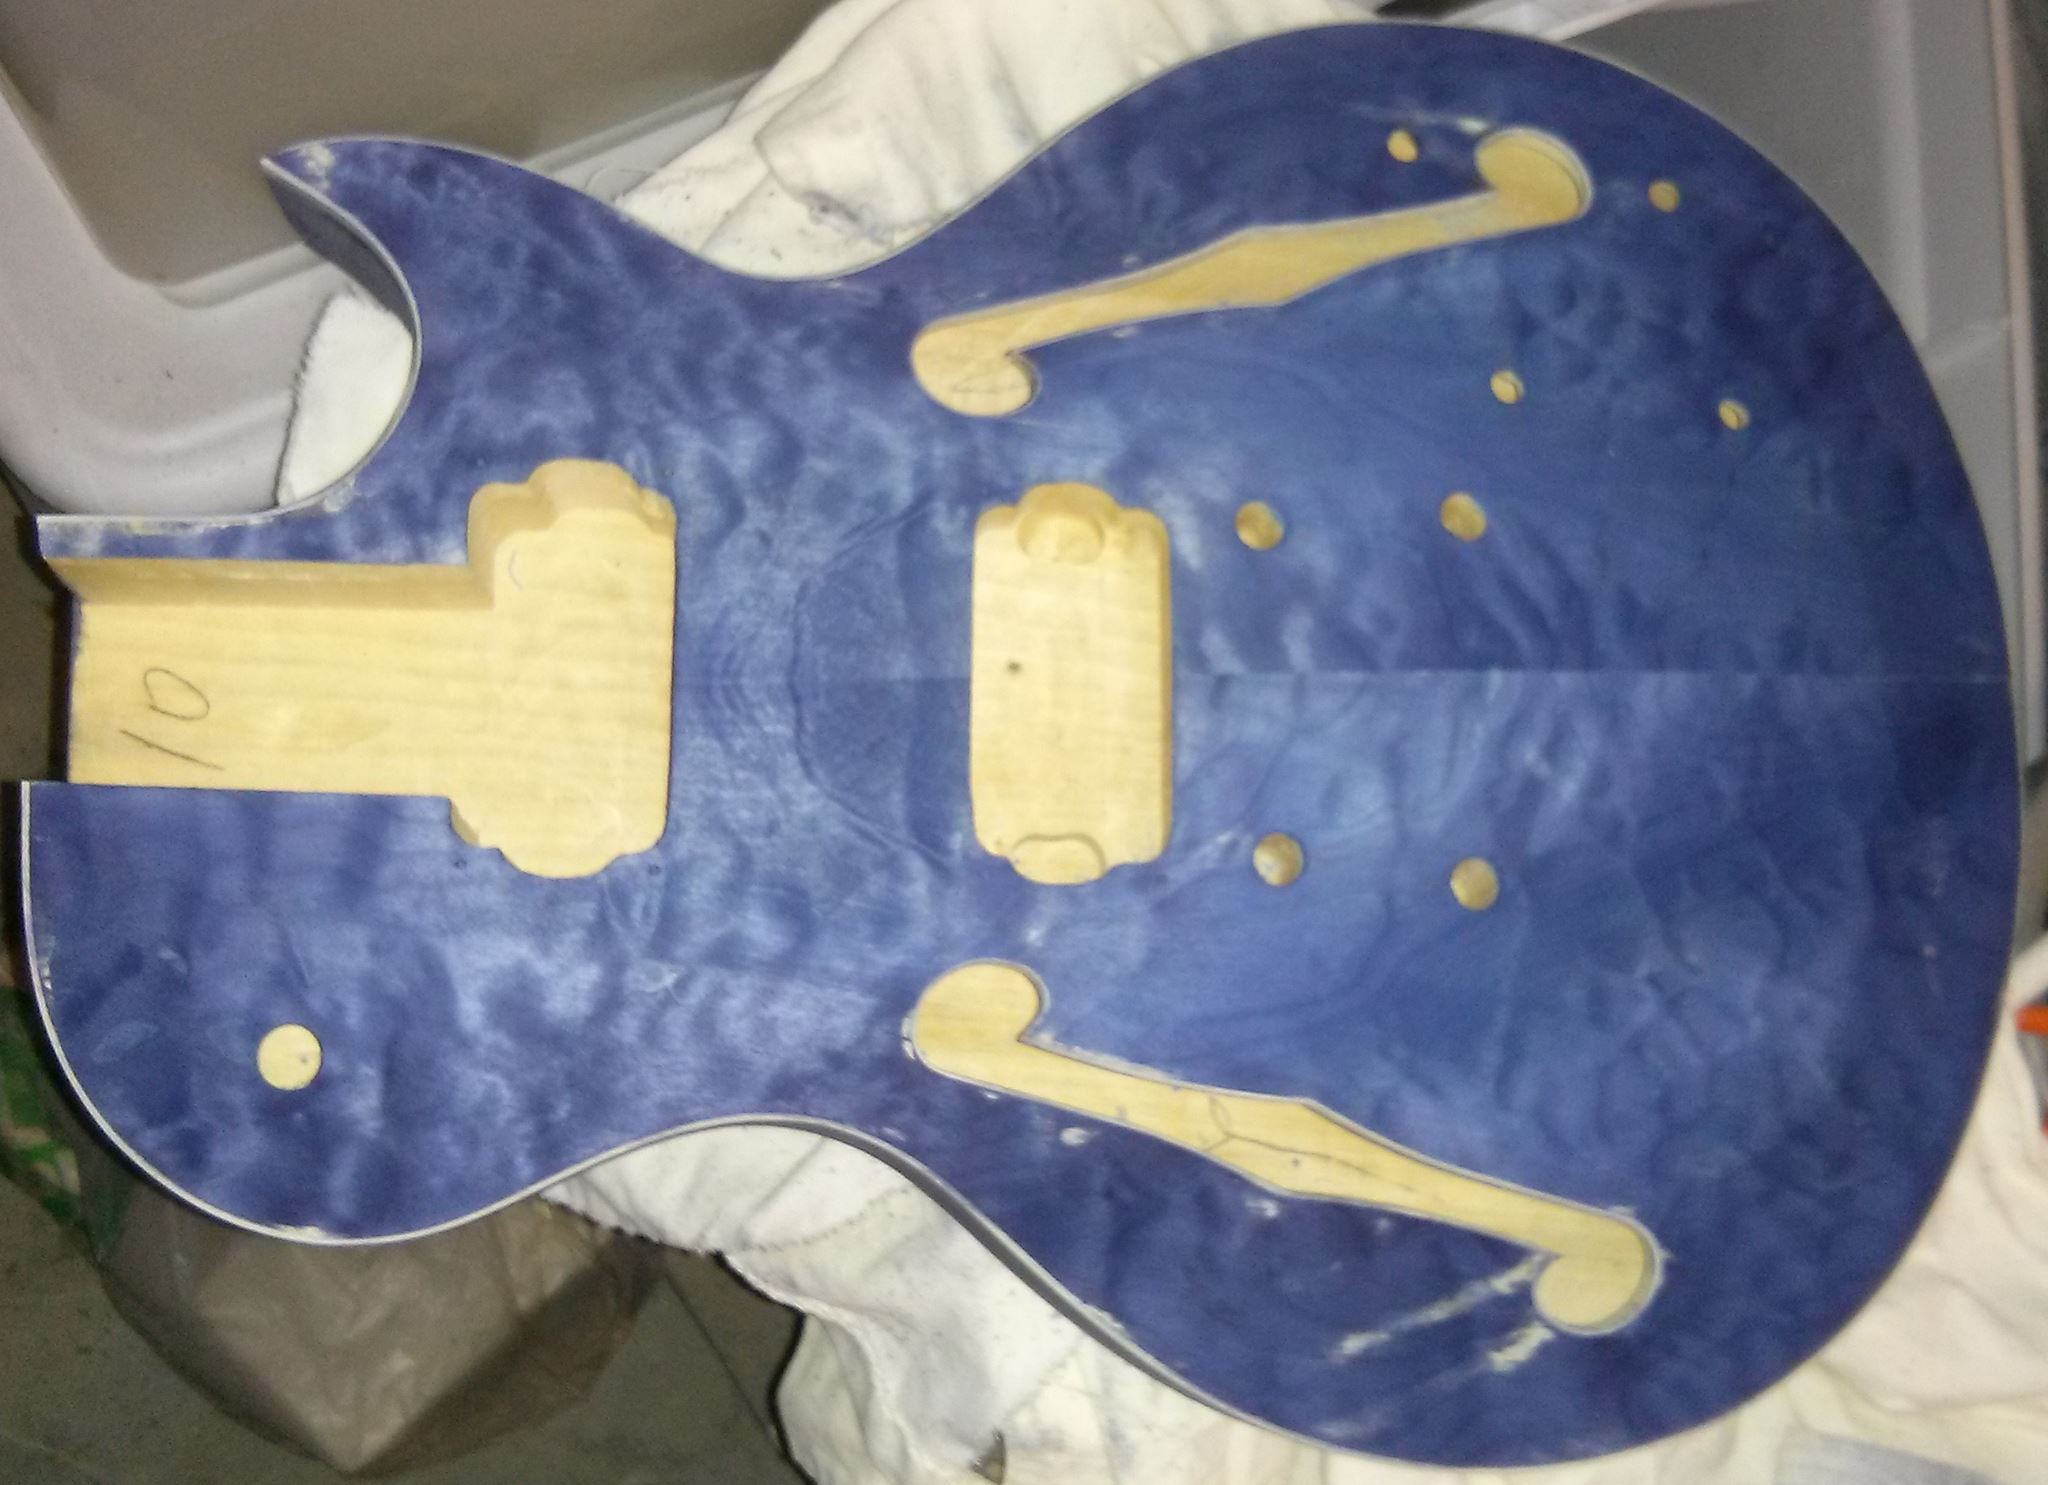
So I sanded the whole thing back. Not to bare wood, but enough that the light and dark blue no longer appeared to be separate colors. It took a lot of sanding, and I don’t have photos of it along that particular path, but once I’d sanded it back a reasonable amount, I layered the entire front in dark blue. And here is the result:

Yep.

I put about a dozen arrows on that image to highlight the flaws, but they in no way point to ALL the flaws. The thing was fucked even after sanding it back and laying down a new coat of dye. It was just that bad (which is all my fault for not sanding enough in the first place. The surface looked so good to begin with that I started with 220 grit and worked my may to 600 grit. I never considered that I might need a coarse sanding).

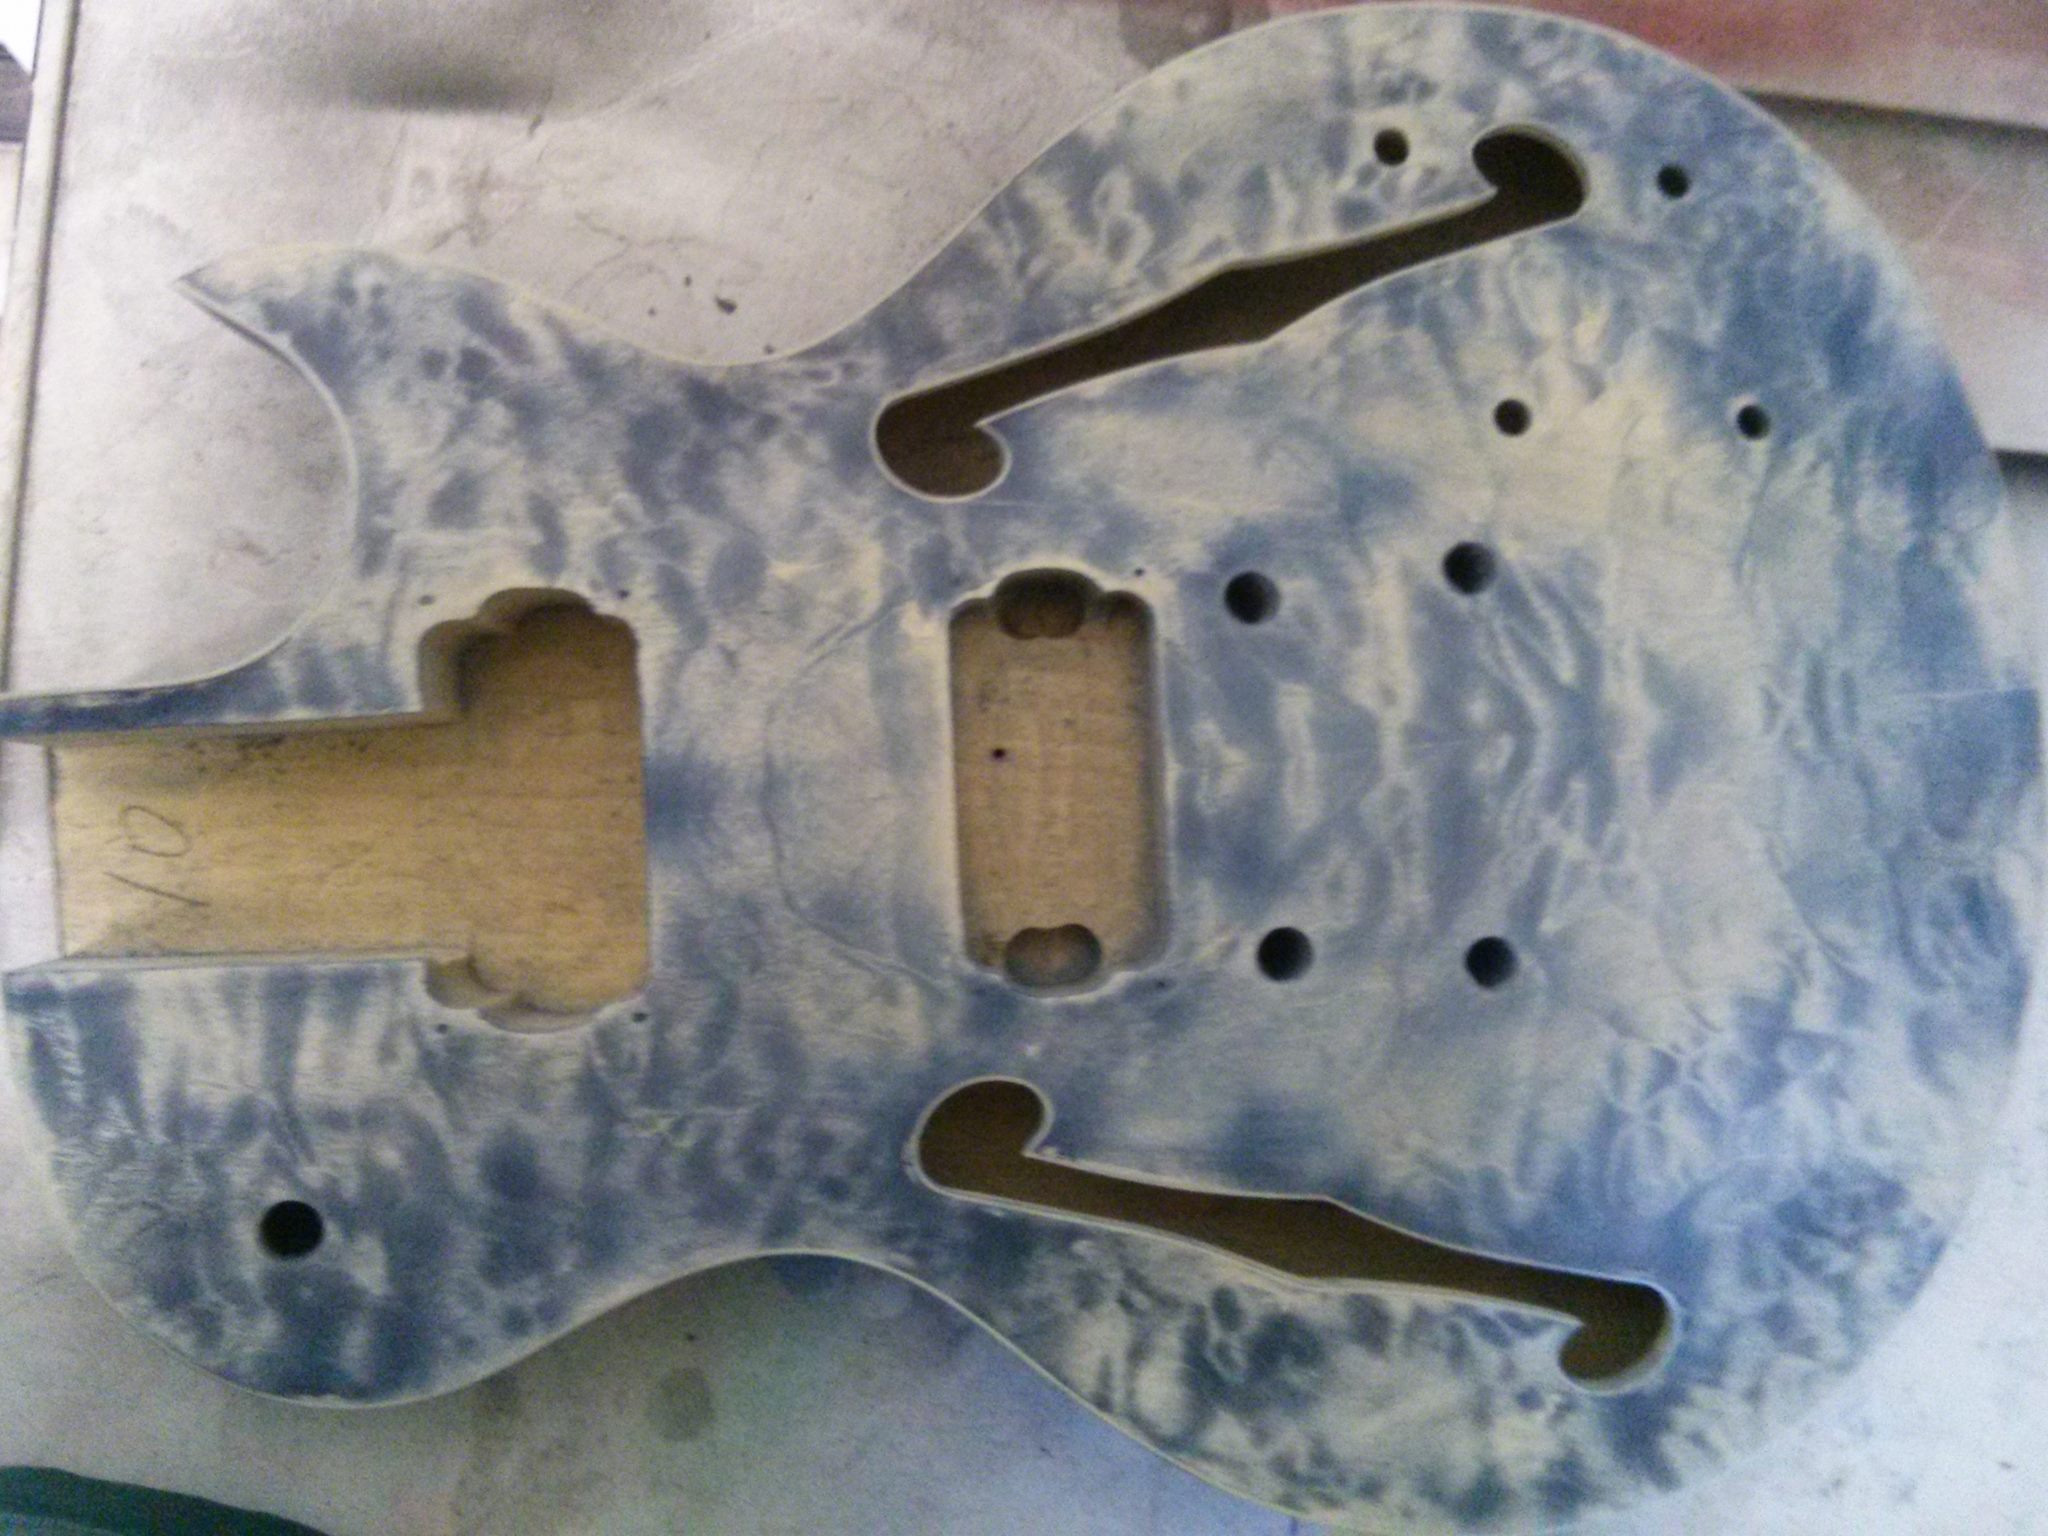
The next step was unquestionably the most difficult part (mentally) of the entire process. I had to admit that I was never going to finish the project without basically starting over. I put some 90 grit paper on my orbital sander and, with a tear of regret, destroyed my masterpiece. I took care to sand heavily in the problem areas, but tried to go light in the unaffected areas. I also made sure to leave areas of blue amidst the fully sanded area with the hopes that the contrast would pay off later. After an hour or so (the first half with 90 grit, then 20 minutes with 150 grit, and another 10 with 300 grit) this is what I had:

While I’m not going to take the time to highlight every one of the problem areas again, you will note that I sanded all of the problem areas back to bare wood (a few of which I did highlight. Bear in mind that I was using wood DYE so there was no way to get it back to bare wood). Anyways, here is a photo pointing out a few areas I sanded back to wood while leaving other areas a much darker blue:

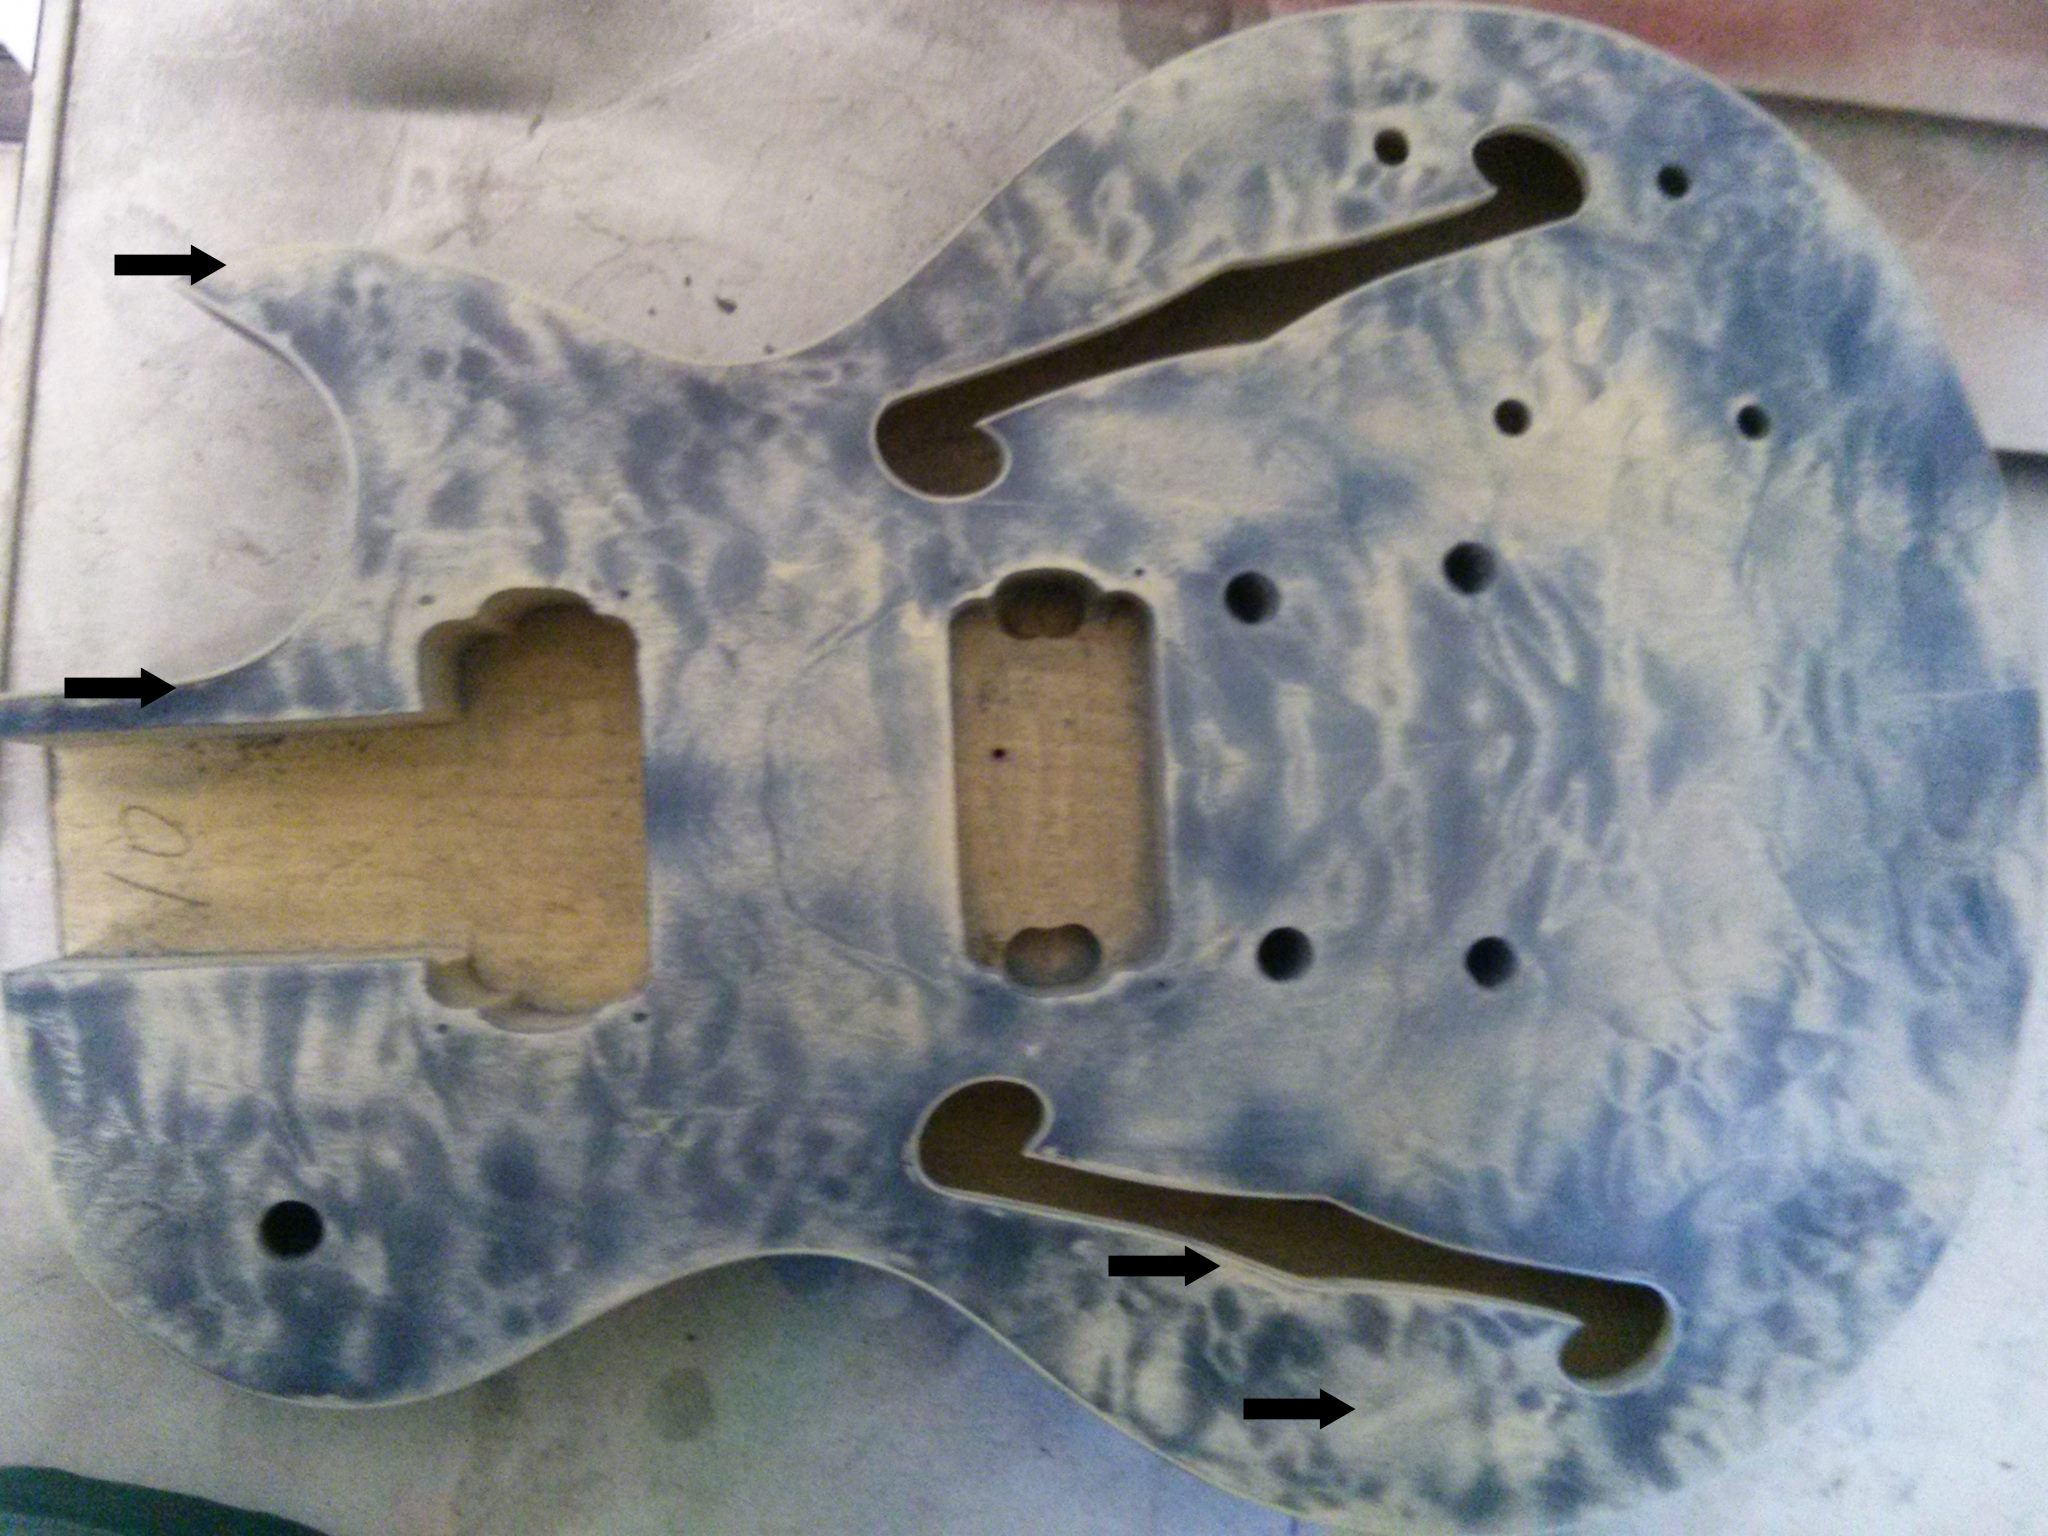
I want to note that I spent a lot of time making sure this sanding phase left light and dark areas. It was only when I had to sand the whole thing back that I decided I was going to call the project “Blue Velvet”. I hoped that leaving enough light and dark areas would allow me to pull off that effect in the end.

The good news is that my sanding worked out great. Here it is after a couple coats of dark blue dye and a bit of time to dry:

That is a pretty accurate photo of its state at the time. Probably the most accurate photo of any yet posted. The waves of color came out really well, but there was no … what? Pop? Luster? Sheen? I don’t know. It just lacked something.

When I began this project, I decided that I wasn’t going to finish the front with any sort of lacquer. Instead, I was going to finish it exclusively with Birchwood Casey’s Tru Oil. I arrived at that decision after reading tons of reviews and recommendations about finishing a semi-hollow guitar. Tru-Oil, they say, dries in such a way that it will add luster with each thin coat. The result of that will be that after 20 or 30 coats (and I easily put 50 coats on the front of this thing) each coat will dry differently and give the finish something approaching iridescence. Yeah, I was skeptical too. But after rubbing in a coat of Tur-Oil every half hour that I was awake over the course of two or three days, the finish really started to pop.

Here are a couple images of the final product (the dye and Tru-Oil was completely dry by the time I took these photos):


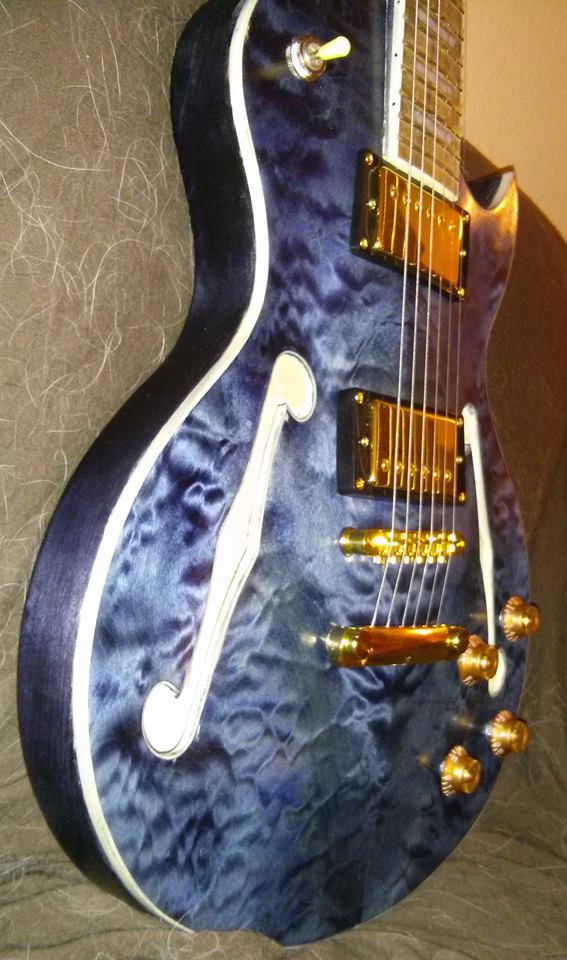
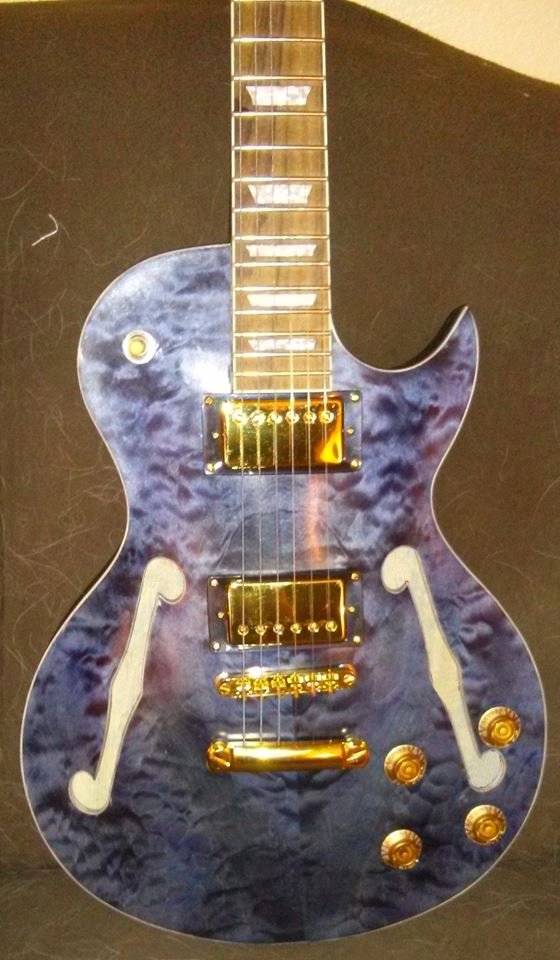
After all the time spent dying and Tru-Oil’ing this thing (it was definitely dozens of hours and probably hundreds) I was very pleased with just how well it came out. I did buy the gold pickups, gold bridge hardware, and gold knobs aftermarket (the kit came with silver accessories and different colored knobs). And trying to finesse all of those things into place through the f-holes on the guitar was extremely trying. Thankfully there are a lot of youtube videos to help you through wiring a semi-hollow guitar. What there aren’t a lot of youtube videos of is what to do when you try to finish a guitar and part of it simply won’t accept wood stain. I limped through it pretty well, but I wish I had been vain enough to video the process. I think you’d have to agree that from the photos at the top of the page to the photos on the bottom, I really nailed this one.

As a final note, The Fret Wire (the place I bought my guitar kit) featured MY GUITAR BUILD -dubbed ‘Blue Velvet’– on their website on January 2, 2017. So it may not be me blowing my own horn when I say the final product looks pretty damn good.

Second Pancake Complete!

I believe Q*Bert said it best when he said, “@!#?@!”. I could probably expand on that, but the eloquence of the simple phrase seems so fitting to describe project: second pancake. It’s finished now, and finished is such an apt term.

The engine and interior really look very good on it. Even the wheels, decals, etc.:
rolling1

And then there’s the body. Jesus Fucking Christ. Everything that could have gone wrong certainly did. The initial attempt to install bare metal foil on the side trim resulted in having to strip and repaint it. The second shot at painting wasn’t nearly as smooth as the first. Still, I soldiered on. I went with the two-tone paint because I knew it wasn’t going to be a showpiece and I figured I could learn something along the way. That also went pretty well. Even the application of the trim paint wasn’t too bad. Then I Installed the windows. Evidently I got some paint on my fingers during the process which resulted in globs of paint on the top. I’m too many coats of paint in to care to try stripping it down and starting over, so fuck it. I’m done.

front
rear

I want to point out that what you are seeing on top of the fenders, hood and trunk lid isn’t imperfections in the paint, it is actual dust that collected because assembly of this thing took me so damn long. Once I had the body paint fucked up, I just kind of quit trying. But it’s done now and I can move on. Hopefully I won’t repeat the same mistakes on the next one. The next one was going to be an AMC Gremlin, but the wife bought me a Corvette model for Valentine’s Day (which I subsequently bought some wheels and paint for) and I am itching to get started on it. Crossing my fingers that I won’t make some boneheaded mistake that costs me the project.

Second pancake nears completion

emptyboxWith the neck no longer bothering me, I was able to get project second pancake to this crucial stage. All parts from the trees are now in place with the exception of some of the chrome and the windows. I’ve been applying decals along the way, so there will be little left to do once I have those in place. As with project first pancake, the most disappointing part of this one is going to be the body paint. I had such high hopes in the beginning… I just overshot my skill level in choosing a car with so much chrome for my second go around. I should have gone with something much more mundane. Oh well, you live you learn.

interiorThe interior on second pancake is far and away the best feature. From the dashboard features to the two-tone trim and even the decals, this turned out really good. Rather than beating myself up for totally fucking up on the body, I really should be congratulating myself on how well I pulled of the interior. That’s not the way my brain works, though.

rolling1The rolling chassis now completely assembled, there are a lot of things I could be pleased with: The engine compartment detail also looks very good. The weathering I did for the radiator came out very well. Those tiny decals for the wheel center hubs (not to mention the one for the center of the steering wheel from the interior photo) look great and were a huge pain in the ass to install -the wheels have an embossed Oldsmobile logo that matches the image on the decals. While you can’t see it from the photos, lining up the edges was a real challenge. A challenge that I don’t even think would have been possible without the use of Micro Set and Micro Sol. The tiny size and the contours just wouldn’t allow for a simple water bath to make the decals pliable enough to put in place. After using the micro set, it took another four or five applications of micro sol to get them to really sink in.

Now that the rolling chassis is all outfitted, it looks pretty darn good.

rolling2

I got the interior painted tonight also, so all I have left to do is install the chrome and glass. Since the boy is more or less a lost cause, I’m going to apply the chrome in the factory finish. If my paint looked a bit better, I would probably take the time to do it in Bare Metal Foil. Since this one is now deemed a ‘pancake’, that seems like a waste of time. Hopefully I’ll have the glass and chrome in place by this time next week so I can get started on the Corvette model the wife got me for Valentine’s day.

’50 Olds chassis

A recent neck injury has kept me from working on this one for a while, but I finally got around to finishing the chassis. In my last update, I had the engine mounted to the chassis and needed only a few minor parts added to the suspension to complete it. Then I ran into a major problem with installing the exhaust. In this kit, the pipes lined up with the header fairly well. The problem was that after I installed the engine, part of the frame was pushing where the pipes needed to be. Because of the small area I was working in, there also wasn’t a way to get a clamp of any sort to hold it in place. If I tried to glue it into place, there was going to be a sharp angle where the pipe met the header, and that wasn’t going to look good at all. With a bit of reluctance, I decided that my best shot was going to be to remove the engine and mount the exhaust to it outside of the chassis. With my trusty X-acto, I cut through the glue holding the engine mount and transmission in place and removed the engine.

Even with the engine outside of the car, getting this exhaust lined up was still no small task. I had to line up one side, glue it, shim it in place with toothpicks and alligator clips and let it dry (I waited 24 hours) before moving on to the other side. After I was confident that the glue wasn’t going to fail if I touched it, I repeated the process on the other side. Here it is shimmed, glued and clipped together, all being held in place in my cheapy Helping Hands:

exhaust2

This is the second side, after the opposite side was already heavily glued and allowed to dry for 24 hours. You’ll see the transmission and exhaust held in place with the alligator clips, the toothpick to shim it so it lined up right, and a big pair of tweezers to weight it down. I put a lot of glue on this thing. I wasn’t a huge fan of doing it this way, mostly because trying to mount the engine with the exhaust already in place didn’t seem like it was going to be particularly easy. Once it was glued up and dried, though, it went in fairly easily.

Once that was in place, I still had to complete the suspension in the back. Some of these parts were very small and it wasn’t immediately apparent where they were supposed to connect. I ultimately got it all in place, but not without a bit of guess and check. It’s finished now. Here’s how it currently looks:

chassis1

The camera is far more critical of it than my eye is, but still it looks pretty good. This particular kit has an incredible amount of detail on the underside, particularly when it comes to the suspension. That required painting some very small parts after everything was already glued in place (some were flat black per the instructions but seemed like they should be silver instead). I’m getting pretty good at doing that kind of stuff freehand, but it’s not without errors. Here is that from another angle:

chassis2

Since I already have the interior mostly finished, there are only a dozen or so parts still left on the trees (not counting the chrome and clear). As far as assembly goes, I should have this thing together in a few more hours of working -which could take me weeks in real time.

50 Olds Chassis

I’ve been snapping photos as I’ve been working on the 50 Olds, but I haven’t posted any of them in a while. Consider that remedied!

body3When we last left our hero, he had just completely fucked up an otherwise near flawless paint job on the ’50 Olds Coupe with incompetent usage of Bare-Metal Foil. That pissed him off quite a bit. He soldiered on, even knowing it wasn’t going to be as perfect as he had hoped. Here is a fairly good representation of the state of the car once the trim was painted with basic Testors Metallic Silver instead.

newspaperLargely due to the knowledge that the body was already pretty fucked because of gouging issues in the current paint, I decided to go ahead and take a crack at the two-tone finish that I had previously decided against. This is an ill-advised way to go about this. When I decided to tackle it, I already had multiple coats of paint in place as well as the trim already painted. I used Tamiya Tape to follow the curves of the molding and then used FrogTape to hold the newspaper to the body, as well as using it to block the windows to keep from getting gloss black on the interior.

twotoneUsing the tape on the inside probably wasn’t strictly necessary, but I didn’t want to have to try to maneuver sandpaper around on the inside of the car to remove the gloss before I paint it to match the interior. Here you see the finished product. I later used a brush to touch up the areas around the door edges where the black didn’t completely coat over the original maroon, and I had a bit of a bleed issue where the tape wasn’t applied well enough at the top of the door trim, but otherwise it came out very good. It’s hard to tell from the photo, but that top has a mirror-like sheen to it and it really helps to draw the eye away from the horrible fuck-ups imperfections in the maroon body paint.

Next I went to work on the engine. This kit advertises 135 pieces. While I’m not going to count them all to see if that is accurate, what I do know is that there are about 25 of them that go into the engine (not counting decals).

enginerealWhen I initially looked at the engine components, I was a bit confused as to how they all went together. I’m used to a more standard 350 type motor with a short Quardajet carburetor and the intake/carb setup on this one didn’t look anything like that. To make sure I was assembling it properly, I sought out photos of a restored 50 Olds for comparison. That motor is pictured here to the right. The other oddity about it is the air filter. That big black cylinder on the firewall side of the motor is the air filter. Again, I’m more used to seeing the frying pan type air filter in older cars, so this one took looking at to understand.

engineIn an attempt to make the transmission look a bit more realistic, I bought some Aluminum Metalizer and Gun Metal Metalizer to paint it. With the parts already primed, and after taping off the engine, I used the aluminum to paint it first. After that dried, it looked a little too smooth for my liking, so I took the gun metal spray, held the can at about 18 inches away and hit it with one very light dusting to give it a bit of texture. The result was quite appealing. After that, I slapped together the major engine components, painting them after assembly to hide the seams (the green, that is. Things like the belts, pulleys, etc. were painted still on the trees). It came together nicely. It isn’t nearly as bright a green as the image would suggest, but just like the body paint, it simply won’t photograph in a reasonable shade.

fingerIn the last photo, you’ll note that I still had some work to do touching up the paint on the distributor, intake and belts. I put that off while I assembled the rest of the it. This kit is fairly detailed, including such parts as a starter, oil filter and ignition coil which also needed to be placed. In addition to that, it also boasts some of the smallest decals I have ever seen. In the photo of the real car engine above, you’ll see the words ‘Oldsmobile Rocket’ painted on the gold strip on the valve covers. To the right you’ll see the decal to replicate that on the model. It’s resting on my fingertip. I cut the strip from the decal sheet about three times the size of the actual decal so I could grab onto it with some tweezers to get it into the water and back out. For an idea of scale, you can see my leg hairs, the faded blue ink from a horrible prison tattoo and the maroon fabric of my shorts also in the picture. I mean, this thing is small.

enginedecals2When I finished with the painting and assembly, I started placing the decals. I was sure happy I bought a 6-Piece Stainless Steel Tweezers Set to handle them. I really like this particular tweezers set because they are all stainless, come in a variety of sizes and have two different sets that can lock to hold things in place. One of those simply work backwards from normal tweezers (at rest, they are closed, you have to pinch to open them). The other locking set has a small pin in it that you slide toward the tip to lock them in place. Both have been invaluable for this model. Here you will see the finished engine with the decals in place. I have put some arrows on the image to highlight the four decals visible from this angle. There appears to be a haze over the decals, but to the eye they are crisp and bright. I applied these under a magnifying glass so I was sure I had them right-side up and was quite surprised to see that the camera managed to capture the text on the oil filter.

As an aside, I’d like to know who came up with the step numbers for these model kits. This kit has 135+ pieces but is divided into only ten steps (I think it’s only 9 for the stock version). I don’t even think Ikea furniture averages fourteen pieces per step and people constantly clown on them for making difficult to assemble products (as another aside, I never understood that. I’ve never had a problem assembling anything from Ikea, nor do I personally know anyone else who has). I think it must be the same guy who decided that there needed to be six Vitamin B’s, despite the fact that there are twenty letters of the alphabet without a vitamin assigned to them. Better yet, since it has now been shown that a Rubik’s Cube can always be solved in 20 face turns or less, that would be less than two steps according to the guy who numbers model kits.

shocksOne thing I can say as I get older is that I learn way faster than I did when I was younger. I don’t mean that my brain absorbs information faster or anything like that, more like I don’t forget mistakes and am more apt to remember serendipitous events. Such was the case when I went to work on the chassis of the model. My short experience building these things has taught me that modeling glue will quickly strip paint. When I started to work on the shocks, which were primed in black, I used that knowledge to my advantage. I put a dot of modeling glue on the tip of my thumb and rolled the coil of the shocks through it to strip away the primer. Once the primer was gone, I was able to use a dry brush technique to get silver on the coils without any of the paint running into the black portions in the center. Was stripping the paint first necessary? For me it is. If I attempt this without first stripping the paint, it will bleed onto surfaces where I don’t want it because the finish is the same. Once the finish is stripped, it only goes where I want it to: the stripped area.

chassisI used a variety of paints to finish the front end of this thing: metallic silver, grey, flat black, semi-gloss black, aluminum metalizer, gun-metal, gun-metal metalizer and Model Master Schwarzgrau The last of those is also the color I used for portions of the interior. I didn’t follow the instructions for which colors to apply or where to apply them, instead I combined my knowledge of cars, a bit of common sense and a touch of artistic license to come up with something that looked more like one would expect the underside of a car to look than all semi-gloss black as the instructions suggested. The result was pretty good, but I did get too many layers of paint in a few places.

chassisdetailHere’s another view of the assembled front end with a focus on the suspension. You’ll note that the paint stripping and dry brushing really paid off on the shocks. The tie rods, linkage and stabilizer look like you’d expect. You can almost imagine that the parts can move. They can’t, of course, but you want them to look like they can. I’m quite pleased with how well the front end of this one turned out. I only hope I’ll be able to bring the rest of it together just as well. After this, I had to take a break after working on it for a few hours to let parts dry and my eyes rest.

bottomcomponentsWhile I was painting the transmission earlier, I used the same metalizer paints mentioned above to finish other components for the underside of the car. One of my biggest annoyances with the GTX model was how cartoony and fake the exhaust looked. Using the aluminum metalizer, followed by an extremely light dusting of gun metal, I was able to get this one to look almost like a real exhaust system. The problem now is that it just looks a little too good. I don’t think exhaust pipes look this good even on brand new cars. Next time, I may add a bit of brown in splotches before painting it with the metalizer to see if I can get some hints of rust to show up. Or, who knows, maybe I will screw something else up along the way and serendipity my way into a better finishing technique.

enginemountedThe last thing I did before putting the frame aside was to mount the engine. I’m gong to need this to be good and dry before trying to route the exhaust because test fitting shows that it doesn’t line up quite as well as you’d want it to. It’s going to take some tweaking to get it connected. This isn’t an issue with my building of the model, but the kit itself. Even before putting the engine in place, the exhaust didn’t line up.

wheelI had also painted the wheels when I painted the body, and was curious to see how they were going to look. I skipped ahead to step seven and put one of them together. The wheel is four pieces total (plus the tire and the pin) with two making the wheel (painted maroon) and a chrome ring and hubcap. This is what one of them looks like assembled. The tires in this kit are nice. They came in a separate bag and don’t have any molding marks on them. I didn’t have to sand, trim or otherwise modify them in any way to get what you see here. That part, at least, should be easy.

Getting better

As previously mentioned, I’ve been putting off painting the body on the ’50 Olds because that is where I expected it all to go off the rails. I don’t know why I have such trouble getting body paint to look good. I’ve probably watched twenty videos showing how to do it at this point, and it looks so damn easy. Yet the second I touch the paint can, it all goes to hell. But what really doesn’t make any sense is that I can make the primer look perfect, just not the color coat.

I finally had to suck it up and go for it:

body1a

I really hate that I can’t photograph this one in anything approaching the correct color, but you’ll get the idea. The paint went down with only a couple of very minor imperfections (a couple specks I had missed in my final cleaning and a rogue fiber about half the size of an eyelash). It looked very, very good.

It turns out that my primary issue was misunderstanding what was meant by the term ‘wet coat’. My mist coats would go down fine, but when I got to the first wet coat, I would put too much paint on and it would start to run. I think I now understand why they always put the term ‘wet’ in quotations when they talk about it. I was trying to get the entire surface of the body to look like it was covered in liquid, which can only be achieved by covering the entire surface in liquid. Once you do that, all that liquid starts to run. This time, I just sprayed until the whole thing was covered fairly lightly. When I pulled the can away to check my work, I noticed that the light reflecting off of it made it look very shiny, as if it was wet. So you don’t want it to be wet, you only want it to look wet. Lesson learned.

Once the paint was dry, I started to work on the side chrome with Bare-Metal Foil. I’ve used the product around a window and even did the grill of the last build with the stuff, but I was concerned with how well I would be able to apply it to the long, thin chrome strips on the sides of the car. It turns out that my concern was not misplaced. Putting the stuff down wasn’t much of an issue; I had the first piece in place and tacked nicely (using toothpicks and tweezers) in ten minutes or so. Where it all went bad was in trying to trim the piece and remove the excess foil. The trim on the side of the car is raised only very slightly. When I began to run my X-acto knife down it (brand new blade, using only the weight of the tool) it slipped a couple of times in both directions; some damage was done to the trim and some to the body paint. I cursed under my breath, but continued. Repeating the process on the other side of the car, I had exactly the same result: damage to the paint and trim.

I truly believe in the Bare Metal Foil product, but in this case I simply couldn’t make it work. It’s one thing to apply it around a window where you have neat little grooves to use as cutting/tucking guides, however, on the long, flat side of the car, I simply couldn’t achieve a good result. Knowing that it would only get worse as I tried to cover more of the trim, I scrapped it and started over.

Removing the Bare Metal Foil from the portions I had already applied it to did more damage to the paint. My once nearly pristine finish had a couple of gouges in it. I did some wet sanding on the body and painted it again. This time there are a couple of noticeable flaws in the surface. Fuck. I’m going to continue pressing forward though, knowing that with my current skill level any attempts to improve it will only make it worse.

After the paint had time to dry, again, I took another shot at the trim. This time I masked it off with Tamiya Tape and hand painted it with Testors Metallic Silver. I had a couple of very small oopsies, but overall it looked much better than what I was able to achieve with the Bare Metal Foil in this particular application.

trim

Again, I am very disappointed that I’m not able to get the actual color of the thing in the pictures. It’s a much deeper color, more like burgundy. All I can get in pictures is red or brown. My trim is far from perfect, but it looks fairly good, even under the unforgiving eye of the digital camera. I joked previously that the GTX would be my 3-foot car (stand that far away and it looks good) and my next one would be a 2-foot car. It looks like It will be more like a 1-foot car, so I skipped one step completely. Though this one is far from completed, maybe the next one (a 1975 AMC Gremlin) will be the one that looks good even if you hold it in your hands – but don’t touch it, dammit!

Wasting perfectly good OCD

dashThe interior of the ’50 Olds Coupe is coming along nicely. In the last post, I showed the dashboard after doing some detail painting and using Micro Sol and Micro Set to apply the decals. I updated the photo after the decal applicator had done its job and I’m including it again to the right (still with a bright pink arrow pointing at the odometer that isn’t really visible to the naked eye). This is certainly far from perfection, but for a second shot at building a model, I think it looks pretty damn good.

enginecompartmentI’m continuing work on the interior, mostly because I am afraid to paint the body. After the issues I had painting the GTX, I’m not eager to fuck up the body paint and end up half-assing the rest of the project. The paint for this project is a Model Master Honduras Maroon. This is one of the two step paints that requires a paint coat and a clear coat, or so it says. I’ve never used this type of spray before, so I’ve painted some of the non-essential pieces to get a feel for how the paint flows. I have to say that I’m doubting whether it will actually need a clear coat (I’m going to give it one anyway, but I don’t think it will be strictly necessary; I can see my reflection in it as it is). This color doesn’t photograph very well either. Every picture I snap makes it look almost fire-engine red, while the paint is actually much closer in hue to any one of these cars.

redThe color was by no means stock for the car in question, at least not by the name Honduras Maroon. The car was available in a color called Chariot Red, but none of the red paints I could find were anything close to the color chit for the car. Sixty-five years later, it’s difficult to imagine that any original automotive paint still exists on a ’50 Oldsmobile. I think the image to the right here is a pretty faithful representation of the stock color, and the Model Master Honduras Maroon lays down very close to that color (though it doesn’t seem to photograph in that color). Not that matching the exact color is a huge deal to me since I’m also planning to do it in two-tone with a black top, which also doesn’t appear to be stock. However, in looking at countless images of this car over the last few weeks, I think it looks much better that way.

stripsAs for the interior, boy howdy was my OCD getting out of control. The dash now finished, I went back to try some of the sharpies on the door panels. Not trusting myself to be able to freehand it with any sort of accuracy, I started taping the panels off. During this process, I was taking 10mm tape and cutting it into fifths (the second strip of which I am removing from a piece with tweezers in the photo to the right) to try to match the curves as closely as possible. This was also necessary because the trim pieces were closer to each other than 10mm, so the tape was too wide without being cut. It took me no less than an hour to lay down a ridiculous amount of tape around all the trim. The good news is that once the tape was down, I spent all of twenty seconds painting it with a metallic sharpie. The results of those processes can be seen below:

doorbeforeafter

And so, with full confidence in my exemplary taping job, I knew it was going to be perfect. I played a drum roll in my head and peeled away the paint to find… mediocrity.

freehanddoorIn truth, I began to suspect that my results wouldn’t be ideal even as I was laying down the tape. One of the truths I learned early in computer programming was that if you have to try way too hard to do something, you’re probably doing it wrong. Such was the case with taping off this door. The tape didn’t mask nearly as well as I hoped it would, so I had some small areas where it seeped into the dark paint. I sat looking at the finished product and thought I could have done just as well freehand. I put that theory to the test. At right, you will see both panels with the trim painted silver. The bottom one was done with an hour’s worth of careful taping with tweezers and toothpicks. The top one was down with about three minutes of careful manipulation of a marker. Looking at them, I think the freehand one looks slightly better, but both have many issues. At the same time as doing the freehand trim on the top panel, I also did the window rollers and door handles in freehand. The flash hides most of it, but those also look fairly good.

I’ll be able to make them look a bit better on Friday when my bottle of Model Master Schwarzgrau RLM 66 paint arrives, because, like the lesson I learned in the previous build, you need to have a bottle of any color that you have in aerosol for touch-up.

With the major portions of the interior done, and still waiting on the engine paint, there’s not a lot more I can do other than take a crack at painting the body. Hopefully this whole thing won’t go off the rails when I try.

On Sharpie as model paint

When last I checked in, I was waiting on some Sharpie Oil-Based Paint Markers, Extra Fine Point, Metallic pens to try out for the purpose of chrome detailing. They have now arrived, and they simply don’t work for the intended purpose. The directions for use of the pen read thusly:

Remove cap. With marker it tip up position, depress point with finger. Recap and shake well to mix paint. Depress marker point several times on surface to saturate point.

Based on that, my expectation was that the point would become saturated, after which you would be able to use it like a normal pen. Not so much. When you ‘depress marker point several times on surface’, the paint runs down the outside of the pen to get to the tip. This means that the paint is pooled up on the instrument just above the tip and the second it touches anything, paint goes everywhere. ‘So,’ I thought to myself, ‘now that the pooled paint is gone, it will work like a normal pen’. Wrong again. Once the paint that is on the outside of the instrument is gone (which I technically cleaned off with a towel so I wouldn’t accidentally pour it on my fine detailing) the actual tip of the pen is bone dry. I could dip the tip into the puddled paint and apply it that way, but then it’s exactly the same as using a toothpick and some Silver Model Master paint, except that I’m out the four bucks on the pens. And while it’s true that the paint costs a few bucks (seriously, if you’re buying paint, buy a bunch of them from either Tower Hobbies or find a seller on eBay who has a ton of colors avaiable and will combine shipping and get them all at once. On Amazon, some bottles are two bucks and some are seven with no logical reason why), you will then have it for your next project as well. Not like the pens which will dry quickly even if not in use.

sharpiesI didn’t sit down to write an op-ed piece on how much I hate Sharpie or start an I Hate Sharpie fan club though. I did find a couple useful sets of them for modeling. First up is Six Dollar set of twelve Sharpies. They come in a dozen colors, though I expect the black will see the most use. I purchased them thinking I might use them to do some detailing on dashboards and seats where a brush is difficult to get. These are the ultra-fine point variety, but unlike the ones above, they work like a normal pen. To give you an idea of how fine the tip is, to the right is a piece from my current kit (a piece that would be used to build the rally version, and thus not one I will use). I’ve used the color they call ‘berry’ to color in some detail grooves that were pressed into the piece. As you can see by the tape measure, the seams are right at 1/32″ -less than 1mm- and it worked well. I did that freehand with zero preparation just to get a picture to post. Had I spent any amount of time on it instead of just running the pen up and down each channel three times, I probably could have made them look amazing.

chromedNext up is a set of Sharpie Metallic Fine Point Permanent Markers. This is a pack of six, with two each silver, gold and bronze. These have standard sharpie tips (which seem impossibly big for modeling) and work just like one would expect a marker to work. Using the silver one of these, I took a shot at the text on the chrome trim I was wondering how to finish in a previous post. Again, I didn’t properly mask the area and I just went at it freehand. The body still needs to be primed and painted and regardless of how I ultimately finish the trim pieces, they will have to be taped over during that process or the lettering detail will disappear anyway. I wasn’t able to achieve the look of the original (which has white paint in the center of the lettering), but the felt (foam? fabric? whatever the tip is made of) tip made application smooth and easy without the brushstrokes I would have gotten if I’d tried to paint it by hand. The paint is also much thinner, which leaves the most possible detail, and makes that lettering pop. For freehand, I did a pretty damn good job here (as far as you know. What you don’t see is the huge fuckup I made just beyond where I cropped it).

dash3I used those same pens to finish my dash. In this case, I did tape off the one large grill-like portion before painting, but the radio and all the knobs were done freehand. From the top view, and not to mention due to the flash, the knobs look like only the tip is painted, but trust me when I say that they are painted all the way to the dash. Overall, I really liked the performance of the pens for this task. I don’t know that it would hold up on a piece that is constantly being handled, but for something that will be trapped away in the interior of my insanely-over-detailed -non-covertible- model, they worked perfectly.

dashLastly, another product I’m using for the first time is the combination of Micro Set Setting Solution and Micro Sol Setting Solution. Prior to this build, I’d never used anything like these. However, nearly every video or tutorial I’ve watched or read has said to use these products (not another similar product, but these exact products) in the application of decals. For some reason, you can’t buy them as a set on Amazon. You can buy them as a set on eBay for under ten bucks -shipped. I’m taking it for a test run with the dash. In the photo (which is much less flattering to the silver paint from this angle, but keep in mind that the size of the thumbnail is about 300px wide on a pc -counting the tree- and that is very near actual size) you can see three decals: the clock, the speedometer and an odometer. Because the odometer is very hard to see, I pointed a big, pink arrow at it. There is no earthly way you can read that thing. Even under the magnifying glass, I could barely tell what it was supposed to be (and speaking of magnifying glasses, this photo was shot through the magnifying glass on my helping hand station. I had never given it any thought, but isn’t it odd that the camera doesn’t magnify when the photo is taken through it?) while looking at it. There’s no way you will ever see it through the window of the car, but I put it in there anyway.

In regards to the micro sol and micro set, I followed the package directions for use and now have to wait and see how they turn out. Early on it didn’t seem like they were doing much. Application of the decals was still a straight-up bitch. The decals just didn’t want to go into the correct place and orient themselves the right direction. After putting down several layers of the blue bottle both before and after application of the decals, I was thinking it may be like snake oil. After applying the red bottle and having let them stand for about an hour now, I can see why people rave about this stuff. Once the red solution is in place, you don’t need to touch it again. It melts (or whatever it is actually doing) them right into the nooks and crannies. After only one application, they already conform very well to their new homes. Directions say you can apply it again to make them conform even more. I plan to do so later today to see just how well this stuff can work.

tedious taping

frameblackIn my brief time working on these models, one lesson I haven’t quite yet learned is to take pictures before instead of just after. In the case of the frame, I have a before, but it’s not from the car I’m building. Nonetheless, it will serve to illustrate my point, so here it is. One of the great things about this Revell ’50 Olds Coupe Kit is that the floor panel is a separate piece from the frame. This made it really easy to paint the frame in black and the pan in grey. However, when test fitting the pieces, it looked odd having the front portion of this in black. You can see where the frame comes out and makes a nice little rectangle there but the rest of the front of the car is attached to the frame because the engine compartment makes it impossible to attach it to the portion with the floor. I don’t like that.

frametapedEnter tape! And I mean a lot of tape. I took my little Tamiya 10MM Masking Tape roll and just went to town. Because of the very small size of the frame, even the 10mm tape was way too wide. I had to cut it into tiny little pieces and apply them in bits. No piece of that tape is longer than probably a half an inch, and each was subsequently trimmed with a razor and tucked in place with a toothpick. Once all the small parts were taped, I followed that up with some FrogTape to cover the larger areas (the part beyond that was covered with an old envelope while I painted it).

toothpickWhen I say I use a ‘toothpick’, I should specify that it’s not really a toothpick. It’s the behemoth you see in the picture here (shown next to a bic lighter for scale). These are Diamond Extra Long Toothpicks (linked to Target because they aren’t available on Amazon). My wife had these in the cabinet when I started on the first model and I’ve found them to be indispensable ever since. They are far more rigid than a normal toothpick, but soft enough that they don’t do any damage to the plastic. You do have to be careful around paint, but that’s true of most tools. The one on the left of the lighter is what they look like out of the box, while the one on the right is what a battle-worn one looks like. Once the tip gets rounded over a bit, they get considerably better for maneuvering small pieces without getting stuck on edges and the such. Fresh from the box, they are great for tucking the tape into tight corners you wouldn’t otherwise be able to reach. Because they are thicker than standard toothpicks, you can put enough pressure on them to get some really sharp corners.

frameandbodyI really had to turn off my OCD for this one. I knew it wasn’t going to be anything close to perfect due to the tiny size of the frame being taped and my not-so-steady hand. It certainly looks passable (although a bit better in the picture than in person. While the frame itself looks better in person than in the photo so Megapixels giveth and Megapixels taketh away). I snapped this one with the frame sitting in place on the body to illustrate what I meant about it looking wrong for the whole thing to be black. With the front portion now matching the grey of the rest of the underside, it looks much better in my opinion. Was it worth the thirty minutes of mumbled obscenities as I tried to lay down pieces of tape about 1/8 the size of a postage stamp that didn’t want to cooperate? Probably not. Sometimes you just do things to see if you can.

realdashAlso today, I got the second (of three) paint colors on the dash. For those of you keeping track at home, I happened across one of these cars for sale and have more than adequate pictures of what the interior should look like. The dash should be a light color on the top with a dark color in the center. The grill looking area will need to be done in a silver or chrome. Ideally looking much like the picture here. Or at least as close as I can reasonably come to it. The kit came with decals for the clock and speedometer which means I’ll only have to worry about tiny little details with the stereo and other knobs. Hopefully I can pull that off (the knobs are another thing I am hoping to be able to do with the Sharpie Oil-Based Paint Markers, Extra Fine Point, Metallic . Of course I haven’t yet gotten them so this could all be moot).

dash2This is the first piece I ruined so badly on the first shot that I actually stripped the paint back down to plastic and started over. Logic says that when you are painting something like this, you’d want to paint the light color first, then tape off the light portion to go back over it in the darker color. This didn’t work at all. The second coat of paint stripped so much detail from the knobs and grill that you could hardly tell what they were supposed to be. With some paint thinner, a brush, some elbow grease and a half an hour, I got it back down to bare, white plastic and started over. The second time, I painted the whole piece in the darker color first, then taped it off to paint the lighter color. Counter-intuitive for sure, but the result was much less paint on the more detailed areas. As you’ll no doubt see in the photo, taping around those tiny elements wasn’t exactly easy. I have a couple of spots that aren’t as straight as I would like them, but it’s like my Dad always said, “if at first you don’t succeed, lower your expectations.”

Door panels on the 50 Olds

realdoorI’m typically not a very lucky person, however, in the case of the ’50 Oldsmobile, I happened to find a number of them for sale online. Finding the car for sale makes researching paint colors and details way easier than trying to google search. In the case of this car, there are no less than 12 1950 Oldsmobiles for sale on Hemmings.com which gave me a number of sources to view. The reason it is so much easier is that cars for sale tend to have way more pictures than you’re going to find in a simple google search. As luck would have it, one of them has the same two-tone interior colors that I was trying to match. Technically, I think this one may be done in three colors, but I don’t think I can reasonably pull that off.

tapedpanelsSticking with my two-toned theme, and taking inspiration from the source photo above, I taped off the areas that should remain the lighter color. This was pretty straight-forward, although I did learn that when you are covering something against an edge (as is the case around the chrome trim) it is much easier to stick the tape well over where you are trying to cover and use a stout toothpick to force it back to the edge. That’s what I did in the attached photo. Due to the odd shape of the front top portion of the door panel, I had to leave some excess tape in no-man’s land beyond the front trim piece. I didn’t want to try to trim the other side of the angle as well because I was fairly certain I would lose the tack of the tape on the finished side if I tried. It took me about 45 minutes to get this taped and tucked into the seams with a toothpick. After that, all there was left to do was spray it.

stripped tapeLearning from the rough edges I had with the seats last night, I sprayed it and then immediately put on a rubber glove to hold the tree and grabbed a pair of tweezers to strip the tape away while the paint was still very, very wet. This gave me much sharper edges than I got when I let the paint dry enough to handle it. With the tape now stripped away, you’ll see what I mean about leaving the tape in no-man’s land near the front. It will be easy business to tape off a straight line on the trim piece and get that portion repainted. It needs to all be done in the lighter color and I hope the dark doesn’t show through. The portion in question will be under the dashboard though, so it doesn’t need to be perfect. If I have too much issue hiding it, I could just as easily do it in the dark color. However I plan to do the carpet in a dark color as well and I think the light would look better next to it. I’ll have to see how well I can cover it with the lighter color and make the decision then.

panelsOnce the paint was dry enough to tape it up again, I went ahead and did the front portion back to the light color. At the same time, after doing some dry fitting, I discovered that the seat back also needed to be done in the light color to match the trim I had already done on the seat front, so I went ahead and painted it back to the light color as well. Now that the paint is dry, it looks pretty good. The edges certainly came out a whole lot crisper than when I let the paint dry on my first go. Lesson learned. Another lesson learned is to leave yourself a ‘tab’ of tape sticking off to make removal with wet paint easier. Obviously it’s very important to be able to grab the tape easily and pull it cleanly away or you risk dropping it into the wet paint.

All that’s left to do is the trim on the doors. To do the chrome trim, I’ve decided to take a shot at it with a Sharpie, oil-based, extra-fine point, metallic silver paint marker. I have never tried using one of these before and can only hope it will work. If it doesn’t look that great, it will be on the interior of a car which isn’t a convertible, so it won’t really be seen that much anyway. If it does work, I will probably finish the window rollers with the same pen and maybe even take a crack at the chrome with the “Futuramic” lettering mentioned in the previous post.

I’ll follow up once I’ve gotten the markers and given this a shot.