The $700(ish) PC build begins!

I had initially planned to take copious photos of the PC build to put up here with lengthy descriptions of the PC building process. I did take some photos, and I am going to talk about specific parts of my particular build, but NewEgg has a 3-part video series on PC building that covers everything in much more detail than I ever could:

Part One covers the parts that you will need to buy before taking on the project. Unless you have never taken the sides off of a PC tower it doesn’t really offer much in the way of new information.

Part Two Is where they cover the actual assembly of the components. I kept this one up on my screen as I was putting these things together just to make sure I wasn’t missing anything. It is quite informative, and is definitely a recommended view for first timers.

Part Three Covers installation of the software in your new machine. This also isn’t something that will be a great deal of use, but it does cover the subject well, so is worth watching -especially for first time builders.

pile of componentsMy particular circumstance was this: I wanted to build a pc for about 800 bucks. That changed after I had ordered a pair or video cards and a pair of power supplies (as was detailed in a previous post). With the video cards, power supplies, and cases in hand, my mission changed from building one 800 dollar PC to buying the rest of the components to build TWO reasonable gaming systems for under 1000. I did it, but barely.

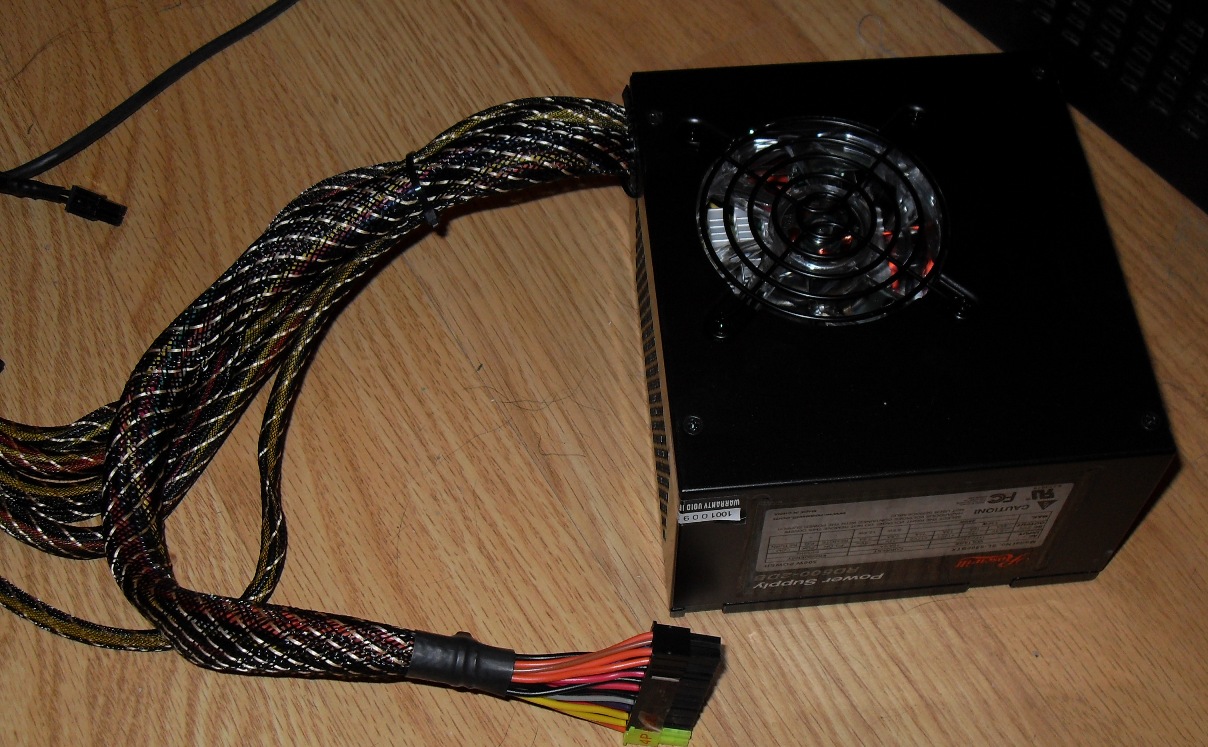
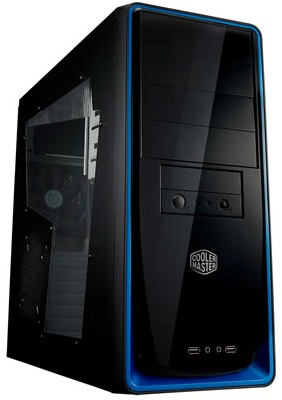
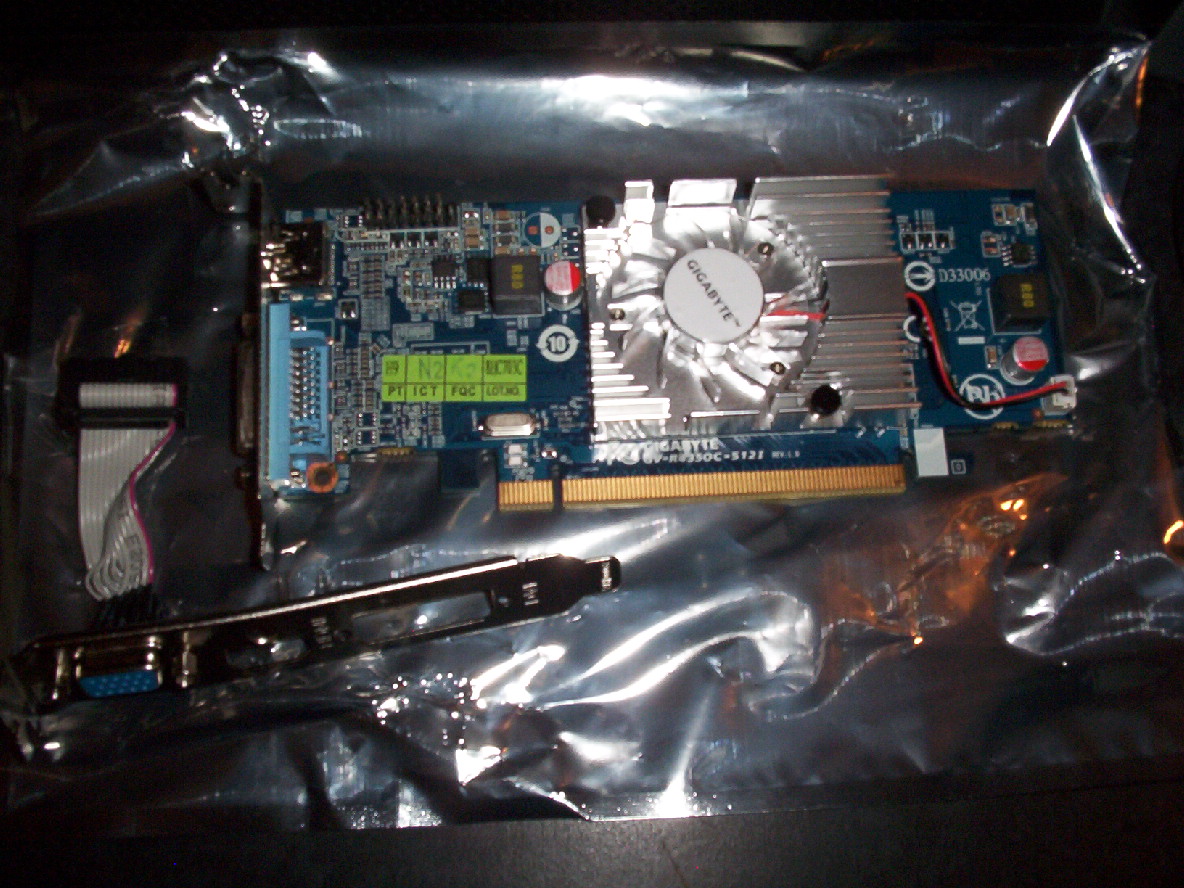
The previous post has the exact specs of what went into it, but I will sum it: Rosewill Gear X3 cases, Rosewill 600 watt power supplies, Intel BOXDH67CLB3 motherboards, Intel core i3 2120 processors, Radeon HD6850 video cards, Team Elite 8gig (2×4 gig) RAM, WD Caviar Blue 500GB HDDs, ASUS DVD drives, NZXT fan controllers, Rosewill CPU cooling fans (there were a lot of complaints about noise and vibration with the stock fan for the i3-2120), 1x140mm fan and 5x120mm fan per system, and finally, Windows 7 Home Premium. That all tallied up to $731 per system after delivery charges. Not a bad price for what it is, I think. And it looked like you see here before I started the build.

It was pretty intimidating to look at. While you can’t really tell in the photo, that all took up a huge chunk of my living room. I had planned on waiting until the weekend (my day off) to start putting them together, but I wanted to start getting the place dug out, so I opted to start working on them after I got home from an 11 hour shift on Wednesday night (they are all 11 or 12 hour shifts, so no biggy).

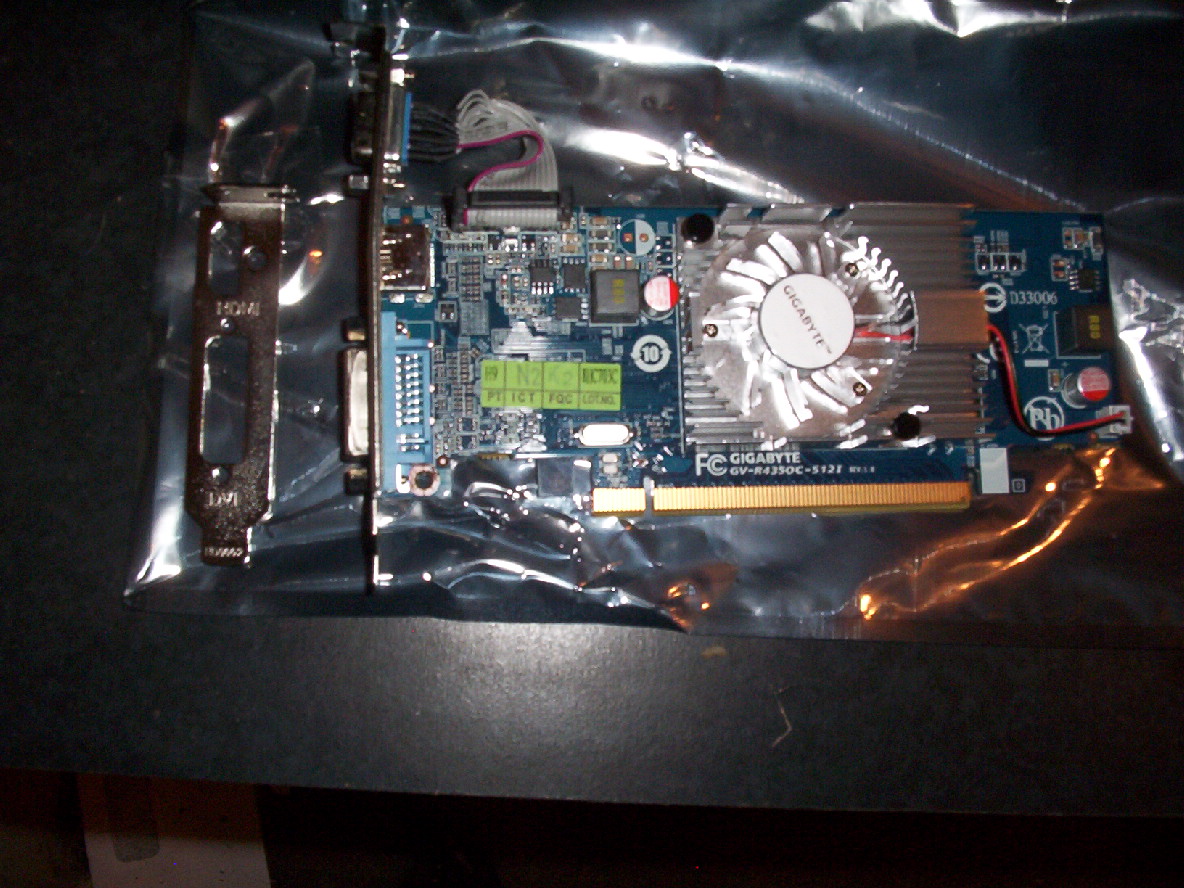
The first external build went together pretty quickly:

the external build

As you can (maybe) see in the photo, I did the full, powered external build on the first system (although I had the power supply disconnected and the 6-pin power removed from the GPU before I thought to snap a picture). The only reason I went so far as to power it up externally was because I had bought such a random mish-mash of components that I wanted to make sure they actually would work together. When I got around to building the second one I still put the CPU, CPU cooler and RAM into it externally, but I didn’t do a full, powered external build. Now a note about the particular Intel board I was using (all Intel boards?): The boards came with an electric system speaker hard-wired to the motherboard -and no system speaker header-. I was thanking the stars that there was no system speaker header though because in the process of googling the location of it, I found out that the Intel board had done away with the single post beep. If I hadn’t known that bit of information I’m sure I would have freaked right the fuck out when it didn’t make a sound at power up.

The workday being 11 hours and the drive each way being an hour, I really only had an hour and a half or so to work on this on day one (and opening all the boxes probably accounted for at least half an hour of that). That led to leaving the first system, not to mention the living room, in a state of complete disarray. The following photos should be pretty clear evidence of that:

pc blowing up

living room blowing up

cleaned up pc
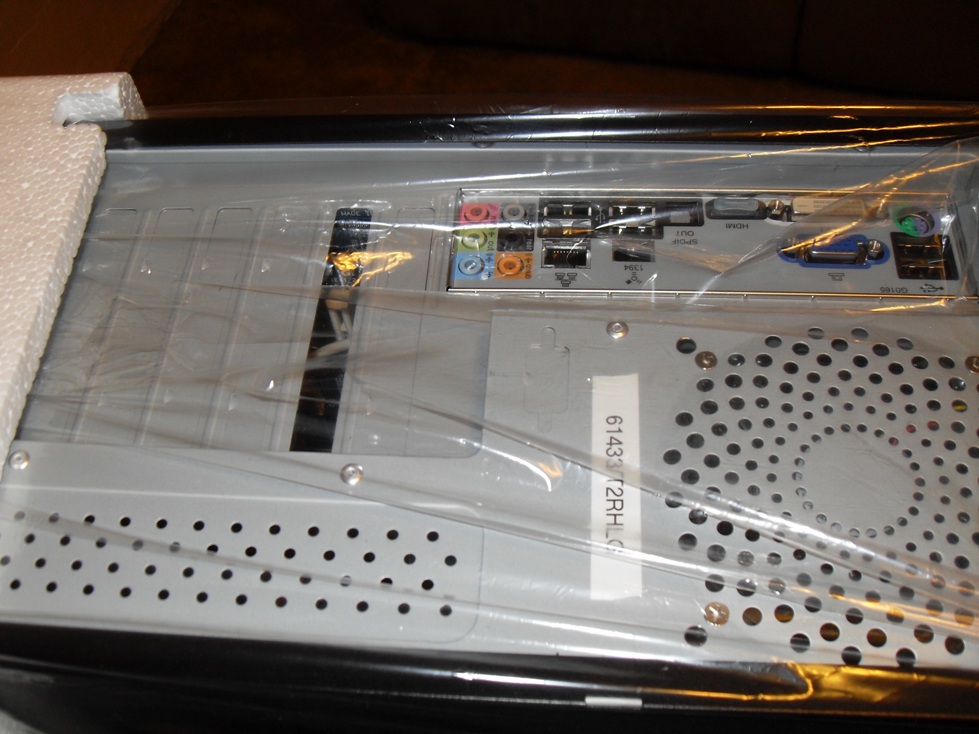
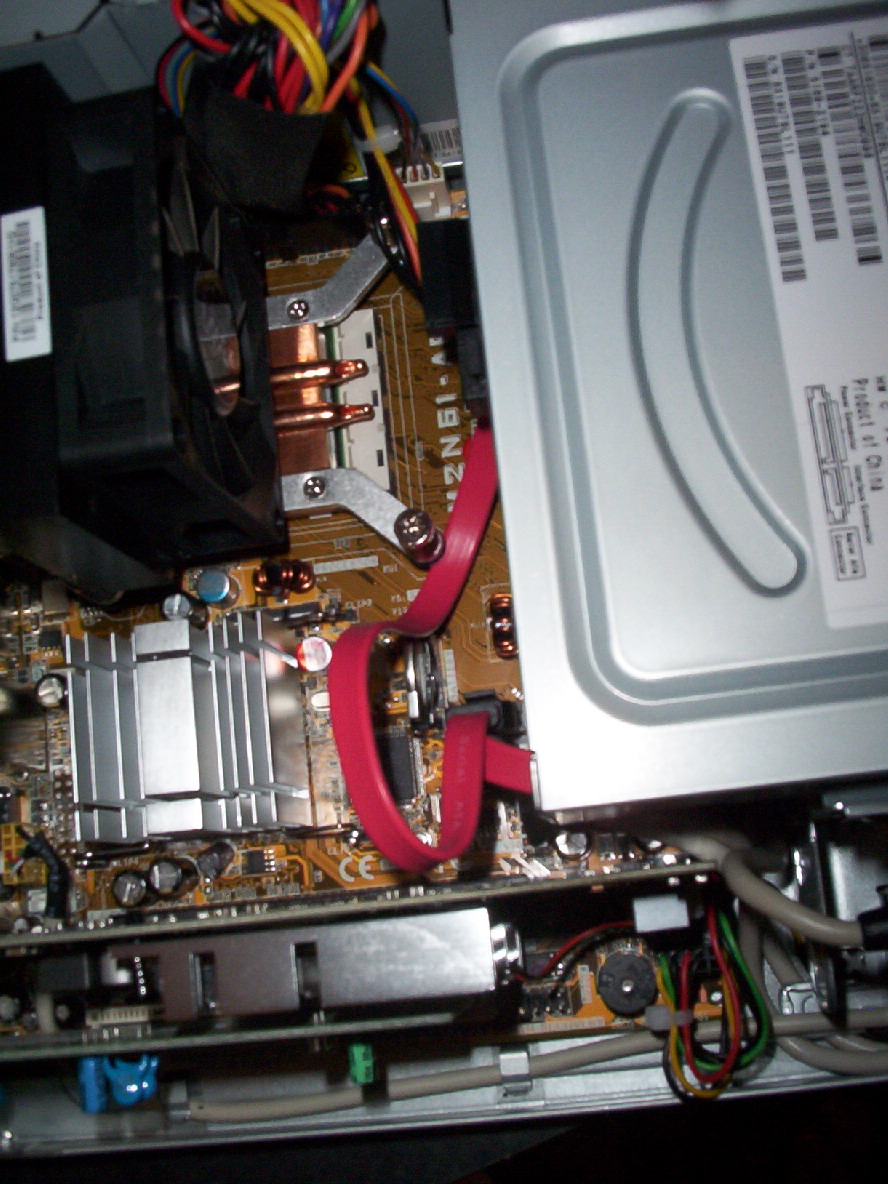
When I started on night two (another hour and a half or so to work on it) all the components were in place (except the fans), and I just had to get everything wired up, and said wires put away. I did this exactly wrong. I thought that the way to go about it would be to run the big ass power wires all around first, then fit the little ones in where I could. While this ultimately did work, it meant having to feed the wires for the front panel, the SATA cables, the fan wires, pretty much everything, over the top of the big ass cables that were already in place. Once I had it all hooked up, the result of that was that the cables were sticking so far out of the cable-corraling side of the machine that it took a good deal of force to get the side on. So while you may see a nice clean machine here on the right (except the extra power cables all gathered up below the drive bays), the back was a huge fucking mess. It was bad enough that, even though I made it through the Windows install, driver installs, and windows updates on the second day, I would go back the next day and reroute all the cables. I mean, I may want to add or remove a component at some point and if I opened up that mess I’d probably have to kick my own ass.

backside of pc
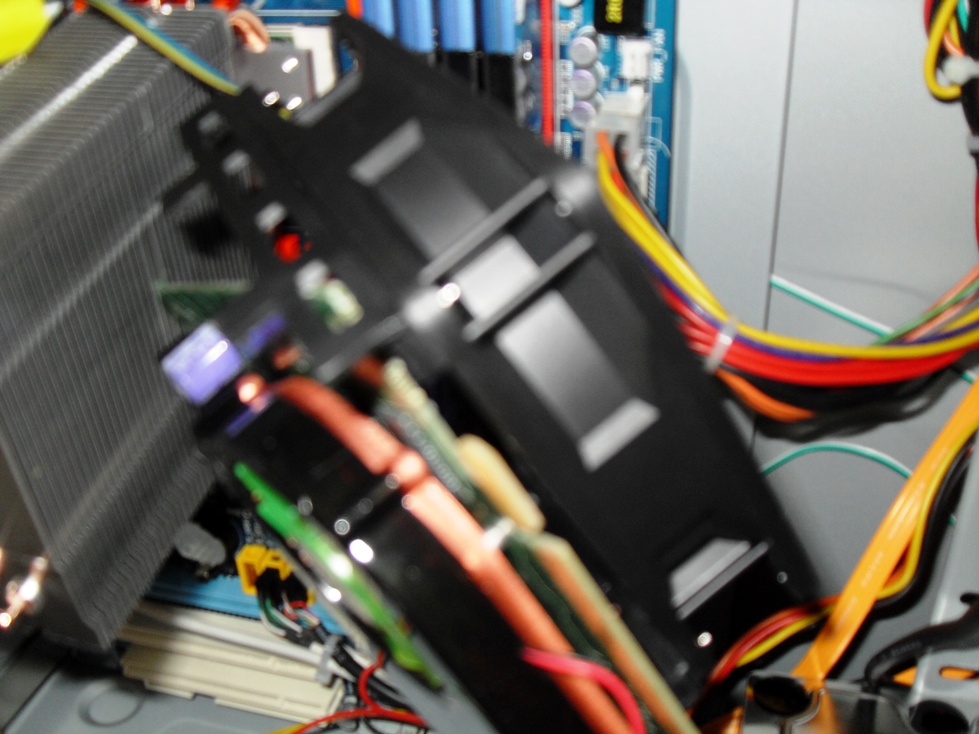
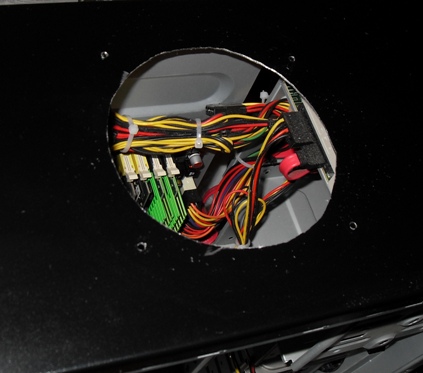
Unfortunately I didn’t take a picture of what it looked like before I re-worked the cables and this photo doesn’t do a lot of justice to just how well the wires are actually secured. As you can see, the big, braided power supply cables are the real hard part to hide. In this photo there are four fan cables, the USB 2.0 front panel cables, the HD audio front panel cables, a USB 3.0 passthrough cable, and all 6 (well 4, but 6 pins) of the power, reset, LED, and HDD LED cables running from the front panel to their destination, and aside from the big-ass, white molex mess near the drive bays (the fan controller came with 3 pin connectors, the front fan had a molex connector, so I had to use a 3-pin to molex converter to hook up the front fan. And since there are six fans and only 5 slots on the controller, and since the headers on the motherboard are conveniently 4-pin [none of the fans had such a connector] I had to add two additional 3-pin to molex converter to wire together the two top fans [because I didn’t have a 3-pin splitter and there is nowhere to get one in a town of 3000 people at 3am]) all you can really see is the braided power cables and the SATA cables. And while the photo doesn’t really evidence it, the wires were all below flush and the side panel slid on without any cartoon-character-sitting-on-a-suitcase type shenanigans.

One other thought on the cabling subject: It was actually a good thing that I had to rewire the case, because it gave me a day to think about it while I was at work and I handled it completely differently. The first time I wired it up, I just grouped everything together and zip-tied it. It seemed like a good idea, but what if I need to change the power supply later, or the hard drive, and everything is tied together? So in the second run I routed and tied all the front panel wires first, then I routed and tied the fans, then I routed and tied the power cables, and the SATA cables went in without ties because I think they will be the most likely to need to be moved in the very near future. If anything else need replaced I should be able to change it without having to rewire the entire case.

So build one took me three nights at an hour and a half a night to complete from opening the first box to the latest windows updates being installed. Build 2 started at about 4:30 am on Sunday. The build took roughly 2 hours to complete, but I stopped after installing windows and the drivers because the front panel USB didn’t work. I would have kicked myself for not doing a full, powered external build except that the front USB isn’t something you are going to check during that process. The USB 3.0 passthrough was working, the audio and mic was working, the power and reset buttons were working, just not the USB. So rather than finishing up, I had to leave it for after some sleep.

front pins
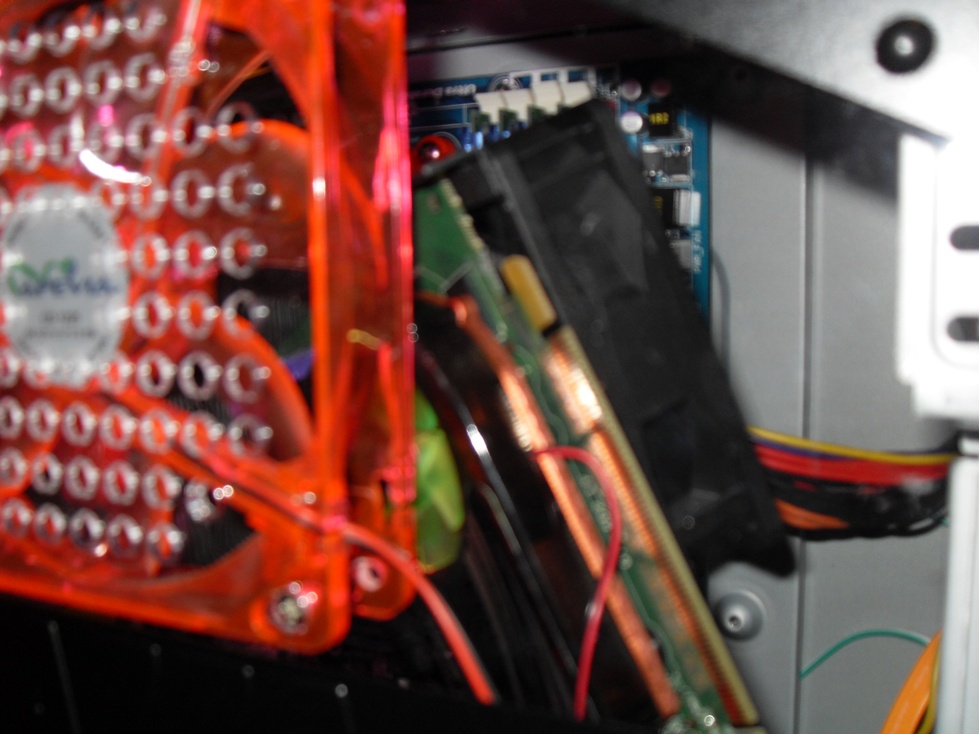
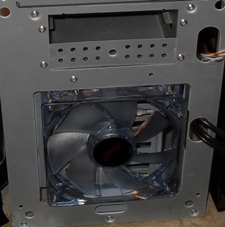
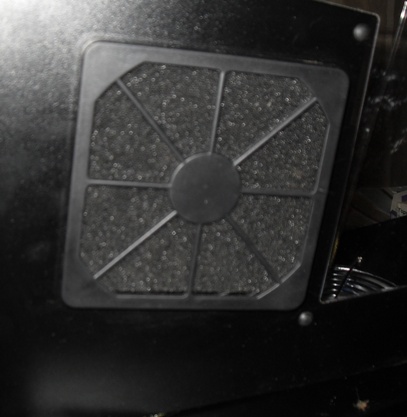
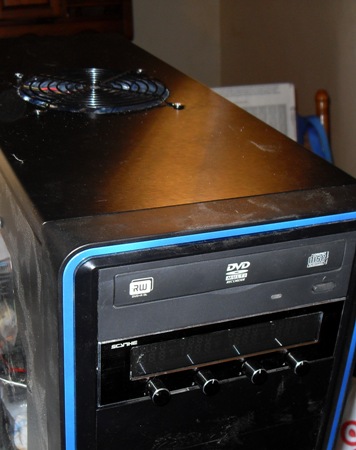
When I got back up to try to troubleshoot the USB problem, I searched google for anyone else having the same issue, and of course found nothing. But since I had no way to test the USB headers on the motherboard, I decided to check the front panel connections first. Unfortunately I couldn’t see what the hell was holding the front panel on, and any google search for the case with “front panel” in it just resulted in dozens of pages of the item description, which conveniently says, “Easy to remove front panel”, but doesn’t tell you how to remove it. Nor does the owner’s manual. Once I got out a flashlight I was able to chase down six of these little plastic clothespin looking things (two of which can be seen in the photo) that were holding it on. A quick job with some needle-nosed pliers and I finally had access to the front panel connectors:

front panel connectors

finished pc
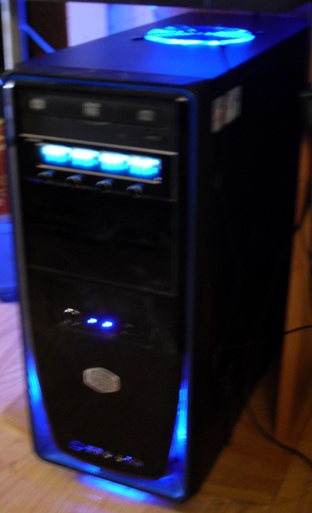
While it is hooked up in the photo, the USB connector was absolutely disconnected when I got the front panel off. I don’t know if it was that way from the factory or if my various routing maneuvers caused it, but I was certainly glad that all I had to do was plug it back in to get USB; I really didn’t want to have to rip the whole thing apart and RMA the motherboard or the case. Anyhow, each build took 3 to 3.5 hours including installing all drivers and latest windows updates. The finished product (one of them) is to the right here, complete with snazzy Intel core i3, Sapphire Radeon HD6850 and genuine windows stickers in place -for that professional look … or it would be if there was any way at all to fit the component stickers on the front panel or the genuine windows sticker on the chasis -which there simply is not. As you can see, this is a very plain little box. Previously I was very happy to have big, bright, shiny PC’s to showcase just how big my penis is, but all the LED’s and cold fusion lights in the world can’t increase your frame rate… Also worth noting that all those bright, shiny LED’s are a bitch to keep clean.

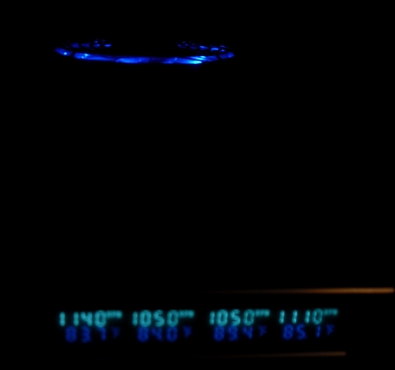
So once I had these things built and all the drivers in place, I had to run the Windows Experience Index to see where I was at, and was rather disappointed to see:

experience index
an experience index of 5.9. I know I wasn’t running premium parts, but my two year old pc has exactly the same rating! Further inspection shows that it’s not that bad:

experience index performance

Looking at the same page on my two-year-old PC, it has exactly the same thing crippling it: damn hard drive. But when you are putting together a 700(ish) dollar PC in February 2012, there’s no way you can go with a solid state drive with a reasonable amount of storage and a decent video card. But since the machines are primarily going to be used for playing games I think the rest of the ratings are pretty damn good for the budget. I am keeping an eye on SSD’s though, and as soon as I can get 120 gigs or better for a reasonable price I will probably jump on that -of course I will have to buy one for each machine.

And in case you are wondering, ReaperCell Systems is the company I invented just so I could put a cool logo on this thing (see, because the box is so plain it made me think of the ‘sleeper’ cars; old granny boats that some kids used to drive in high school. That made me think of ‘sleeper reaper’, but that is a game someone made already, plus it sounds too cutesy. That made me think of ‘sleeper cell’, which is also a game (and a tv show), but it made me think of ‘Reaper Cell’, and I like the way it sounds)… Because it was either that or a picture of me, and no one wants to see that.

The Great 2012 PC component adventure

The idea was to do a minor upgrade to the two main pcs in the house. I just wanted to bump up the graphics a little bit. My graphics card is an antiquated (by enthusiast standards) radeon hd 5570, while my wife is sporting the also antiquated (by enthusiast standards) geforce 220. I say antiquated (by enthusiast standards) because they are plenty for what we are doing now, but they won’t be able to play new games at max frame rate, and my computers are the one area of life that I like to indulge (on a budget).

sapphire radeon 6850
Sapphire Radeon 6850 - mmmm.

So I set about to choosing a video card. I turned to Tom’s Hardware’s best video cards for the money to help me pick them out. If you are at all geeky about computers and you don’t know about that site, you certainly should check it out. Nearly any time I am trying to find information on a specific pc component, I am able to find it there. The site doesn’t just have a dude throwing out anecdotal evidence for why he thinks one brand is better than the other; there are pages and pages of benchmarks and extensive testing. The testing even breaks it down by what component is better suited for what task. To use a for instance, in the January edition of best processor for the moneyit breaks down the current hundred dollar processors and mentions that the AMD is better suited for multi-tasking, while the Intel counterpart may pull ahead in single application speed. That is exactly why I go there for the majority of my research. So in the aforementioned best graphics card for the money article, I found the Radeon graphics card they recommended in the ~150 dollar price range to be just what I was looking for; I play my games in 1920×1080 or 1920×1200 depending on the game, while the wife plays them at a lower resolution because she likes the interface to be bigger (she is a clicker, not a hotkey-er). This card should be able to run any game in those resolutions without having to lower settings. I was able to pick up a pair of the Sapphire Radeon 6850 cards for 149.99 a piece.

And that is how it all started.

I set about to scrolling through my email for the invoices for all the crap in our current pcs (I never delete any email. I have copied all incoming and outgoing email from pc to pc ((minus obvious junk mail)) for quite literally more than a decade) to see what I put into the power supplies at the time of purchase. You see, the video cards that are currently in our pcs are in there mostly because I was trying to get the best cards I could find without having to run separate power -that is, they are powered by the PCI-e slot alone.

Rosewill RP600V2-S-SL

It turns out that I (just like all pc manufacturers nowadays) had totally skimped on the power supplies on our current machines. In both cases they have listed the “surge” power on the PC stats, so realistically they are running at about half the listed power (and how can they get by with that? They don’t do that with a power supply when you buy it, why is it different when it comes already in a case?) While my wife’s rig does have a 600w power supply, that is a no-name, 600w “surge” unit that does not have a 6-pin power connector for the PCI-e. My machine only has a 500w “surge” unit, but it does have a 6-pin connector… which really doesn’t make sense, because at the maybe 250 watts it puts out continuously it won’t be able to realistically push a discrete video card in the first place unless I, you know, remove the cpu. At any rate, when I ordered the video cards, I went ahead and ordered a power supply unit as well. I ordered a Rosewill Rosewill RP600V2-S-SL 600w power supply for $59.99. I did this based on favorable results I have had with Rosewill power supplies in the past, as well as the ratings the power supply has on NewEgg. A lot of enthusiasts throw around the “you don’t want to run a cheap power supply like that because it will fry your whole system” phrase. But, what? In the 501-600 watt category on NewEgg, this particular unit has 73% five star ratings, which is better than the OCZ Fatal1ty and ModXstream, better than the Antec TruePower, better than the SeaSonic Bronze, better than the Corsair Gaming series. In fact the only supply you can find with a better % of 5 star ratings is the Antec BP 550 and then a few that have under 35 reviews, while this one has over 600. So I can’t figure out what they are basing this on. That is actually the reason I am writing this, but I will get to that later.

When the cards arrived, I threw them right into the pc’s. More or less as expected, my machine would fire up and run with it, but when I attempted to actually use the card to play a game the system would simply shut off. The wife’s machine could run it, but barely. It soon became evident that I would need to get a new power supply for her machine as well. So I ordered another of the Rosewill ones pictured above to replace the cheap-ass, flimsy crap that came with the system.

Roswill X3 Gamer Case
Roswill X3 Gear Case

top fan detailHere is the part where I curse NewEgg (where I buy all my parts). When I went online to order her power supply, they had the exact case I had been planning to buy for my next pc build on sale with their shell shocker deal for … $39.99. When I say it was the exact case I had been wanting, I don’t mean that I was looking at this case and a few others too, I mean I had done some research on cases, I narrowed my decision down to a few different ones, then I watched the NewEgg review of it on YouTubeand decided it was definitely the case I wanted. The major selling points for me were: 1)A single USB 3.0 on the front panel; I recently got an external hard drive that uses USB 3.0, and I currently have it running through a 2.0 on my machine. I am storing all my programming crap on the external drive so I don’t have to copy it to a thumb drive anytime I want to use it on a different machine. Having the USB 3.0 on the front panel will make that so much easier. 2) The case has one front, two top, two side, and one rear fan position. I intend to use them all -more air is always better. 3)There are slide-out, washable filters on the PSU intake and front fan intake. I have several dogs that like to strategically place their hair all over the case fans on my PC’s, hopefully this will alleviate some of that. This leads us nicely into 4) The thing that sets this case apart from all others I had been looking at is what you see to the right here: The top fans can be lifted out for cleaning. My current rig has 2 top fans, but to clean them I have to disconnect all the cables and take the pc out, otherwise I have to blow the dust down on top of the MOBO and other components. With this I should be able to quickly snap them out, hit them with compressed air and be right back in business. In theory.

At this point, I had already purchased three out of 8 of the components necessary to build two new ground up pcs, so I started shopping that idea to see if I could come up with a build that was 1) forward compatible. 2) A reasonable upgrade over our existing systems. 3) Cheap. And while I didn’t know it at the time, 4) Just to piss off some smug, know-it-all enthusiasts. Here is the final build -in image form, as the cart came through in email with base64 encryption, which didn’t transfer to the web page. I also made it into a public wish list, which looks like it will stay active for about six months, after which that link will be broken and I will be directly responsible for slopp(ier that usual)y writing.

newegg shopping cart

I’m no computer expert and I don’t pretend to be. I would have been happy to hide in a dark corner somewhere to build this budget box and never tell anyone what components went into it… Had it not been for the wild, unsubstantiated facts that were being spewed to me when I asked for a compatibility check in a popular pc building forum. First up was this one:

…It’s a low quality power supply that could potentially fry other computer components. The Seasonic 520W would output more in reality and definitely safer. Alternatives are the Atnec Earthwatts Green 500W (no power cords included) .

This scared the beejeezeus out of me. Could my choice of this piece of shit power supply cause my entire pc to catch fire, rape my wife, stalk and kill my children? Oh noes! That actually talked me out of the build completely for about a week. That was when I started reading customer reviews for the power supplies (and other components) and tried to find evidence beyond anecdotal of this (or any other for that matter) spontaneously exploding and taking the rest of the machine with it. Sure, there is this video (which is thrown about on every pc building forum):


What you’ll notice about that video is that -like all tests designed for a specific result- they conveniently don’t tell you what they are testing, don’t show you any evidence of what load is on it, don’t perform the same test on units from multiple brands, hell, for all I know this is corsair performing this test on their very own power unit.

Next up is my immense annoyance at what constitutes a low quality computer component. What is this based on? I don’t know of any pc part manufacturers that say like, “Buy Widget Brand motherboards, creating low quality pc components for over 3 days now”. Feel free to take the time to search the internet for any computer parts being advertised as “low quality”, I think you’ll come up with the same thing I did: nada. In fact the only references to ‘low quality’ that I can come up with in any reputable review or benchmark testing is in reference to the video setting on graphics cards during testing. Simply put: low quality computer parts is a subjective term. If you have an old eMachine or Dell system laying around somewhere, go pop the cover off of it and take a look at the stock power supply. All of them that I have laying around (about three) have a power supply that is non-descript, wrapped in some cheap galvanized looking tin, look flimsy, feel flimsy, and weight about 10% of what any hard drive you can buy from NewEgg does. I actually wrote about that when I was replacing the stock power supply in my first CyberPower PC. So to me, and probably any layman out there, I think the definition of a low quality power supply would be these cheap-ass, stock power supplies. To some enthusiasts, however, anything that is not their preferred brand gets that moniker.

Since the power supply that was suggested several times as the best replacement for the Rosewill was the Seasonic 520 Bronze, I started to compare the two as objectively as I could with the information I had at my disposal. They had roughly an equal % of DOA complaints -but I would ignore those anyway as DOA does happen and NewEgg is stellar at their customer service and RMA process. As I mentioned way up in this page, the Rosewill power supply that I bought has 73% 5 star ratings on newegg. The Seasonic 520w Bronze currently has 67% 5 star ratings. Of those reviews, 5% (3) are 1 star ratings that say that this high quality psu failed between six and nine months. A direct comparison to the customer reviews of the Rosewill product is difficult since it has 10 times the customer ratings, but I went through the 100 most recent reviews (35 more reviews than the Seasonic has total), and there are also about 5% (5) 1 star ratings based on longevity, only in the case of the Rosewill there is one instance where the customer review says it lasted only six months, while the other four gave it a one star rating because it lasted between 2.5 and 3.5 years. So the average complaint of failure of the high quality Seasonic is 7 months, the average complaint of failure of the low quality Rosewill is 2.25 years. So the term low quality is subjective indeed.

It was at about that point that I realized that it is all bullshit. This is really no different than someone who really likes Ford saying that Chevy is poorly built, shoddy crap, and any foreign cars are death traps held together by rice paper and spit. Someone uses a particular component (a power supply in this case) and every other one is worthless crap. I did find one little nugget in a forum that proves a point (although I think it is exactly the opposite of what the poster was going for):

A low quality psu can do all kinds of things including frying your entire system…if you try to run it anywhere near the overexaggerated wattage rating

Well that is true of any power supply, isn’t it?

The thing is that in the case of Chevy vs. Ford I know that it is just an opinion. In the case of the power supplies I was under the (mistaken) impression that there was undeniable truth to what the tech guys were saying on the forums. I am thankful that I took the time to look a bit further into this because it really changed my entire view of pc building. Every stat I need to know is right there in the component listing, and rather than taking the advice of someone who says that component x is worthless at face value, I can read reviews of actual customers to see if that opinion has merit. In every case in this budget build, the answer to that question was a resounding no.

With all that in mind, I put the pc back together using my own research instead of listening to what the tech guys in the forums were saying. I went with the Intel BOXDH67CLB3 LGA 1155 Intel H67 motherboard because it had the features I was looking for: USB 3.0, SATA 6gb/s, 4×240 pin DDR3 SDRAM, a much lower sticker price and, you guessed it, better customer reviews than the MSI H67A-G43 (B3) LGA 1155 Intel H67 that was being recommended. The Intel Core i3-2120 Sandy Bridge was a no brainer at that price range. And of course for the RAM I went with the Team Elite 8GB (2 x 4GB) 240-Pin DDR3 SDRAM because, once again, it had a much lower sticker price than what was being suggested (G.SKILL Ripjaws Series 8GB (2 x 4GB) 240-Pin DDR3 SDRAM DDR3 1333) and had great customer reviews. And that is what happened with every other component in the build.

To be fair, I haven’t built this thing yet, so it is entirely possible that once I hit the power button it will catch fire, rape my wife, stalk and kill my children. …I’m going to call that unlikely… Since I’m going to assume that’s not going to happen, the bottom line is that I saved myself about 20% off of what the tech guys recommended, and got these two machines built with the components you see listed for about $731 each (after bundle discounts and shipping). I’m not saying that you should outright ignore input on a pc build, but I am saying that you should definitely use that input to augment your own research and make a relatively informed decision; just because TechMan2012 has godlike builder status in the forums doesn’t necessarily mean his opinion is gospel.

Power supply replacement

If you know me at all, or if you happen across my website once every 6 months or so, you know that I go through a lot of pc’s around my place. At any given moment there are always a minimum of three pc’s up and operating in the room I am sitting in now, additionally I have a laptop connected to the TV in my living room right now to use for instant video through Netflix. Normally I think of the PC’s as disposable, however since I have been doing a lot more tinkering with them lately, I have started to become a little more attached to them. The one you see in the picture here was the first one that I really started customizing. In a previous post, I detailed the time and effort spent sawing through the top of this case when I made it my mission to get 4 case fans installed in it. And I really loved how it looked when I finished it. So after I put all the time and effort into it, I was a little too attached to it to just give up on it when it quit working last week.

Oddly the power supply is the one thing that I have never replaced in a pc. I say oddly because I have replaced pretty much everything else, even the cpu, but the power supply is the one part that I have never actually pulled out of the case and changed. Well, I have never changed a motherboard either, but IMO the motherboard and case are the PC, so if you plan on changing one of them you may as well just move to a new box/motherboard combo and call it a new pc.

I bought a new Rosewill power supply unit. This one is 500 watts, so only a very slight upgrade from the previous one, but being a better name, I expected the quality of this to be far superior to the one that had been in the tower in the first place. There was also a less important concern with aesthetics; this one has two blue LED fans to match the case as well as the wrapped cables you see in the picture here. The lines wrapped around the ribbons glow under the lights in the case also. So with the wrapped cables eliminating most of the wire clutter in the tower and the additional glow of the striped cables the whole setup looks far better than it did before. If I were to base the relative quality of the product on weight alone (certainly not the best measure of quality) this one is far superior to the supply it was replacing. The listed weight on this is 5.2 lbs and it certainly feels like it. The old psu, while 480 watts, so only nominally smaller in output, barely weighed 1.5lbs.

My only real concern with the new power supply was with the cables. There were so many different letters in the descriptions -SATA, MOLEX, ATS, EPX,- it had me a bit frightened. Most concerning though was whether a 24pin connector was the same as a 20+4pin connector. I mean, if its the same thing then why are there separate listings for 24pin and 20+4 pin? Is the 20+4pin an older version that was later incorporated as standard into motherboards until eventually they dropped the confusing +4pin descriptor? Thankfully I never had to learn since it all worked when I hooked it up.

In addition to cleaning up the inside of the case by wrapping all the power cables, the inside was further reduced of clutter by being able to directly plug in the hard drive and dvd drives, which had been run through a 4-pin converter on the old power supply but could be directly hooked up with the (SATA?) cables the new psu came with. I only took one picture of it after I got it put back together and then stuck it back beside and behind my wife’s desk (this is our third pc right now, so for backup and occasional internet use only) before I found that the picture didn’t turn out, so until I feel the urge to slide it back out you’ll just have to take my word that it looks considerably better.

But the reason for this post is that I began to wonder -after seeing how easy it was to replace the power supply- if the industry intentionally uses so many acronyms and abbreviations for the cables and plugs on the inside of pcs to try to intimidate the average Joe into thinking that they are difficult to work on. Or perhaps the enthusiasts that build their own machines perpetuate the use of the jargon to make themselves sound more knowledgeable than they really are? At any rate, each new project I work on with regards to pcs makes me realize that they are extremely simple to work on and I’m not sure why I find that surprising anymore.

CyberPower PC response

After my last, rather angry, post about CyberPower PC, I thought I should probably post that I did get a response from them regarding the condition of the PC when I received it.

First I want to say that one thing that they did right was to never try to blame the damage on UPS shipping. I say that because while it may be possible to believe that a component had come out of place during shipping, it doesn’t seem that it would have been possible for the graphics card to unscrew itself, the CPU fan to detach itself, the front panel fan control to loosen its screws, and the Motherboard tray to also loosen its screws. This was clearly thrown together very quickly, most likely due to my email telling them to give me my money back if they couldn’t ship it on the date promised.

As I said in the previous post, I put the components back in myself, tightened everything down, and fired it up. It seemed to work just fine except for a high pitched squealing noise that was coming from one of the fans. Since the two fans that were flopping around loosed during shipping were the one on the graphics card and the CPU fan, I naturally that one of those was going to be the culprit. But in typical, lazy fashion, I wanted to try the easiest ones first. So I began disconnecting the fans one by one (starting with the case fans) as I powered the machine up. It turned out that both of the 120mm side case fans were making a hell of a lot of noise. I was able to bang one of them around to get it a bit quieter, but I had to disconnect the other one entirely to be able to use the machine without getting a splitting headache. The back exhaust fan on the case is also making a lot of noise, however I think that it is just louder than the others due to it being an 80mm fan and -theoretically at least- running at a higher RPM.

I sent CyberPower PC an email at about 2am on Wednesday morning when I first opened the box. That email said that there was damage to the machine and linked to my last post for them to see it. I sent them another email at around 11am, after I was able to determine that the case fans were the ones in need of replacement. I finally got a response to the emails via a phone call on Friday night (more than 48 hours later). The guy was nice enough. He said it would be no problem to send me the new fans, they just needed to verify my shipping info. So we did, and that was that.

So on Friday night they verified the info. I expected they would ship them out on Monday, I would likely receive them by Wednesday. Instead, I got an email from UPS on Wednesday evening saying that they had only just picked the package up from CyberPower, I wouldn’t be receiving them until Friday. At this point it doesn’t matter a whole lot as far as the functioning of the PC is concerned, I still have three functioning case fans and have been running it without the fourth. What does matter though is that when they had the chance to really redeem themselves from a customer service standpoint, they failed twice. It took over 48 hours to respond in the first place, then they called to verify shipping, which was absolutely unnecessary unless they thought I had moved in the two days since they had shipped me the machine in the first place. Then it took them another 5 days to go ahead and drop the fans in the mail.

So, would I recommend CyberPower PC? At this point I would have to definitely recommend against customizing a pc through CyberPower and having it shipped to you directly. However, CyberPower does have pre-assembled machines available on NewEgg. The machine that I got from Newegg came in within 3 days, was assembled correctly, and has worked flawlessly for the last couple of months. Also worth noting, Newegg has probably the best RMA program in the business, I have never had a problem getting an RMA, nor do I get the accusatory “something you did caused it” attitude. You can get the CyberPower machine pre-assembled through Newegg cheaper than you can build it on their site, the only downside being you can’t customize it so you just need to make sure it meets your minimum requirements or plan to upgrade it yourself.

I don’t know if I just got unlucky on my particular order through Cyberpower, but I do know that while I would gladly order another CyberPower machine (even the one that arrived damaged has exceeded my expectations) I would certainly involve a third party distributor in future purchases. While they may be slow to react to a single customer, I would be willing to bet my house that they wouldn’t give Newegg that kind of lackadaisical response time. Even if they did, Newegg wouldn’t pass it on to their customers as they have their own reputation to think about.

In a nutshell, to get back to the point of this post. CyberPower did make it right for me in the end… It just didn’t seem like they were all that concerned about getting it done very quickly.

CyberPower PC disappointment

Normally I am not the type to complain. Well, I complain a lot here, but I mean in real life I am not the type to bitch about a lot of things. The world is an imperfect place, imperfect things are going to happen, if you spend your time bitching about it, you are dwelling way too much on it and it just puts you in a foul mood. But sometimes I just get really, really irritated.

I mentioned previously that I was extremely happy with my new CyberPower PC. Happy enough, in fact, that I decided to get one for my wife as well. The one that I am using I actually bought pre-assembled from Newegg, but I wasn’t able to find a similar deal on a similar system when I started looking to buy a new one, so I went straight to the company’s website instead.

They give you options… Boy do they ever give you options… In fact, they give you every option. I chose to go with a gigabyte motherboard with an AMD Atholn 3.0ghz processor complete with a mean ass cooling thing, 4 slots for DIMM (upgradeable to 16gigs), 4x2gig (some brand) RAM with heat spreaders, an nVidea GeForce 220 1 gig video card, 4x red neon cooling fans, 500gig HDD, 22x DVDR, front panel fan control unit, and a 600 watt power supply, also threw in a red cold cathode light just for fun. I put my order in and they charged my credit card immediately. Then it listed my estimated ship date to be 16 days later.

Now the delay in shipping wasn’t a complete surprise; the website actually displayed a date a couple weeks in the future, but I assumed that was just so people wouldn’t get pissed off if it took them 5 or 6 days to get their system. What was a surprise was that as I checked my order status everyday, they had not even began to assemble the machine on the date it was supposed to be shipped. The order still just read as “payment processed”. The lines for assembly date, quality control date, final quality control date, etc. were all blank.

Since it was already about 3pm on the day they were supposed to be shipping the machine, I dropped them an email that basically said, “Look, you haven’t even started to build it yet, give me my money back so I can buy the parts and build it myself.” That email got a quick reply stating that the (some brand)RAM I had ordered was on backorder, but that they would upgrade me to Kingston HyperX RAM so they could get the machine together and ship it that day.

So, at 3pm they had not even started to put it together, but by the end of the business day they actually did ship it. And a few days later it arrived at my door.

I just opened it up, and here is the first thing I saw when I got it out of the box:

That empty PCI slot you are looking at is where the video card is supposed to be. At first I thought that maybe they had forgotten to install it, but then why would they have removed the shield for the slot. So it must be in there somewhere…

Ah yes, there it is, hanging ever so precariously in the middle of that mass of wires, a mass of wire which can be seen much better in this picture:

You can even see the now completely broken cold cathode tube floating around in there amongst the wires. But the fancy light was the least of my concern. Here is how it looked as I began to pull the cover off to assess the damage:

The Video card is actually sort of connected to the CPU cooling fan, which has also fallen off of the fancy heat disperser thing. Now they are both floating around in there beating each other up as well as the rest of the components. Here are a couple more shots of the Video card and fan, taken simply because I couldn’t believe I was actually looking at it:

The enormous cooling fin system on the CPU is also bent, but doesn’t appear to be damaged beyond cosmetic. The screws holding down the motherboard are all loose. The fan control on the front of the box is also loose and flops up and down every time you touch it…

I am very disappointed with the condition of the system and the non-existent customer service prior to my angry email. If one of the components that I had ordered was not available, why didn’t they call or email me sometime prior to the day it was supposed to ship to ask if I would like to choose a different type of RAM? Was the sale so important to them that they rushed putting this together to get it shipped? I would have been irritated if it had taken an extra day to get the system, but I can guarantee you that if it had arrived in perfect condition I wouldn’t be writing this -despite the wait.

I put the parts back where they go and powered it up anyway. It is currently downloading updates. The motherboard, power supply, HDD, DVD, CPU, and RAM all appear to be in working order, the only question is which of the fans was damaged. I know one of them was damaged because I can hear the high-pitched squeal of it even as I type this. If it is one of the 5 dollar case fans I will simply buy a new one. If it is the fan on the Video card or CPU (which seems the most likely since they were the ones banging around during shipping) I will ask them to kindly send me a replacement -which I will install myself- and hopefully they will; I would love for this to have a happy follow-up, but I’ll be damned if I am going to send this back to them and wait another month to get it up and running.

Update Here

PC cooling

After seeing the heat issues that come from trying to run a 3d game on a laptop -even a laptop that has plenty of muscle to run such a game- I had to start rethinking the issue. I had always made the assumption that any pre-assembled machine that you buy off the shelf would come with adequate hardware to keep it within normal operational temperature. I couldn’t have been more wrong.

I still happen to have about a half a dozen old pc’s within thirty yards of the chair that I am sitting in now (I actually just gave two systems to my brother-in-law, who, not being a gamer, was more than happy with 1.5 year old stuff). I took a minute to look inside them specifically for fans and was surprised to find none. The only fans on any of the boxes I have around me are on the CPU and the power supply (a couple of the video cards also have small fans, but I don’t put a lot of faith in those, for reasons I am sure I will discuss later). There are only vents on all of those boxes, so unless I happen to have them sitting in the direct path of a fan, the hot air inside them just sits there. I’m sure this has been my biggest problem all along: I probably wouldn’t have to replace the PC every few months if they weren’t left to bake in their own radiant heat.

On the right here, you can see the case that my new machine came with. I’m not a huge fan of the overall design of the thing, I mean the window in the side could be a cool idea if there was anything in there to look at, but as it is all you can see is the dull gray metal of the case. I have, however, had the time to think it through, and I think I need to retract my previous statement about the box being too big. That, it seems, is a good thing. All the little parts in there generate a lot of heat, and in order to get that heat out I am going to need some serious airflow, the open space makes it easier to move the air. The case came with a 120mm exhaust fan pre-installed on the back panel, and there may or may not be an intake fan installed on the front under the logo (it is an option for the case, but I didn’t pay much attention when I opened the case to upgrade the ram, and can’t tell observing from the outside), and a spot to put one on the side of the case. I am going to put all of those to use, and I am going to add an extra exhaust fan on the top. I am going to go all out on this, I want to see just how much I can improve performance with nothing but cooling fans.

Fans are dirt cheap. I really had no idea. I never really thought about how much they might cost, but I would have assumed they had to be more expensive than the 5 bucks a piece I dropped on these Rosewill fans. The manufacturer had a lot of good reviews for fans and power supplies, the price was right, and the LED’s, well, I dunno, maybe they will add a cool factor, or maybe they will just be annoying. I am not in the room with the PC when I am sleeping or watching TV, so I don’t imagine they could be much of an annoyance, but I somehow doubt they can transform my plain case into an otherworldly piece of alien technology…But I have been wrong before.

Since I bought this system pre-made from Newegg, I didn’t get to choose the box. Thankfully it has vent running all around the bottom part of the front; from roughly where the logo is down, there is a recess with a screen for ventilation. This, along with the mounting spots on the back and side, means I will only have to make one major modification to the box to get all the fans it: I have to cut a 120mm hole right in the top of it. Well, I am also going to cut out the whole “bullet hole grill” part of the side intake as well, but the top is the more major modification. I have never cut a hole in a computer case before, and I am a bit apprehensive about it. In fact, I plan to practice on one of the old machines laying around the house before I actually put a high speed rotary device to the real thing.

So for those of you keeping track at home, the last, say, 6 PCs I have bought have had a combined total of 0 case fans. This one is going to have 4 120mm fans. I spent some time reading up before I bought all the fans, and I should have enough power to keep everything running.

One other thing that I bought for this project was a Scythe fan controller like the one pictured. I am honestly not 100% sure if this was actually necessary, but I did like the idea of being able to control the speeds; I have no idea how loud this is going to be with all four fans, plus the PSU fan and the CPU fan going on full speed. If it is deafening I would like to be able to turn it down a bit.

I just wanted to get a quick note about this up here tonight, because I plan to unplug the PC and start cutting into it tomorrow. Hopefully it won’t turn into some pseudo-nightmare and the carnage will be minimal. If it goes well I will probably slap up some photos and afterthoughts…If everything goes wrong, I will probably have to make my next post from my wife’s computer.

Installing case fans (aka Cutting into the tower)

I got up this morning and jumped into the case fan install project. It seems to have gone pretty smoothly; the pc is back up and running and the fan control is operating all of the fans. There were a couple of setbacks, but nothing major, I will go into them in a minute.

I consider myself to have a moderate knowledge of computer hardware, and that was more than sufficient for this job. I also consider myself to be relatively skilled in the all-purpose-handyman type skills necessary for the install, but honestly it was easy enough that I would expect someone with little or no skill or knowledge on either subject would be able to complete this. From powering down the pc to having it back up and running took me roughly two hours. I could have done it quicker, but I was stopping to take pictures, and I was extremely nervous when I got the power tools to the case and took it really slow.

Tools: Adding the case fans only took a screwdriver, but cutting the hole for the top vent fan required a Jigsaw and a Dremmel High-Speed Rotary Tool. You could probably accomplish it with only the rotary tool, but I lacked the bit to make circular cuts in metal, so I used to a jigsaw to cut the shape and the rotary tool to smooth the edges. And I really do recommend the rotary tool and not just a drill; the rotary tool can smooth the edges, quickly punch the screw holes, and can be used to clean up any rough edges the other tools leave behind. You will also need either a silver sharpie or a knife for marking the case.

Here we go. I stopped for the first picture after I had made the cut in the top of the case and punched the screw holes. I used one of the metal grills that I bought as a template and etched a line around it with my pocket knife (this would have been easier if I had a silver sharpie, but I didn’t). I used a jigsaw to make the rough cut, then smoothed the edges with the rotary tool. I used the same grill as a template for the screw holes; I held it in place with one hand, put the rotary bit into each of the mounting holes, and drilled through. It took a bit of light grinding to get the holes large enough to accommodate the screws, and it was also necessary to grind the underside of the case to flatten out the raised edges the drilling had left behind. In the picture you can see all of the electronics, and unfortunately I did have to make the cut with the tower assembled; the top is actually riveted to the frame so I had little choice. I put a scrap piece of cardboard between the top and the electronics while I was making the cuts, it kept the metal shavings from getting onto the delicate parts.

As you can see the cutting and grinding left some exposed edges. I wish I had thought ahead and bought some high gloss black paint to hide the edges. The majority of what you see here though is just metal shavings that didn’t come off with compressed air. I was able to clean them up with a rag and some alcohol later, so all you can really see at this point is a little silver ring right around the edge. The hole didn’t come out exactly round, but I didn’t really expect perfection here. The fan and grill are covering the hole from both sides, so pretty damn close to round is good enough for my purposes. Of course if I had been doing this for someone else I would have spent a lot more time on this portion of it, making sure to get the hole exact and the edges finished, but for me this was perfectly acceptable. You can pick up a three pack of these black metal grills on newegg for about 5 bucks. You should always cover the exterior fans, but an exhaust fan just needs something to make sure nothing falls into it and these do nicely.

Installing the front fan actually turned out to be more work than installing the top one. Getting the front panel off was a bit of a chore. There are little plastic clips wedged between the HDD bays and the sides of the tower that you have to squeeze and pull forward to get to release, this took me needle-nosed pliers and a lot of patience, though I imagine all towers have these installed differently. In addition to the plastic clip hassle, the screw holes for the fan were much too small for the screws to fit through, so I had to drill them out. Unfortunately the area I was having to drill is so very close to the edges that I had to do it at somewhat of an angle. I went really slow and checked the size frequently to make sure I stopped before making them too big. Finally, I had to remove the Hard Disk to access two of the screw holes when I got to actually screwing the fan into place. As I said, installing this fan was probably more difficult, and definitely too longer, than installing the top exhaust fan. I should also point out that I was so paranoid that I was going to install the fans backwards that I must have checked each of the air direction arrows half a dozen times before I tightened down the screws.

The side fan was very simple to install, that was why I saved it for last. This is the same fan as I installed on the top and the front, but this one I put a grill and filter assembly onto. Of course keeping dust out of your machine is paramount, so wherever possible you should put filters onto your intake fans. I think this grill and filter set cost 6 bucks on Newegg. The outer cover of it snaps off so you can clean out or replace the filter, and there is actually a grill hidden by the filter that looks just like the one I put on top of the case, only made of plastic. Bear in mind that it is made out of thin plastic, so take care when you are removing and replacing it. I briefly debated putting the filter on the inside of the case with the fan blowing through it so that the LED’s would show more prominently. In the end I opted against that, knowing that I would probably never pull the case apart to clean the filter, this way it is staring at me all the time, hopefully it will guilt me into it.

The fan control was actually really simple to install. Especially so since I already had the front opened to put the fan in. There is a jumper on the circuitry that allows you to set the temperature display to Fahrenheit and Celsius, I opted to move it to Fahrenheit so I wouldn’t have to keep a calculator handy to figure out how hot it was. The instruction page for this was done in about 7 different languages and I couldn’t find the English portion most of the time, but the circuit board actually had print on it -in English- that said “Fan 1”, “Fan 2”, “Temp1”, “Temp2”, etc. I just went by that for the cable routing. I ended up with one temperature sensor each at the top, front, and bottom of the case, with the fourth actually attached to the housing for my Power Supply. The instructions did have a warning about getting the wires too close to heat sinks, and I was independently worried about them getting into the now plentiful fans, so they just ended up more or less right where the fans were installed -even if that was not the place I really wanted to know the temperature. Also in the picture you can see that the top exhaust fan install is actually much smoother than it appeared in the other pictures. And you can see that fine layer of dust all over the machine. This dust is all from the install process, as I dusted it thoroughly prior to the install, so make sure that you use compressed air liberally inside the machine before you power it back up; I must assume that this dust is from grinding the metal, and I can’t imagine a more conductive material than metal powder to short out your Motherboard.

Here is the fan control just as I powered it up, you can also see the LED’s of the top exhaust fan. I have all of the fans set right about half speed as I am checking to make sure I don’t have any phantom noises like scratching, scraping, or thermonuclear meltdown. I didn’t realize until I actually had the machine back together that this fan control allows you to turn off each of the fans, which is nice, and that the LED’s dim with the speed control. I also didn’t realize until I had it back together that the stock exhaust fan is only capable of running at about half the RPM of the new fans I installed. While the others can go to about 1900 RPM (as read on the fan control) the stock one can only do 1050. I wish I had bought one more fan and replaced it, although I’m fairly certain the other three fans can make up for it.

When I bought the fans, controller, and grills, I got a free blue (my choice of red, blue or green actually) dual cold cathode lighting kit. I went ahead and put it in here, ’cause what the hell else am I going to do with it? As you can see by the mass of wires on the right, I’ve never been one for the “finishing touches” aspect of this type of work. Thankfully that cold cathode lighting kit has a switch (that mounts into an empty pci bay -which I have about 6 of with no corresponding slots on the motherboard) that I can easily turn off. Which is how it will remain unless there is someone who really wants to see just how bright I can make that mess of wires look.

Here is the finished product in as near darkness as I can get it at noon in Arizona. My camera has some weird feature that makes it so the flash free photos take a second (well fractions of a second, but it’s relative; it takes longer than instantaneous) to process, and that makes for slightly blurry photos. I have to admit that I am very pleased that I went with the LED fans. They really do transform it from being just a plain metal box to something… well, to something. I especially like the way the front intake lights up the trim around the bottom of the front. And in the dark that top exhaust fan looks like it was meant to be there. I have spent a lot of time working with computer hardware, but this is the closest I have yet come to any actual modification. It was easy enough, and the result is eye-pleasing enough, that I won’t hesitate to do it again if I should ever find myself in a position where I need to.

The total cost of this install was about $75 shipped from Newegg. That includes three 120mm blue LED fans, the Scythe fan control unit, the three pack of black metal grills (of which I only used one for this install), and two of the grill and filter packs (again, only one used during the install. I was planning to put one on the front intake, but the difficulty of getting to the fan nixed that idea, it would take me an hour to clean the filter). As I said, it took about two hours from power down to power up. That includes the time spent searching for stubby screwdrivers, digging out a flexible screwdriver extension, trying to find my new jigsaw blades, ’cause dammit I know I just bought some, etc.

Cutting into the case was really quite intimidating for me, and I wasn’t able to find a “how-to” type guide to answer any questions I had before going into it. It turns out that the case actually cuts quite easily with a standard, all-purpose jigsaw blade, and as long as you take your time for the cut it will look just fine when you are done. If you happen to be thinking about doing this either because you need the additional airflow, or just for the eye appeal, don’t hesitate to do it; it is really pretty simple, and the result looks pretty cool.

PC and music

My recent small flurry of website related activity seems to have stopped almost as quickly as it started. I got the pages that I wanted to reformatted, and started on a couple of the features that I had been thinking about for a while, and then my Laptop crashed.

There are two extremely annoying aspects to the Laptop crash. The first is that it was just after we got back from vacation, and aside from the photos that I have posted on the Vacation Photos page (in vastly reduced size and quality), I had no backups of the images that I lost. A total of roughly 300 pictures, from vacation photos to pets, just gone. Damn it. The other annoying aspect was the loss of all the programs I use for the website: Leech FTP, Screen Hunter (image saving program, saves pictures to file with a click of keyboard button), Audacity (music editing), and numerous others. Some of those are easy to pick up again, just a click through download.com, but others I was using older freeware versions instead of new trial versions so I could have full functionality. Those are harder to come by, and usually require going through a seedy website and praying you come out of it without a virus (much like picking up a hooker on Van Buren). And I didn’t want to waste the time doing that on the Laptop since the crash, coupled with heat issues had cemented in my mind that I needed to get a new PC anyway.

I ended up getting a new PC from NewEgg. If you have read my page in that past, you know that I like them so much I am practically a spokesman for the company. The last time I bought a computer I stuck with a name I knew. This time, before I even went to shop for one, I knew that I was going to try a PC built specifically for gaming. Either a CyberPower PC or an iBuyPower machine. Both of these have an entry level price that is roughly the same as an entry level eMachine or a Compaq, but they are (theoretically) built for gaming. The one I chose this time was a CyberPower PC.

The CyberPower was my second choice. I had actually already put one from iBuyPower into my cart and went through the payment process, but due to a changing zip code my order was put on hold. Three days later it still hadn’t processed so I cancelled the order. By that time the machine that I wanted had sold out, so I went to plan b. The CyberPower machine I chose came with a 2.9ghz processor, 4gigs of RAM (upgradeable to 16gigs), a 1gig GeForce 9500 video card, and integrated 5.1 surround. I ordered an additional 4 gigs of RAM (to upgrade myself) and got the whole setup for just a shade over 600 dollars. And boy am I ever glad that I chose to go with a name I hadn’t heard of.

The tower is huge, but that is pretty much my only complaint about the system. When I fired it up for the first time and got to the desktop I was ecstatic to see that there were no icons there. The machine came equipped with 64bit Windows Vista and nothing else! This was a huge plus for me, though I could see how it could be a minus for someone who actually uses anti-virus software. The thing about anti-virus software is that it has always bogged down my machine so much that the tiny amount of security it provided (let’s face it, I have been on the internet for 15 years, I know how to keep myself virus free) isn’t worth sacrificing the performance. Honestly, I think the anti-virus software does more to harm the system by constantly running and updating, keeping you from running programs -even windows update won’t run under some of the bigger names-, than the actual viruses they are meant to protect against. In addition to the lack of anti-virus, there were also no trial software offers for AoL, NetZero, MSN, and all that other crap that usually clutters up a new machine. In fact while looking through the start menu, the only trial offer I could find was Microsoft Office. There were only a recycle bin and two other icons on the desktop, neither of which necessarily needed to be removed. The lack of third party software is why my next PC purchase will definitely be from these guys.

I do have one petty bitch about the machine though. For reasons unknown the 5.1 surround that it comes pre-installed with has all of the tools turned off. Instead of having an audio manager with an equalizer and such, the only thing it shows when you click on the “Via HD Audio Deck” is the ability to change the input/output assignments of the audio ports on the tower. It took me a lot of toying around to find out that if you go into the control panel and get into the sounds settings, under the advanced tab there is an equalizer option (which has presets that sound so terrible and tinny that they are of 0 use to anyone) which I was able to use to get it to sound great -but not through headphones. I am not sure if the headphone issue is my hardware or a software issue though, so I will hold back my tirade on that bit of it for now.

So in order to set the equalizer, I needed to get some samples of different types of music onto the machine. I have an external hard drive networked here in the, well, let’s call it an office, that all the pcs have access to, so I copied the library here. I started tweaking the settings while playing different styles of music until I got to where it sounded great for the Heroic Power Metal that I seem to listen to the most, and it still sounds good for the more popular Rock and Metal that makes up the rest of the library.

While I was copying the entire library from the external drive, I realized that my taste in music has changed quite a bit over the last decade. I used to listen to almost exclusively death/thrash metal, but that has been slowly evolving to where I now enjoy melodic stuff more. I still like the music to be in-your-face and pounding, but with death metal getting ever more bestial in the lyrics (the sound, not the content), and me with no particular desire to listen to the Cookie Monster doing death metal, I have been gravitating to the other type of music that seems so prevalent now: Heavy Music with a woman doing harmony over it.

I heard a song by the band Luna Mortis a couple of months ago, but wasn’t able to find the album online until recently. This is just the type of thing I am talking about, but with a twist. The music is heavy, but the vocals on this one range from beautiful and melodic to just a hint of the cookie monster-esque death metal that turned me off to death metal in the first place. For unknown reasons it doesn’t bother me in these songs, perhaps since there is actual singing to compliment it? That well could be, as I also like the band Bullet For My Valentine, who also have normal vocals mixed in with the Jaba the Hut chorus. Here is a sample of the song “Ruin” from Luna Mortis’ album The Absence


I chose that song because it was a good example of the mix of lyrical styles, not because it is one of the better songs on the album. In fact, I think it is probably one of my least favorite songs, but it typifies the style in a small sample far better than any of the other songs do. Now even I can’t listen to this style of music exclusively, but mixed in with a library old Metallica, Megadeth, Pantera, and newer, popular rock and metal, it fits nicely.

And speaking of newer, popular rock, I can’t stop listening to Halestorm, even though every time I find myself enjoying it I want to kick my own ass. They are another band with a female vocalist, but very clearly trying desperately to be mainstream. All of the songs are three minutes long, they all have very easy to remember hooks for the chorus, and let’s face it, if you have a penis, you can’t help but want to bang the singer. She does display some amazing vocals in a couple of the songs, but every time I started trying to find an example of that to sample, I just ended up scrapping it and going back to this:


That is the beginning of I Get Off from their self-titled album. I don’t know what it is that keeps me coming back to that song. Perhaps it is the sexual deviant in me finding some comfort in a woman finally admitting that she knows that she is being watched when she is undressing near the window, and that she is doing it exactly for that reason. Which is great for me, since it just gives me a visual of a sexy, sultry woman in a teddy, posing near a window. But I could certainly see how a more delusional sexual deviant could take this as license to stop jerking off outside her window and go in to get him some. I have no doubt in my mind that within a year this song will be cited as a mitigating factor for some pervert raping someone. Just hopefully not Lzzy Hale, ’cause the visual doesn’t currently work for me if the woman teasing me is dead -that is an entirely different song.

HP Slimline means I learn about low profile video cards

My old pc had started making a horrible noise. Well, technically it started making several horrible noises. One of them I could pretty easily identify as the fan on the graphics card, as it only made the noise when I started gaming, you know, when the fan on it would start working. The other two noises I couldn’t identify as easily. I was pretty sure that one of them was the hard drive going out, but I had also been getting an error message on startup for several months that some pci bridge was not functioning, and I have no idea what that was all about. I was playing some World of Warcraft one night and my framerate was an unbelievably low 12 frames per second. I say unbelievable because I remember when I first put that machine together I was able to get about 60 frames per second with ease.

I had to do something about it. My choices were to buy a new video card and hard drive to see if that would fix the problem, and if it didn’t to keep replacing shit until it did. However the graphics card in my machine was at least 3 years old (it had been in my last machine as well) and my motherboard was at max level for ram, so I decided to just look into getting a new one.

Figuring I would spend about $500 on a new computer I found a Hewlett Packard (which I swore to myself 15 years ago I would never buy again) that was in the right price range, had a 320gig HD, 3GB ram and a 3.2ghz processor. That should get my by for what I need. I probably replace the computer once every 18 months or so, so it isn’t that important to me to pick up cutting edge stuff; I only need middle of the road crap that I can throw a couple of cheap upgrades into to get me by for the next year or so. Unfortunately, in this case I spent so much time reading technical specs on it that I completely missed the big, bold Slimline listed on the front of the box. And since it came with a 22″ widescreen monitor (a backup since we both already have one) it was in a box big enough to hold a standard PC. So when I got it out of the box, I opened it up to see my upgrade options before I even plugged it in. You can see what I saw here. The main problem is that the case is just over 4″ wide, narrow enough that the cd player has to be mounted vertically, and narrow enough that a standard graphics card won’t fit into it.

Through some searching around online I was able to find the specs for my computer, which stated that the graphics card could be upgraded with a pci-e X16 low profile video card. Being that the description has so many words, I figured it was going to be outrageously expensive, but I was able to find a pretty decent selection of them on Newegg.com. As an added bonus the price on low end memory cards has come down considerably from the last time I bought one a couple years ago. I was able to get basically the same 512mb Radeon card in a low profile design today for about 1/4 what I paid for it a couple of years ago. So it only cost me $39.99 to get the card shown here.

Of course when I got it out of the box I saw that while it was indeed shorter than your average video card, it wasn’t actually set up for a low profile install. It had the bracket for it (to the left of the card in the photo) but it didn’t have any instructions on how to actually change it. As you can see the standard VGA video out is on the top of the original bracket -the part of the bracket that I am going to have to remove to put the low profile bracket onto the card (also the standard bracket was a little bit bent when I got it, but I could have straightened it if I had planned to use it). So with no instructions, I just dove right in with some pliers and a screwdriver.

It was easy to change, just a couple of screws really, but the on thing I wondered about was what I was supposed to do with the VGA port. As you can see, I just left it attached to the standard size bracket and disconnected it from the card completely. My monitor doesn’t have a DVI plug on it, but I did have an adapter laying around from a previous video card so I was hoping that it wasn’t actually necessary for it to be there. I took another look through the instruction manual to make sure there was no mention of the VGA port, and to see if I had a high enough version of Direct X to run the card (and Kudos to the company that made this card. It came with an actual manual, with an actual English version, that used actual sentences. I have bought cards that had no English version, and possibly worse, cards that had bad English. They would say things like “Make happy the dutiful installation screws prior to the power performance of the repairing device.”). And then set about putting it into the mini tower.

“Snug” doesn’t adequately describe the fit of this card. While this photo may not show it as well as I can see it, there is maybe 1/16″ of clearance between the video card and the other pci card. I also had to disconnect the gray cable you see at the bottom right of the photo because I had to push the card about a half an inch further that way to get it to clear the edge of the case before I was able to slide it back over to line up with the pci-e slot. And if it looks like the right of the card is bending ever-so-slightly, it probably is. There are cables below it, and not enough clearance above it to route the cable any other way. Hopefully there won’t be enough strain on it to do any actual damage.

As for the performance, it does quite well. I am able to run the latest version of Wrath of the Lich King with the video setting all to max and get about 60 frames per second in zone where it is just me, down to about 25 frames in zones where there a lot of other people. And coming along with that, there is the inestimable joy that comes with fluid character movement. If you have ever played any 3d game you know how frustrating it can be when the movement is choppy, and I had gotten to where I was running into a lot of things because I could do an arc while running; more like a square-edged zigzag that resulted in lot of running into walls and other obstructions. In fact I am getting better graphics now than I have gotten at least since I built my computer before the last one, since I recycled my video card to build the last one and it was getting blocky from the start.

Anyway, the reason I was compelled to write about the process and the results of this is that while searching for suitable low profile video cards I found a lot -and I mean a lot- of people complaining that there weren’t any available and that the only use you can get out of a slim tower is for office work. I don’t find that to be the case at all. With the 3gigs of ram this had stock, and the new 512mb video card, I am getting great performance. And I am getting this knowing full well that I installed one of the cheapest cards on the market for slim towers (in fact the cheapest one I could find that came with a cooling fan). If you were willing to spend a couple hundred dollars on a real video card I am sure you wouldn’t have any complaints about the gaming performance.

Compaq: an old Indian word meaning huge, steaming pile of SHIT.

I know that I have made mention of the three computers that I keep running in my office on this site before. Reasoning was thus: One for me, one for the wife, and one just in case either of ours happened to go down. If you have ever had to go without your pc for even a few days, you will certainly understand the potential benefit of having another one, with all your software and the such already loaded onto it, right next to your main machine. So each time I bought a new machine, the eldest of our three would go to a needy relative (Hi Mom!) while ours would rotate so that the newest was the wife’s, the oldest was the backup, and I generally always have the middle machine. So you see I absolutely knew that one of our machines would go down at some point, and I had planned for it pretty well. I just never really expected that it would be our third machine that went down.

It happened after a power surge a couple of months ago. Some cursory exploration under the cover led me to believe that it was just the power supply that had gone out, but as this was the eldest of our machines, I wasn’t sure if it was worth it to me to fix it. Its 1.8Ghz processor, 512mb of RAM, 80Gb hard drive, and 256mb video card are pretty dated by my household standards, and the parts aren’t replaceable to any other machines on hand (still using standard ddr ram, not ddr2. Video card is AGP and none of our other machines have such a slot. I could recycle the hard drive, but being only 80gigs, I could also replace it for about 20 bucks at this point). So for a couple of months I let it go, wondering if I should indeed replace our third computer.

Over the months that passed while I was debating whether to replace it, I kept my eye out for specials at Wal-Mart and Best Buy, my go-to places for getting good prices on the base eMachines that I like to buy for upgrading. But during this time, I came to realize that I really like having the third machine around. Since we have always had a spare, my mp3 library is backed up to it, and I listen to it over a set of speakers that are run through a shelf stereo unit with speakers directly beside my pc speakers. This takes the load off of my own processor (a must for gaming) while making it much easier to adjust the volume of the music without having to also fuck with the different device volumes on the games, audio player, and windows components on my machine. Lately I have also been listening to Sirius satellite radio online since it comes free with the subscription, and of course the streaming is another burden that really should be avoided while gaming if at all possible. The absolute worst of it all is when playing the mp3s through the audio player. Whenever it switches songs there is about a half a second where my keyboard controls will become unresponsive in game. As anyone who plays online games can tell you, a half a second can easily mean your life. And it did, on several occasions.

Because of all of that, I started my search for a new machine in earnest about eight weeks ago. I wasn’t able to find an eMachine that met my simple criteria -had to have a faster processor than the old one, double the hard drive, expandable to 4x the memory, and a PCIe video slot. At least I couldn’t find one being sold without the monitor, and I certainly have no need for the monitor when I already have three LCD monitors (two 19″ and a 15″ on the backup) in the room. Instead of waiting until I did find a suitable eMachine, I made a horrible, horrible mistake. I bought a Compaq.

The support and drivers page for it can be found right here. If you ever should buy a Compaq, you will no doubt be spending a lot of time there. No doubt by now you have probably figured out that this isn’t going to be a glowing praise about the Compaq, so I may as well dive right into this.

I took the new computer out of the box, plugged in the basic cables (mouse, keyboard, monitor and power) and turned it on. After about a minute, it said “Please wait while windows prepares to install for the first time……” and it stayed that way for, well, I left it for about an hour, knowing that it was completely frozen (pc working light not flashing), for about an hour before doing a hard reboot. Straight out of the box, touch the power button once, computer freezes on boot. Try a second time, gets through that initial part but freezes on the page where you enter your information to register Windows. Call Wal-Mart, they don’t have another in stock, but don’t sound too enthusiastic about exchanging it anyway. So, I tried the only thing I could think of: I used the system restore disc that came with the PC. Never actually loaded Windows, but already reinstalling the OS. Not a good sign.

After using the restore disc I was able to get the OS loaded and download current drivers for my DSL modem. After that the thing would freeze absolutely randomly. Could be 3 minutes, could be 6 hours. I restarted it in Safe Mode several times over the next few days as that was the only way I was able to keep it running long enough to actually download and install some of the drivers that it needed. The motherboard driver, for instance, is outdated. There is a new one available for download from the above-linked site, but why wouldn’t they include a current driver when they actually boxed up the machine?

Anyway, I spent the next couple of weeks thinking that maybe it wasn’t the new computer that was having problems, I was blaming it on Windows Vista. I have no experience with Vista, but I do have some experience with Windows ME, and the problems I had with that OS were very similar to the problems I was having with the new, Vista-installed Compaq. I was trying to soldier through the problems by uninstalling every program that it was running. This included the antivirus software, automatic update, windows firewall, anything I could think of that would be connecting with something outside of the computer itself (the freezing seemed to happen most often when downloading over the network), but I eventually took a day to just try to figure out what the fuck was wrong with it. Here is what I found:

Tested Video Memory from Windows: Failed. hmm. maybe something serious.

Tested Hard Drive from BIOS: Hardware Error.
Tested RAM from command prompt: Failed hmm. maybe somthing REALLY serious.

I installed a known working PCI video card, and known good RAM into it (changed the path to make it ignore the integrated video) fired it up and ran the same tests, with the same results. So the only thing left to do was *cringe* call customer support. While I didn’t actually keep a transcript of the call, I can assure you that at some point I did tell him that the problem was that “the very first time I turned the power on, before I connected it to a network of any sort, I turned the power on and it froze before it could finish windows installation.” and he really did reply with “This is a sign that you have downloaded a virus.” I told him several times, yelling at him a couple of them, that I had not connected the modem or network card to anything, only the power cord. And he said, I shit you not, “A virus can be transferred over any cable connected to your computer.” So he is saying that the fucking power cord is where I got my virus, I mean it is the only thing that was connected to both my computer and anything else.

I had to talk to this moron for at least an hour. This guy is proof that people in other countries (I believe he was from India) really do watch American television, and it dumbs them down just like it does our own native sons and daughters. Certainly not the type of influence to be proud of. He made me try to use the system restore disc again, but blissfully it froze in the middle of that process. His response “It should not freeze during system restore. The virus should have been eliminated with the drive reformat.” So an hour in I think I have him believing that there really is something wrong with it, until he says “Unless you have a boot virus.” Dumbass.

After a time I was transferred to a supervisor. Being the senior technician on staff, he also spoke the best English. Aside from a very sleight accent, the only thing that gave away that English was his second language was the quote “My name is XX, I will provide you perfect customer service and make satisfactory your problem.” He was at least willing to take me at my word that this wasn’t a simple driver problem. He asked if I knew how to access BIOS, and had me check a couple of stats from there (hard drive type, Boot Path, a couple of other things) then said to try one last time to turn it on. When it froze this time, he had an empty box overnighted to me to pick up the defective piece of shit.

Along with the empty box there was a page that said, “Please describe your problem in as much detail as you can.” Unfortunately I didn’t think to save a copy of the message that I included. I tried to keep it under 2 pages, figuring they would quit reading by that point anyway. I told them every symptom it had, gave a list of some of the specific error messages I was getting, some from the event log (a Modulo20 error kept appearing while testing the RAM), and details of every piece of hardware that I had changed out attempting to isolate the problem. I concluded it with “I will guarantee you that either the Motherboard or the CPU are defective. Please let me know which, I am quite curious by now.”

I got the thing back today. While they didn’t specifically reply to tell me what was wrong with it, it did have a copy of the service report, which reads as follows:


Repaired (The customer problem was duplicated during full diagnostics)


Failure: MB118 No boot/Hangs at POST
Failure: RC514 TATTOOINFORMATIONINCORRECT-MODEMBF2 TATTOO MOTHERBOARD
Failure: RC515 SWReloadedduetoCorrupt/MissingRecoveryPar
Failure: MC912 LocksUpConsistently MBF 1 Replaced Motherboard
Failure: RC515 SWReloadedduetoCorrupt/MissingRecoveryPar
Failure: VC316-1 VideoMemoryTestFails
Failure: CP512 ConstantLock-UPS/ApplicationandOSERR Replaced CPU

Since one of the error codes is there before the motherboard and again after, I must assume that this is the exact order in which they got these errors. Guessing by the incomplete descriptions, it looks like they attempted to reinstall the software -just as I had- from a disc. The recovery partition of the hard drive was destroyed when it froze up during the attempt to restore it. After that they were still getting lock-ups and video errors. So they replaced the CPU. I was almost right, I said it was either the motherboard or the CPU, I never dreamed they would have sent it to market in the first place if Both of them were defective

The repair was free of course. And aside from being treated like an idiot by a nameless schlob in India, I don’t suppose the service was too bad. I have yet to plug it in since getting it back though, so I won’t set forth any judgment about the service over there just yet.

But seriously, how does it make it out of the shop when the first time you touch the power button it locks up?